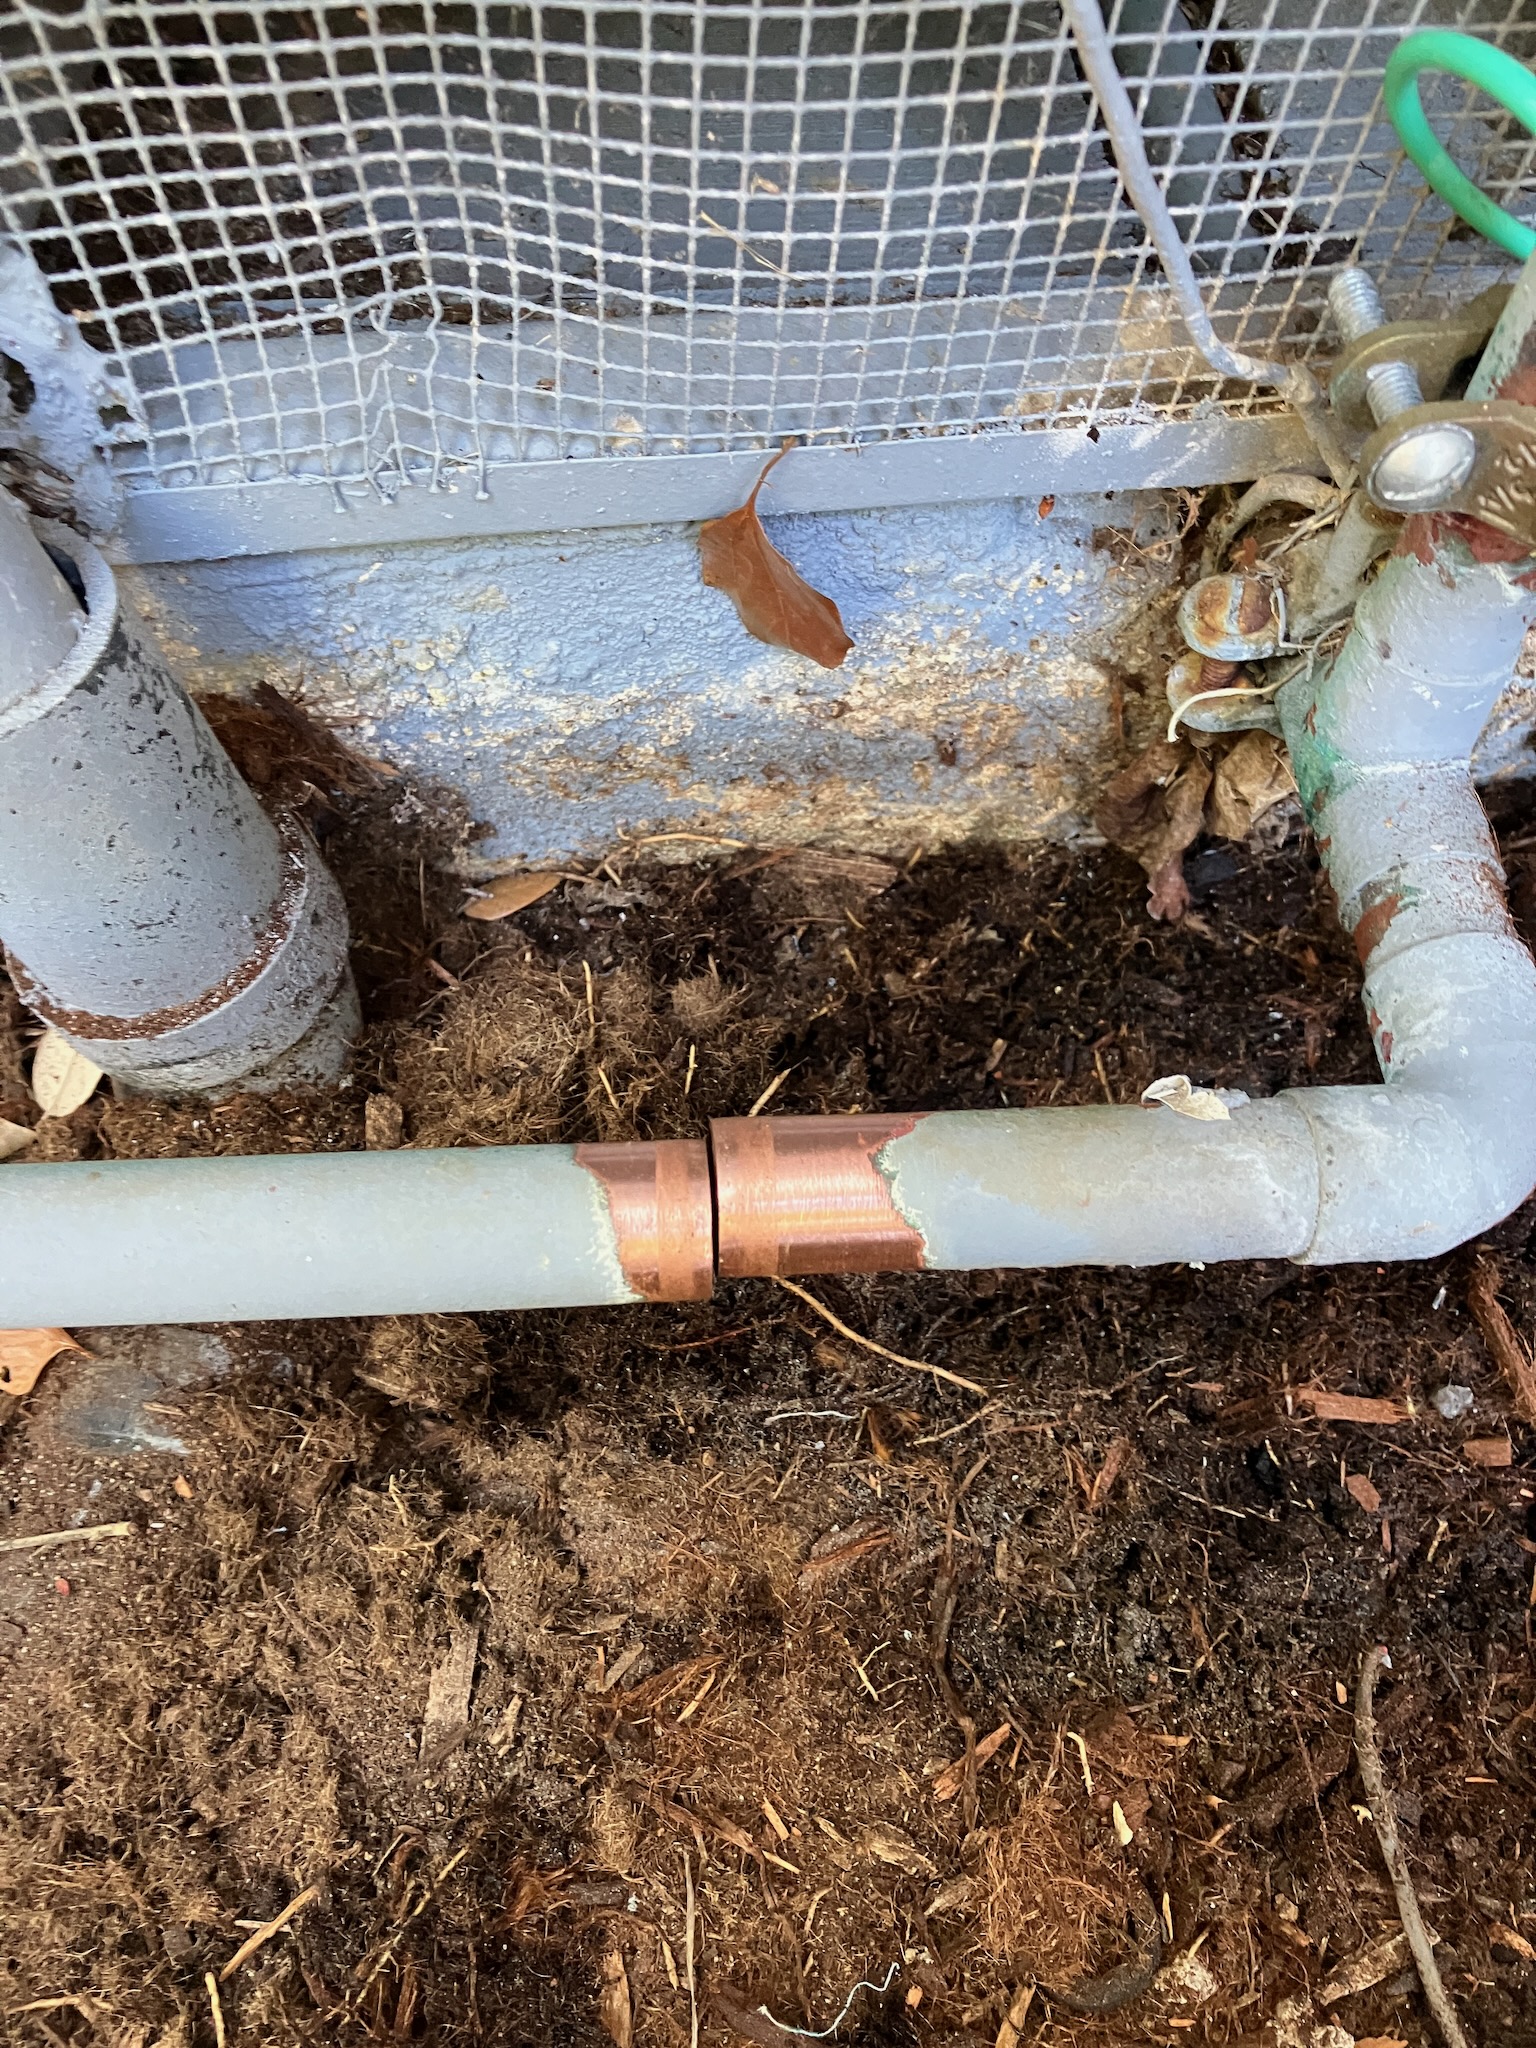
I have a small emotional support lawn in my back yard. It requires irrigation, and that irrigation is automated by way of this bit of plumbing here.

I really have only one question I'd like to ask whoever installed this system many years ago.

Who hurt you?
Anyway, somewhat unsurprisingly the last threaded connection on this ungodly horror is leaking, and with everything soldered/glued into place, there's no way to actually tighten it, or pull it apart to re seal it, or really do anything other than let it leak.
That is, without cutting out this mess and redoing it better.
So, step one: clear away the mulch to give ourselves some better access.

Now we can get in here and sand away the paint and grime on the outside of the copper.

It's a good thing I bought a fresh roll of emery cloth.
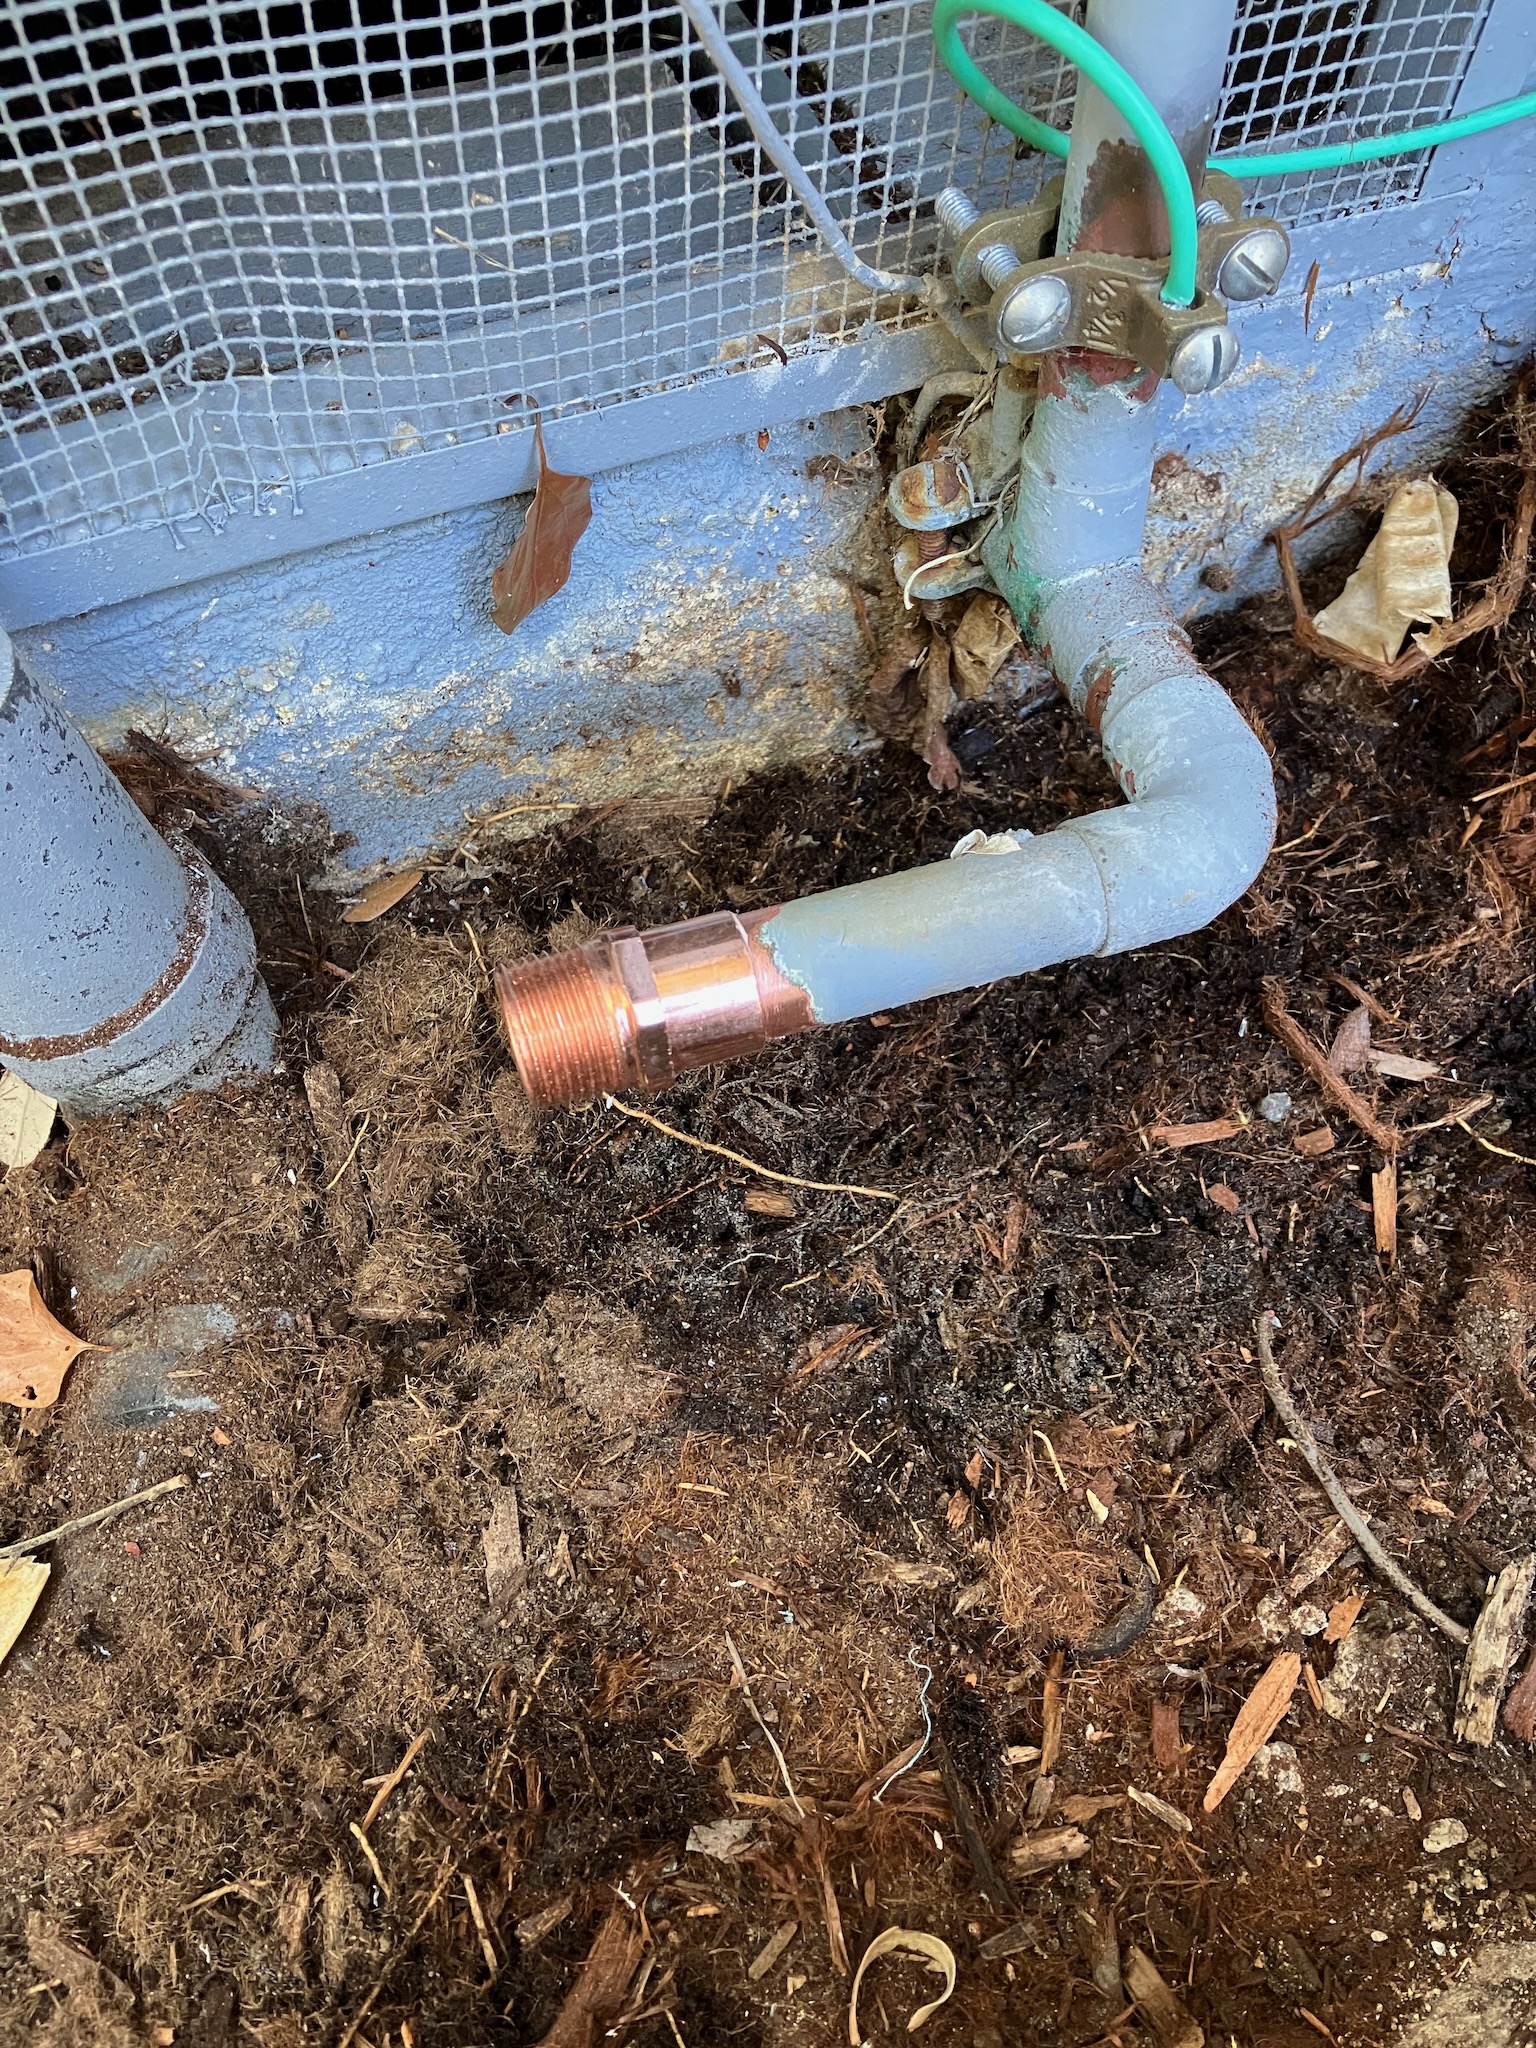
Also it's very important to check the underside when cleaning up a pipe in preparation to solder, as there can often be some corrosion hiding under there, such as there is in this case.

That would not make a good solder joint.

Not perfect, but way better.
Next step is to test and see if I remembered to shut the water off.
And I did! Well, no turning back now, let's get this fluxed up and soldered.
While taking the appropriate precautions to not set my entire back yard on fire.

And then we solder.

It's maybe not an instagram-quality joint but it's nice and solid all the way around. Remember to wipe away any excess flux and solder blobs with a wet rag while it's all still hot.

And once it cools off we can butter it up with pipe dope and screw the valve in place. Despite the corrosion on the outside caused by the slow leak, the valve is actually in great shape and should be able to handle many more years of reliable service.

And thankfully this is the milestone where we can turn the water back on and check for leaks, of which there are none.
Moving on, I decided to save a little plastic by reusing part of the short stub pipe from the original work.

This piece gets glued together with the part that should have been in here all along: a union.

This will save me a lot of potential headache in the future.

Next up is the real reason I wanted to finally address this slow leak (which, by the way, was doing wonders for the shrub growing next to it, which I believe is a Cordyline Baueri), which was to finally install a water hammer arrestor in this line to keep the pipes from banging all throughout the house at fuck-you-AM while I'm trying to sleep.
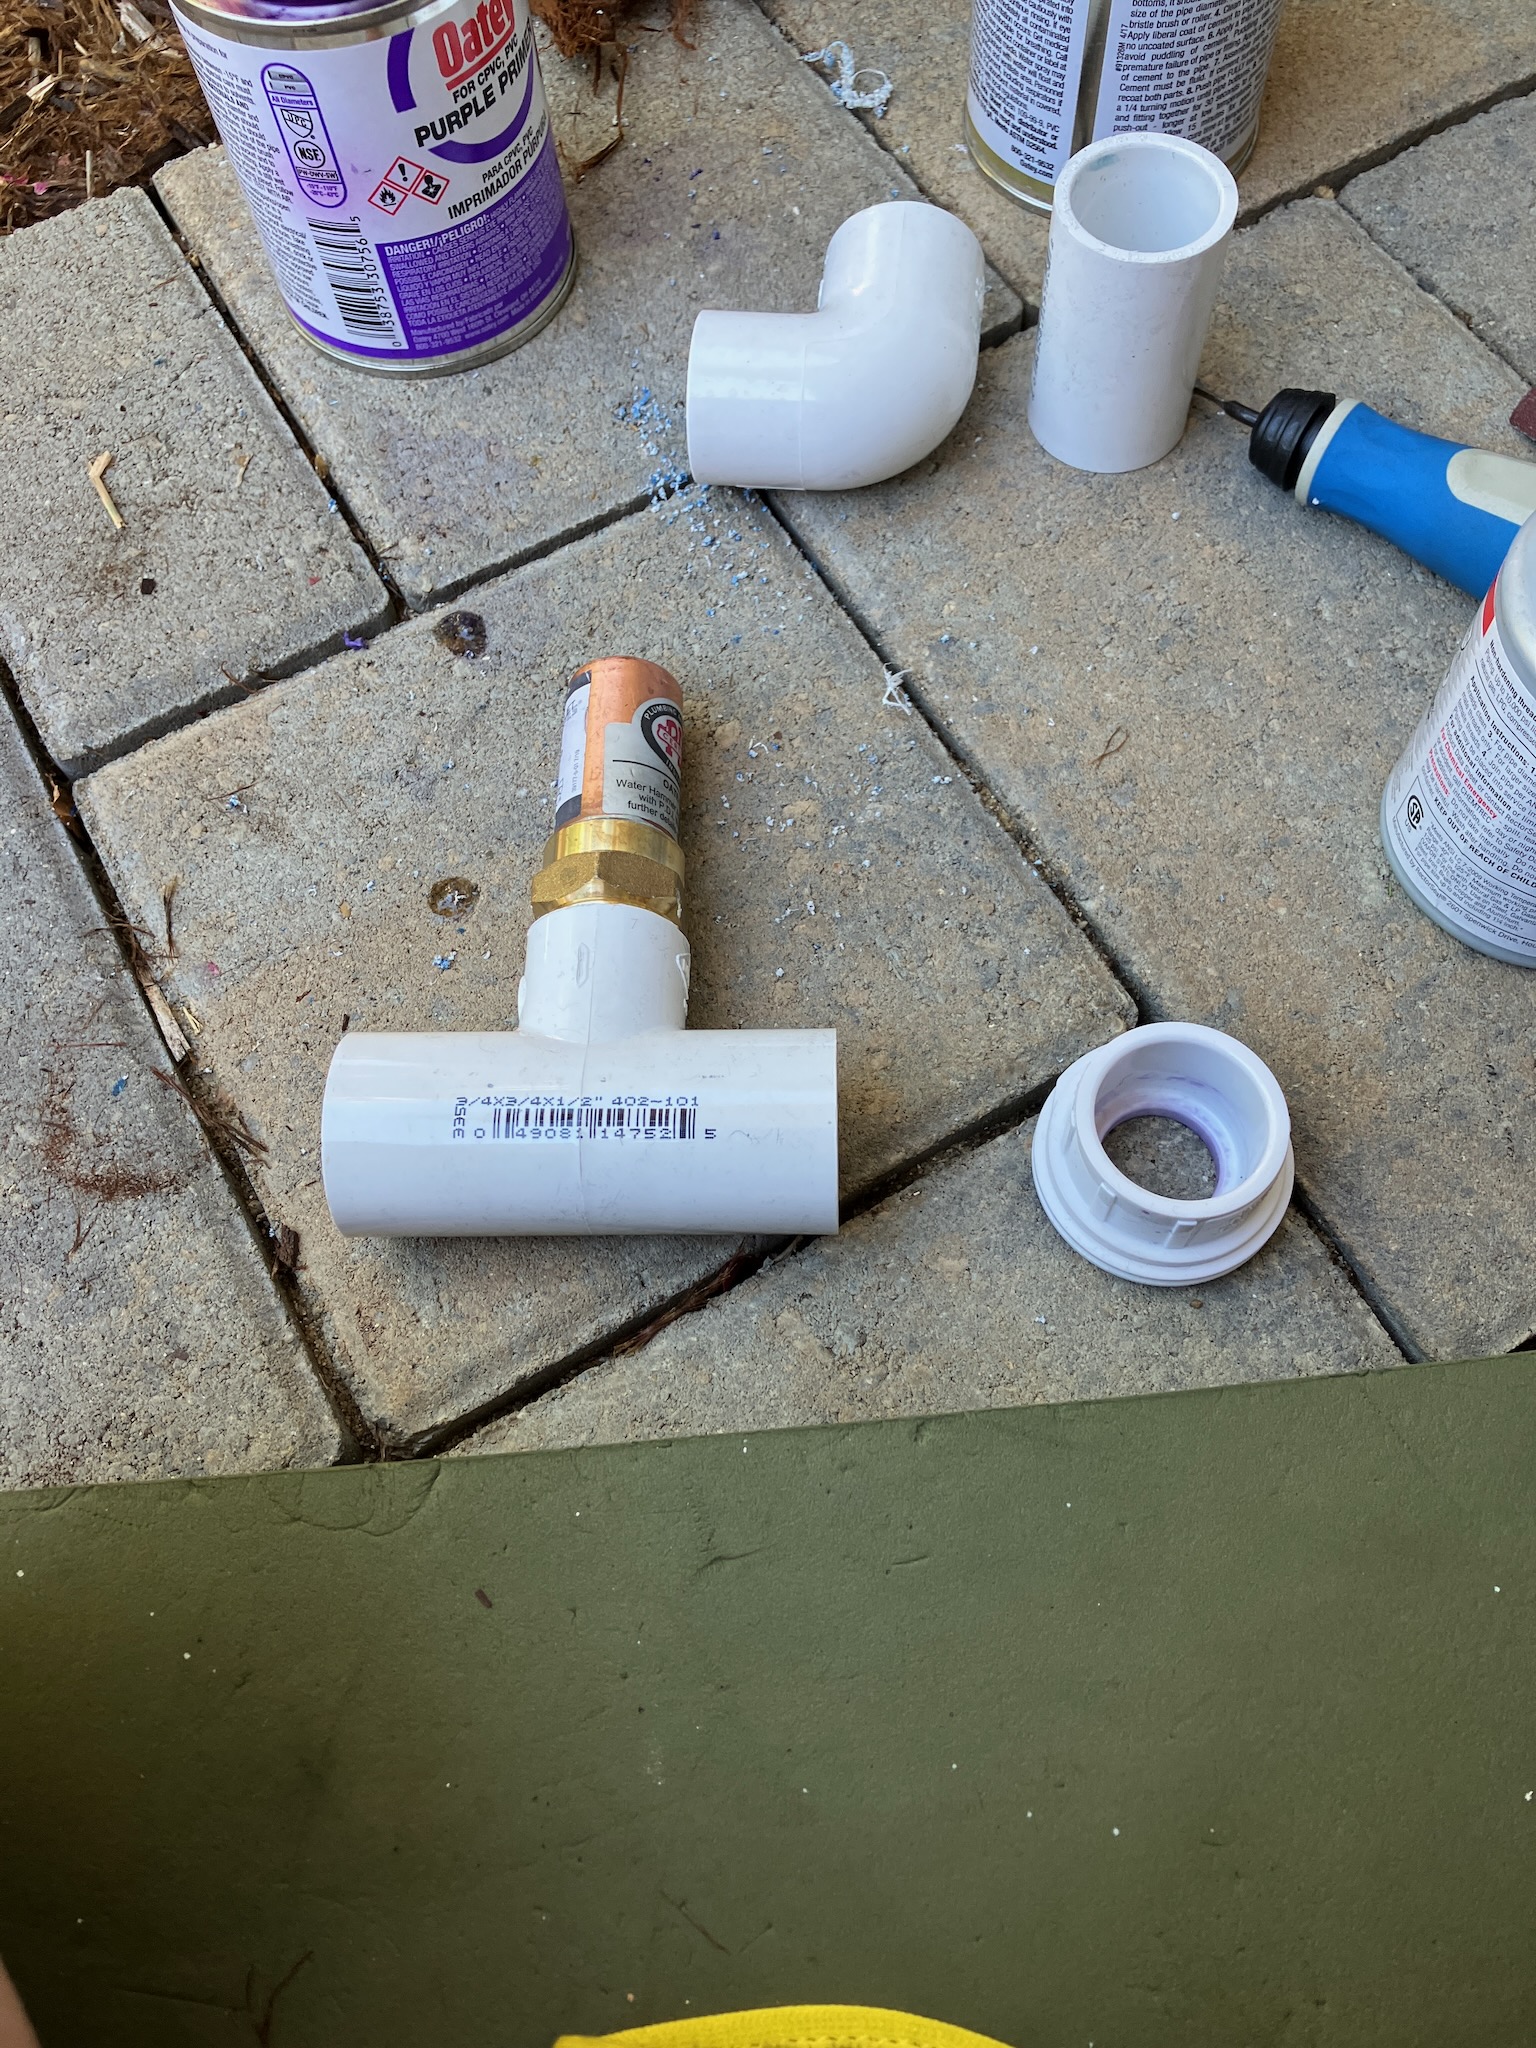
It's going on the other side of the union with a short stub in between.

There's probably better hydrodynamic orientations to install this in, but this reducer tee has a 1/2 FPT branch on it so I could thread the arrestor in directly, and that just seemed like the cleanest installation.

So with that end stubbed out, we need to address this very sad and annoying threaded street 90. Luckily there's just barely enough room in here to get a hacksaw moving, if only just.

Now granted this pipe doesn't need to be hugely optimized for efficiency but come on, at least make an effort.
Anyway, the last pipe is glued into place and all there is left to do is wait for the glue to cure and then check for any heartbreaking leaks.

And as it turned out, there was just a tiny little bit of seeping from the arrestor when I turned the water back on, since I had threaded it in before assembling the tee into the rest of the plumbing, and hadn't quite got enough leverage to torque it down properly. Giving it an extra half gronk with the wrench cleared up that issue and now it's all sealed up.

With the mulch scooped back into place, everything is as good as new.
No comments:
Post a Comment