Sunday, September 8, 2024

More Things That Go Bump In The Night

So you might be interested to hear whether or not replacing the fridge water dispenser valve fixed my water hammer issues. The answer is... it improved the situation. There's a few other potential noise sources though, so let's deal with them too.

We'll start where we left off, at the fridge. The one component that sits between the water inlet and the valve is this here water filter.

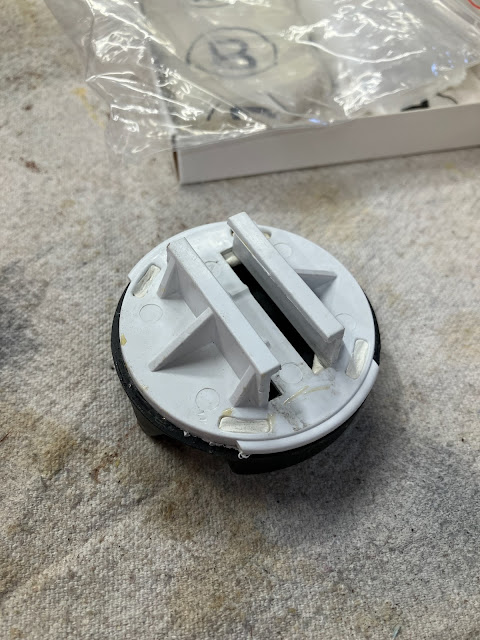
The original filter cap was damaged long before I inherited this fridge from the previous homeowners, so I 3d printed a replacement, mainly aiming to make it reasonably easy to twist the filter the required 1/4 turn to install or remove it. The broken parts of the original were, however, still with the unit when I moved in.

The original part has a pair of extra tabs on it that fit into the filter housing, and I was suspecting that these might help support the outer end of the filter to keep it from potentially rattling around inside the housing.

I had initially, a few years back, tried to repair it using super glue, but as we all know attempting to repair a plastic part like this with super glue usually just leaves you with glue residue stuck to one side of the now twice-broken joint.

So instead we'll try a more robust fix, starting by cleaning and roughing up the mating surfaces.

And instead of super glue, this time I'll be using epoxy putty. You might remember this as being the same material I used recently to fix the top of my industrial sewing machine table.

I kneaded up a wad of it, rolled it into a snake, and formed it around the circumference of the parts, squishing them together and making sure that some of the material got keyed into the slots on the white plastic bit.

While we wait for that to cure, let's have a look at cleaning up the plumbing spaghetti under my bathroom sink.

The black item here is the bypass valve for my hot water recirculation pump. It's intended to be screwed into the wall, but the positioning of the valves and drain here, combined with the annoying orientation of the connections, makes this a lot more inconvenient than it ought to be, thus why I had left it hanging loose all this time.

However, with a bit of rearranging I managed to find an orientation where I could actually screw it to the wall.

It's not perfect, but none of the lines are kinked so I'm calling it good enough.

Meanwhile the epoxy has cured, so let's take off my 3d printed handle and put the original part back in place.

And then we can put the filter back in the fridge.

Did this solve the water hammer noise completely? No, of course not, but at least it's a little more aesthetically pleasing.

Friday, September 6, 2024

Shiny and Chrome

A little while ago, Tyler went dumpster diving and managed to surface with a haul of old chromeboxes. He kept a few of them for himself, assembling them into some sort of linux cluster with which he intends to calculate some kind of digital unholy sins, but set aside for me a pair of them that he didn't need.

More after the break.

Tuesday, September 3, 2024

Things That Go Bump In The Night

You might recall from a previous episode of "Nico's peculiarly random home maintenance adventures" that I did a little bit of replumbing on my sprinkler system, in part to repair a small leak, but also in part to install a water hammer arrestor. I had hoped to quiet some water hammer noise that had been disturbing my sleep in the wee hours of the morning when the sprinklers would cycle on and off.

Of course, the water hammer arrestor I installed did sweet fuck-all to quiet the noise, so it was clearly time to try to solve the problem from the other end, by eliminating the source of the noise rather than eliminating the water hammer.

After a little sleuthing, I determined that it was my fridge that was responsible for generating the noise rather than any plumbing in the walls. This was good news, since, on the one hand, it meant that the noise source wasn't buried in the walls somewhere; and on the other hand, because there are very few components in the fridge between the water inlet and the solenoid valve that could possibly be making any noise.

By which I mean that there are basically no components other than the solenoid valve that could possibly be making any noise.

Now you might wonder how a solenoid valve could make noise from water hammer, and the answer is a bit puzzling if you don't know how a solenoid valve works. Basically there's a (relatively) large diaphragm inside the valve with a small hole in the middle. That hole allows the water to fill the cavity behind the valve, pushing the diaphragm forward and against the valve seat, keeping the valve closed. Then there's a small bypass port, with a pin that's held down over it by a spring, which the solenoid can magnetically retract. By retracting that pin, water from behind the membrane is allowed to bypass the closed valve, which lowers the pressure behind the diaphragm, thus leading to the water pressure on the front of the diaphragm lifting it away from the valve seat, allowing the water to flow through the valve.

So given that the valve is largely driven by water pressure, it's perhaps not surprising that a sudden oscillation in the input water pressure might lead to the valve diaphragm lifting when it shouldn't, causing it to flutter and make a bunch of noise, particularly if the valve is a little bit old and crusty.

Anyway, with that tech talk out of the way, let's get this party started.

By vacuuming up all this dust again...

That's much better.

With a few screws removed, the cardboard cover panel back here swings open, revealing the valve inside.

The red valve controls the water that goes up to the ice maker, while the green valve controls the water that goes to the door dispenser.

Removing two more screws allows us to free up the inlet fitting and valve assembly.

Both the electrical connections and water ports are idiot-proofed luckily: the spades are a different size on the two connectors, and the water tubes are a different diameter. But all the same, it's helpful to take lots of photos as you go.

The water tubes are a simple push fitting. You remove them by pushing inwards slightly, holding the collar forwards, then pulling the tube out.

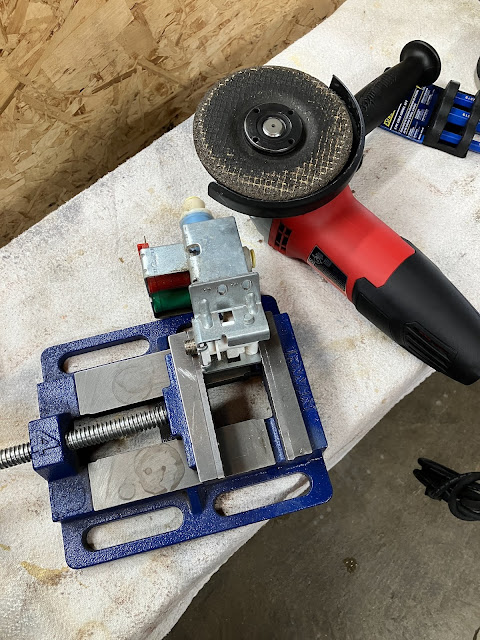
But this is where things get slightly less simple: the valve body is apparently staked together with the inlet fitting.

So it's a good thing I'm prepared for this sort of situation.

The staked pins are easily ground away.

And a little love tap with a cold chisel separates the two parts. There's no need to re-attach the new valve body since the two pieces are held onto the fridge by the same pair of screws.

Speaking of being held onto the fridge, let's get the new valve in place and hooked up.

And after checking for leaks, we can button up the cardboard cover.

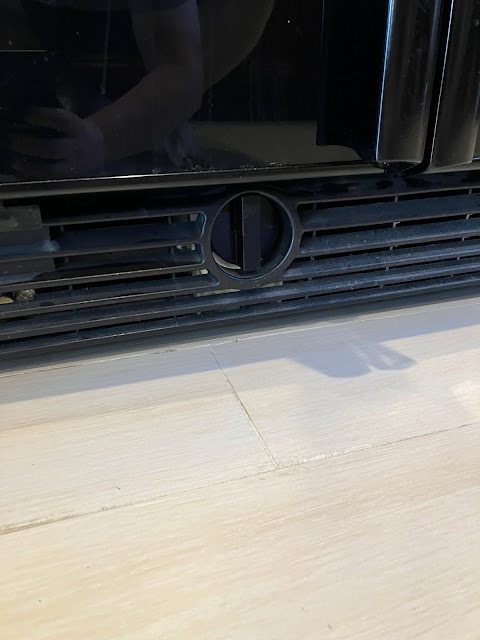
And all that's left to do is push the fridge back into place, which I didn't take a photo of, because it looks exactly like the first picture in this blog post. Go scroll up to the top and look at it again if you can't stand the suspense.

I tried turning the kitchen faucet on and off a couple of times and it's almost eerie not hearing the subtle clunk from the fridge when the pressure wave ripples through the plumbing. Something tells me I'm going to have a good night's sleep tonight.