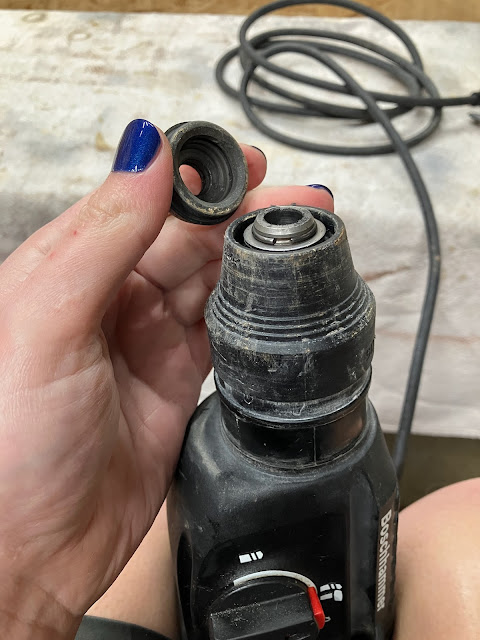
This is my Boschhammer.
It's a rotary hammer, which is basically a hammer drill that put its big boy pants on. What I didn't realize about it, because I probably never read the manual, is that you're supposed to grease the chisels/bits that you insert into the chuck. This is a rather peculiar act for someone who might be more used to standard drills with Jacobs-style chucks, but the SDS+ chuck is a peculiar beast.
The lubrication of the bit against the chuck isn't really the goal here, though it's a nice-to-have element given that the bit is expected to move within the chuck when in use; unlike a hammer drill the hammering action is transmitted directly to the base of the bit, rather than hammering on the whole chuck itself. We'll see how that works in a bit.
The real goal of greasing the chisels is to keep the inner workings of the chuck fully lubricated, as it does have a number of moving parts that are frequently exposed to dust and grit. If the lubrication runs out or cakes up and gets sticky, the hammering action can become sluggish and you may have to apply excessive force to the drill to get it to hammer properly. At worst, the anvil can seize within the chuck, rendering the hammering action completely inoperative.
So with that in mind, let's pull this chuck apart to give it a nice grease-bath.
First up, we pull off the rubber end cap. This just seals the dust out of the chuck (as well as can be expected) and fairly easily pries off the end of the chuck.
Next up, we spend 30 minutes stabbing our fingers while trying to pry off not one but two retaining rings. Ugh. The topmost ring holds a washer in place, while the one below it holds the bit release collar.
The collar holds basically 90% of the chuck together. With it removed we can pull out the ball bearing that retains the bit, as well as its spring and washer, and also slip out the four pins that hold the bit holder into the base of the chuck.
With the pins removed, the bit holder slides out, and the anvil should come with it. This is what gets the bulk of the grease every time you slip in a well greased bit.
The rest of the chuck doesn't disassemble from this side, and shouldn't need a lot of attention. However, we can pull the nose of the drill off by removing 4 T30 screws with an extra long bit.
And then we can peer inside to ensure that the grease here is still present in copious quantities.
The shaft on the upper right is what transmits the drilling action to the chuck, while the hollow sleeve on the left is what holds the chuck itself on the other side, and the hammering action is transmitted through to the anvil through the hollow center.
And all that mates up with this pile of greasy mechanics.
I moved a bit of the grease around from where it had collected in nonfunctional places, but I didn't see any need to mess with this stuff any further.
The rest of the chuck, though, was going to get a nice coating of fresh grease. This is probably not the correct grease to use, except that it's the grease I happened to have on hand at the time so it was absolutely the correct grease to use.
Anyway, the chuck just reassembles in the reverse order of disassembly, with the appropriate care taken to grease things up along the way, and then it's all back together ready to poke holes in impossibly hard materials again.
Though ironically the reason I thought to service this was actually because I'm ordering a mortar mixing paddle that fits into an SDS+ rotary hammer (in rotary mode, not hammer mode). I figured it made sense to get that rather than burning out my regular drill trying to use one with it, or spending $50 to get a standalone mortar mixer that I'd only use once or twice ever, and which would probably burn itself out immediately because it's a $50 mortar mixer.
But that mortar mixing will be a story for a future blog post.

