It should come as no surprise that timing is very important in a sewing machine, and when it comes to sewing machines, timing isn't just about where things happen along the fourth spatial dimension, but also along the other three.
Take, for example, the humble needle bar. While it needs to form a loop of thread at the right time for the hook to catch it and pull it around the bobbin, it also needs to form that loop in the right place.
And that means that it most certainly mustn't be too high and, as we'll see later, it must also not be too low.
To get a good look at how the needle, held by the needle bar, interacts with the hook, we'll need to remove the needle plate first.
And with that removed, we can peer inside, where the magic happens.
Of course, we can't adjust the needle bar from down here, so we need to move upstairs.
And start off with the needle in the lowest position.
We can then loosen the clamp, which frees up the needle bar to shift up and down, or rotate if it happens to be misaligned that way.
The vertical adjustment is usually specified from the bottom of the needle bar frame to the bottom of the needle bar, and it's easiest to measure this distance by cutting a notch in a piece of paper at the appropriate length.
And yes, there is still glitter inside this machine. There will never not be glitter inside this machine.
The hook is not timed form the bottom position, though. Instead, we need to advance the machine until the needle bar has retracted by a specific amount (these distances are all in the service manual for your particular model of sewing machine, and they do vary). This allows the thread on the scarf side of the needle to form a loop, which is what the hook grabs onto. A second notch in the same piece of paper helps align things correctly.
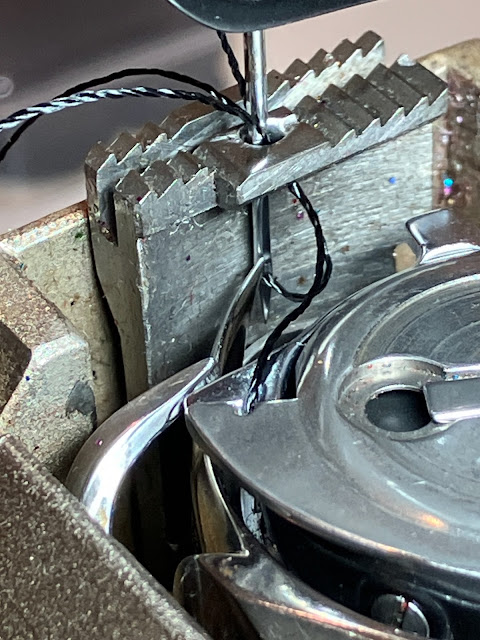
Now we can have a peek at the hook, and see how it's lining up with the needle.
As we can see, the hook tip is just coming around to meet the needle, and it's aligned just above the top of the eye, near the bottom of the scarf. This is the optimal position for picking up the loop of thread, and reduces the likelihood that the loop twists out of the way, or that it picks up a frayed ply of the thread rather than the whole thing.
Of course, the other reason we don't want the needle to come down to low is that, if it did, it would strike the presser foot when the foot is raised. But, as we can see, when properly adjusted that's not an issue.
If the hook were out of time with the needle, then you'd need to loosen the screws on the bevel gear and bring it back into time, and if the hook were too close or too far from the needle, there are adjustments for that as well, and naturally there are a number of other adjustments that can be made to other parts of the machine to make sure that everything is sewing correctly.


No comments:
Post a Comment