Showing posts with label Juki LS-321. Show all posts

Wednesday, March 19, 2025

A Regular Allowance

You might remember my Juki LS321. If you don't, this is what it looks like.

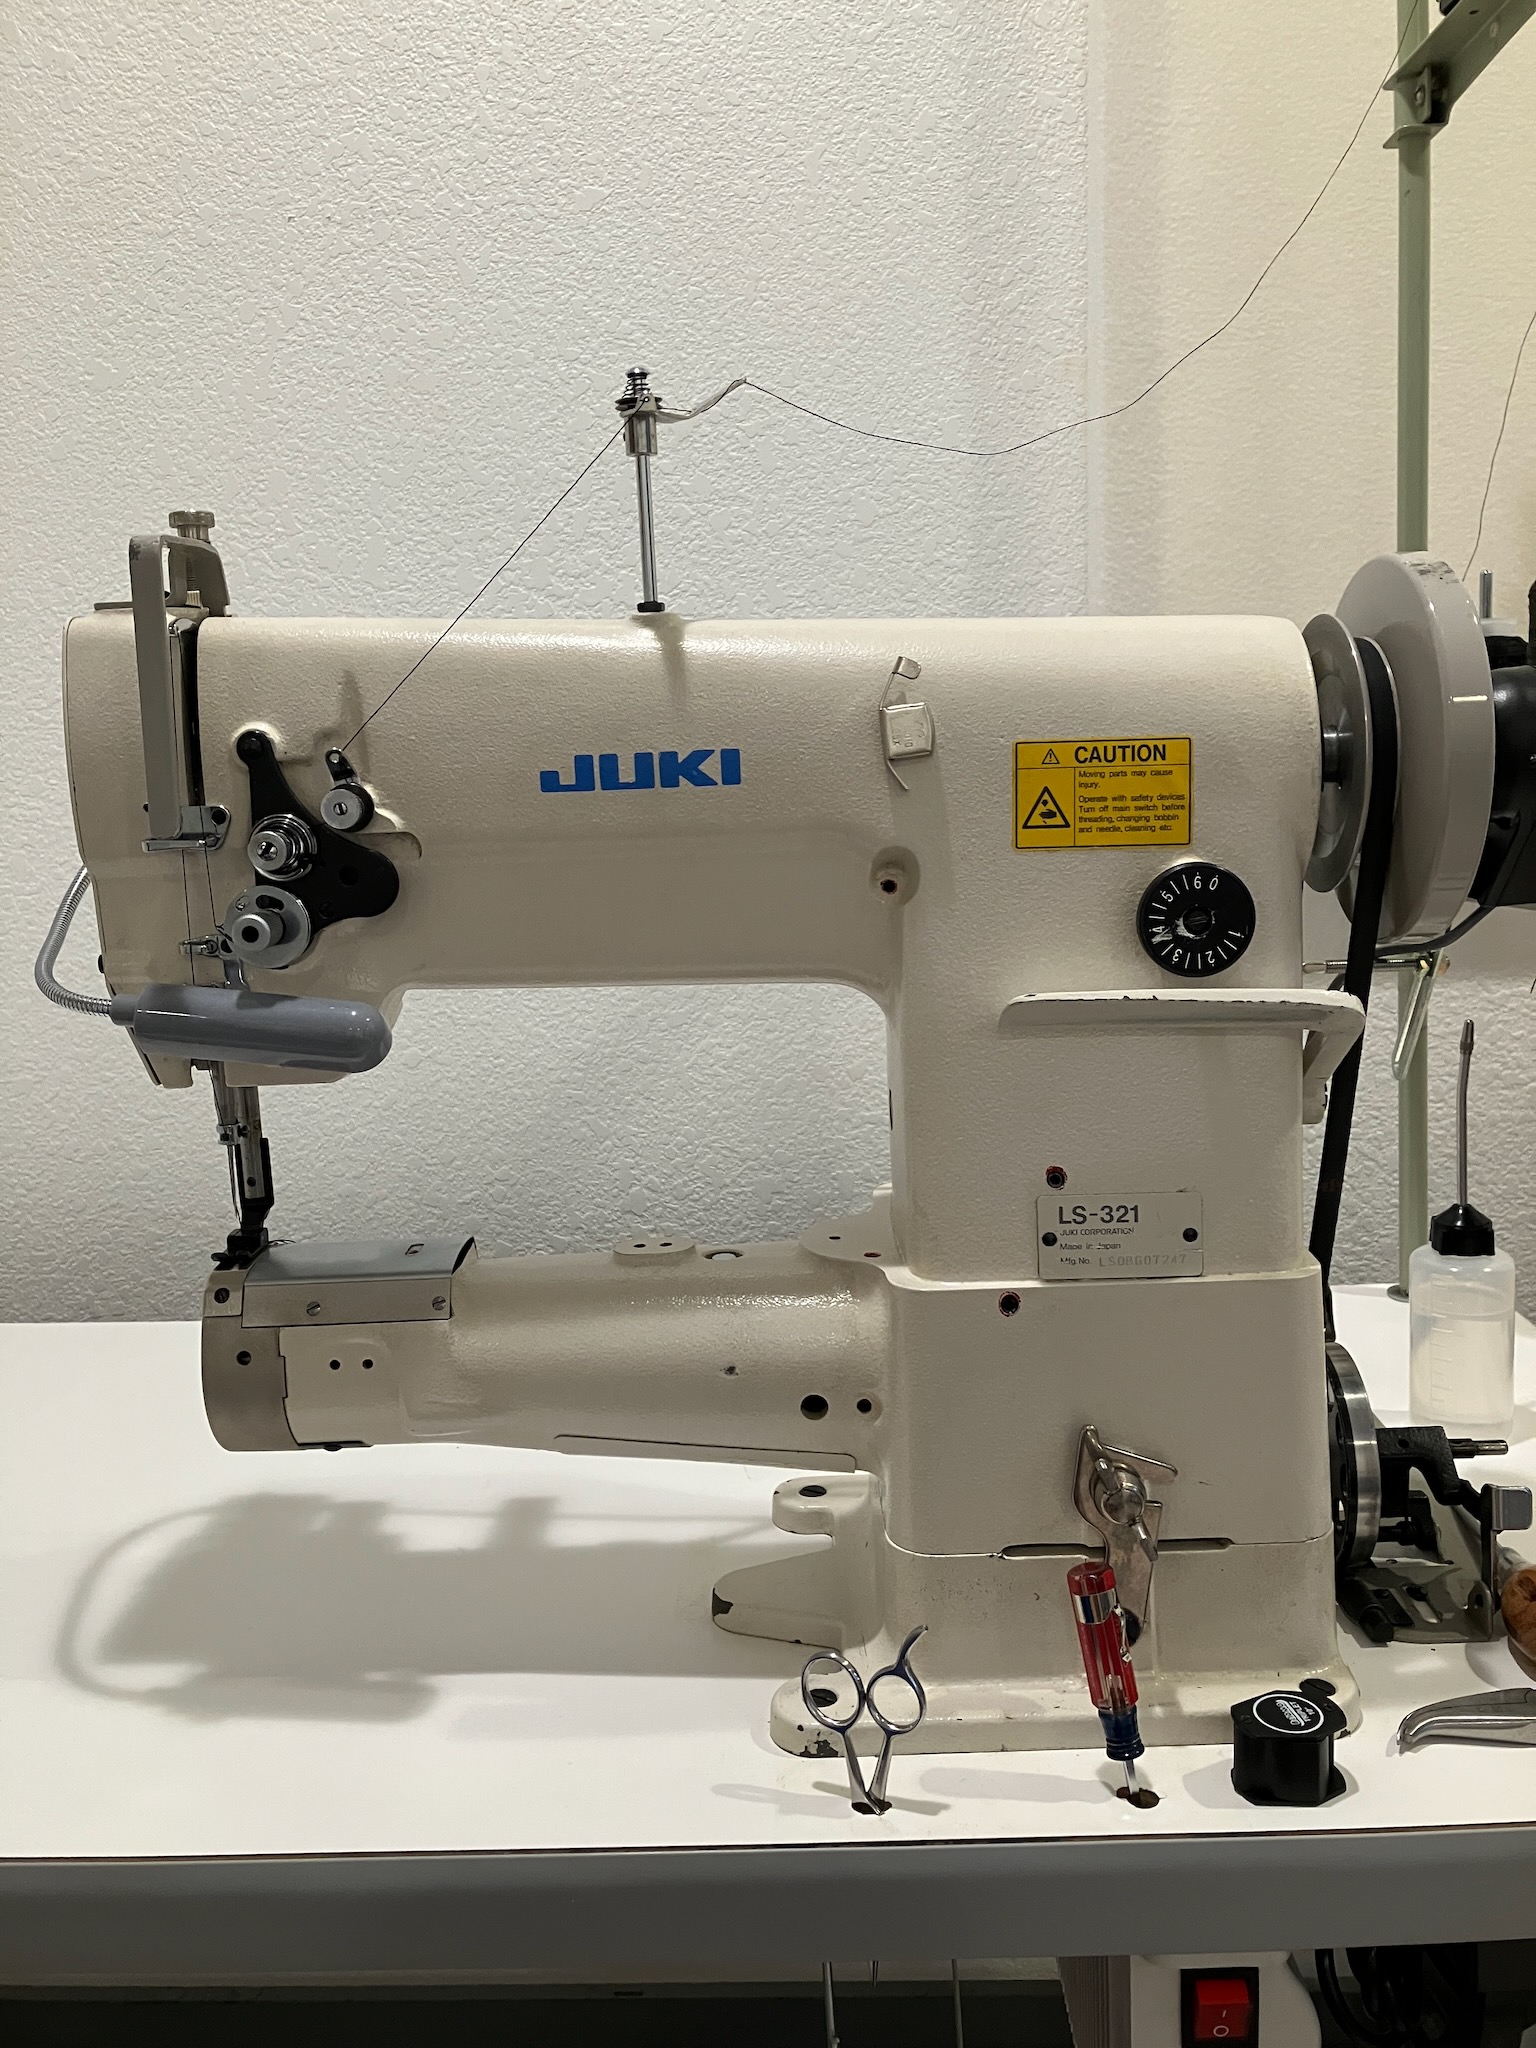
I've actually been putting it to use lately sewing up small booklets, since it has a very large maximum stitch length and I keep it threaded with some nice chunky Tex70 thread. But that's neither here nor there.

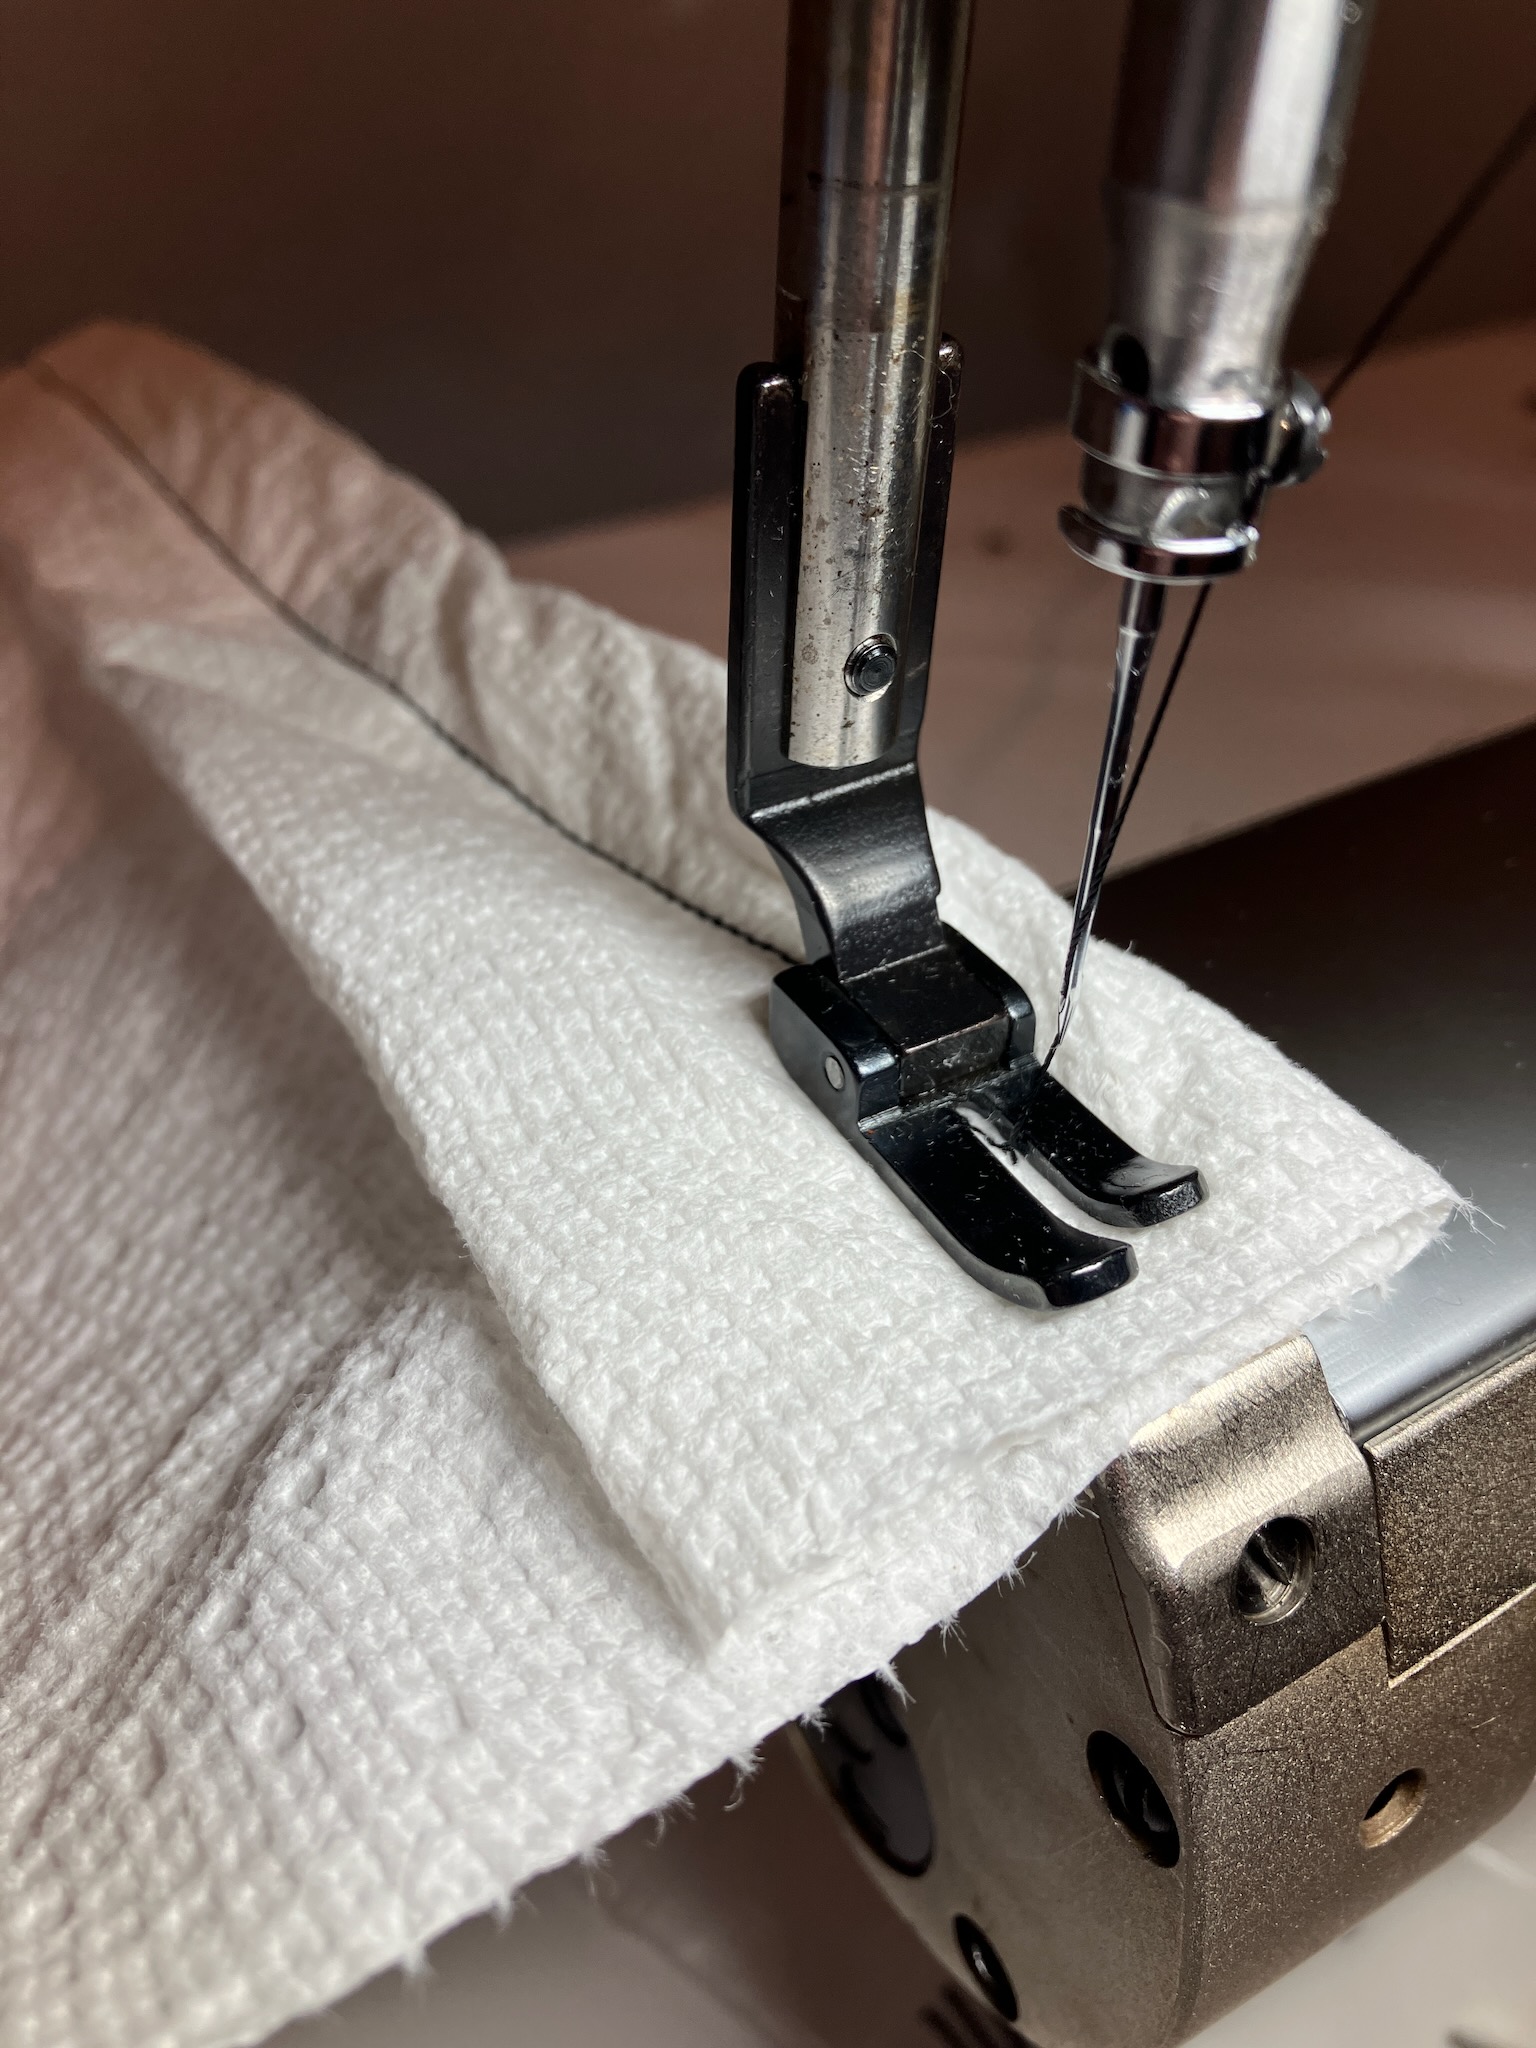
When I'm not sewing through a stack of paper, one of the things that's perhaps a little less than ideal about this machine is that there's no real markings next to the presser foot for you to judge your seam allowance by, nor is there an especially convenient way to attach a seam guide to the bed of the machine.

There's really nothing here but a smooth, featureless cover for the bobbin/hook area.

Thankfully there is a solution for this: a drop-down seam guide.

This bolts to the back of the head of the machine, and the little bearing (which can be swapped for a fixed guide, also included) guides the fabric.

But that does presume that you can mount it to the machine in the first place.

You see, it comes with M6x0.8 screws, which probably fit some more recent models of sewing machines, but definitely don't fit mine. What thread does fit mine? Well, that's where things start to get a little confusing.

Pictured below are three candidates: 1/4-28, 15/64-28 and the aforementioned M6x0.8.

The 15/64-28 is an oddball size of screw that was used by Singer (who, to be fair, designed most of their hardware well before thread sizes were standardized), and is present in a number of locations around the machine. However, it doesn't fit the holes in the back of the head where the seam guide mounts.

1/4-20 (not pictured here) is a very common size outside of sewing machines, but it had no hope of fitting: the thread was very obviously too coarse, and it seemed like the major diameter was probably too large.

M6x1.0 (also not pictured here) is also a very common size outside of sewing machines, but it too didn't seem to fit. Much like the 15/64-28, it would start to thread in but then jam up before getting anywhere.

The 1/4-28 was certainly not going to fit given that the 15/64-28 didn't fit, but it seemed like it might be a reasonable compromise: It felt like the holes were almost surely drilled and tapped for 15/64-28, but had gotten gummed up over the years, and so I either had the option to buy a 15/64-28 tap (which is surprisingly easy to find) to clean out the holes and then find some 15/64-28 screws (which are surprisingly difficult to find) to attach the seam guide, or I could buy a set of 1/4-28 taps and some 1/4-28 hardware and use that to open up the holes by 1/64th of an inch.

Well, you can see what option I went with... Except, something wasn't quite right. A 15/64-28 thread should only be 15 thousandths of an inch smaller than 1/4-28, and in fact a 15/64-28 screw will thread into a 1/4-28 hole with only a little bit of sloppiness in the fit, but trying to line the tap up and get it started in the holes wasn't working out the way I was expecting.

And that's when it occurred to me: I should probably try running a M6x1.0 tap into the holes to see how it feels.

Well here's the M6x1.0 tap after running it in. Just picked up some gunk and maybe a tiny skim of cast iron, but at no point did it feel like it was digging into the existing threads.

So these actually were M6x1.0 holes, but they were just a bit too crapped up with old dirt and dried-up oil so they felt like they were binding when I tried to thread a bolt in.

Well, I guess I bought that 1/4-28 tap set for nothing, but on the bright side I'll have it in my toolbox for some future use. It's almost always better to have a tool and not need it than to need a tool and not have it.

Anyway, the next step was to deal with the bolts. I had a stash of M6x1.0 bolts already, but they were a bit too long, even after running the tap all the way until it bottomed out. Thankfully a little work with a hack saw, a file, and a die got them shortened up appropriately.

The flange-head made things a little bit crowded when I tried to install the bolts next to each other, but luckily I had more bolt holes to choose from.

4 in total, in fact, and the mounting bracket was just wide enough to span two non-adjacent holes.

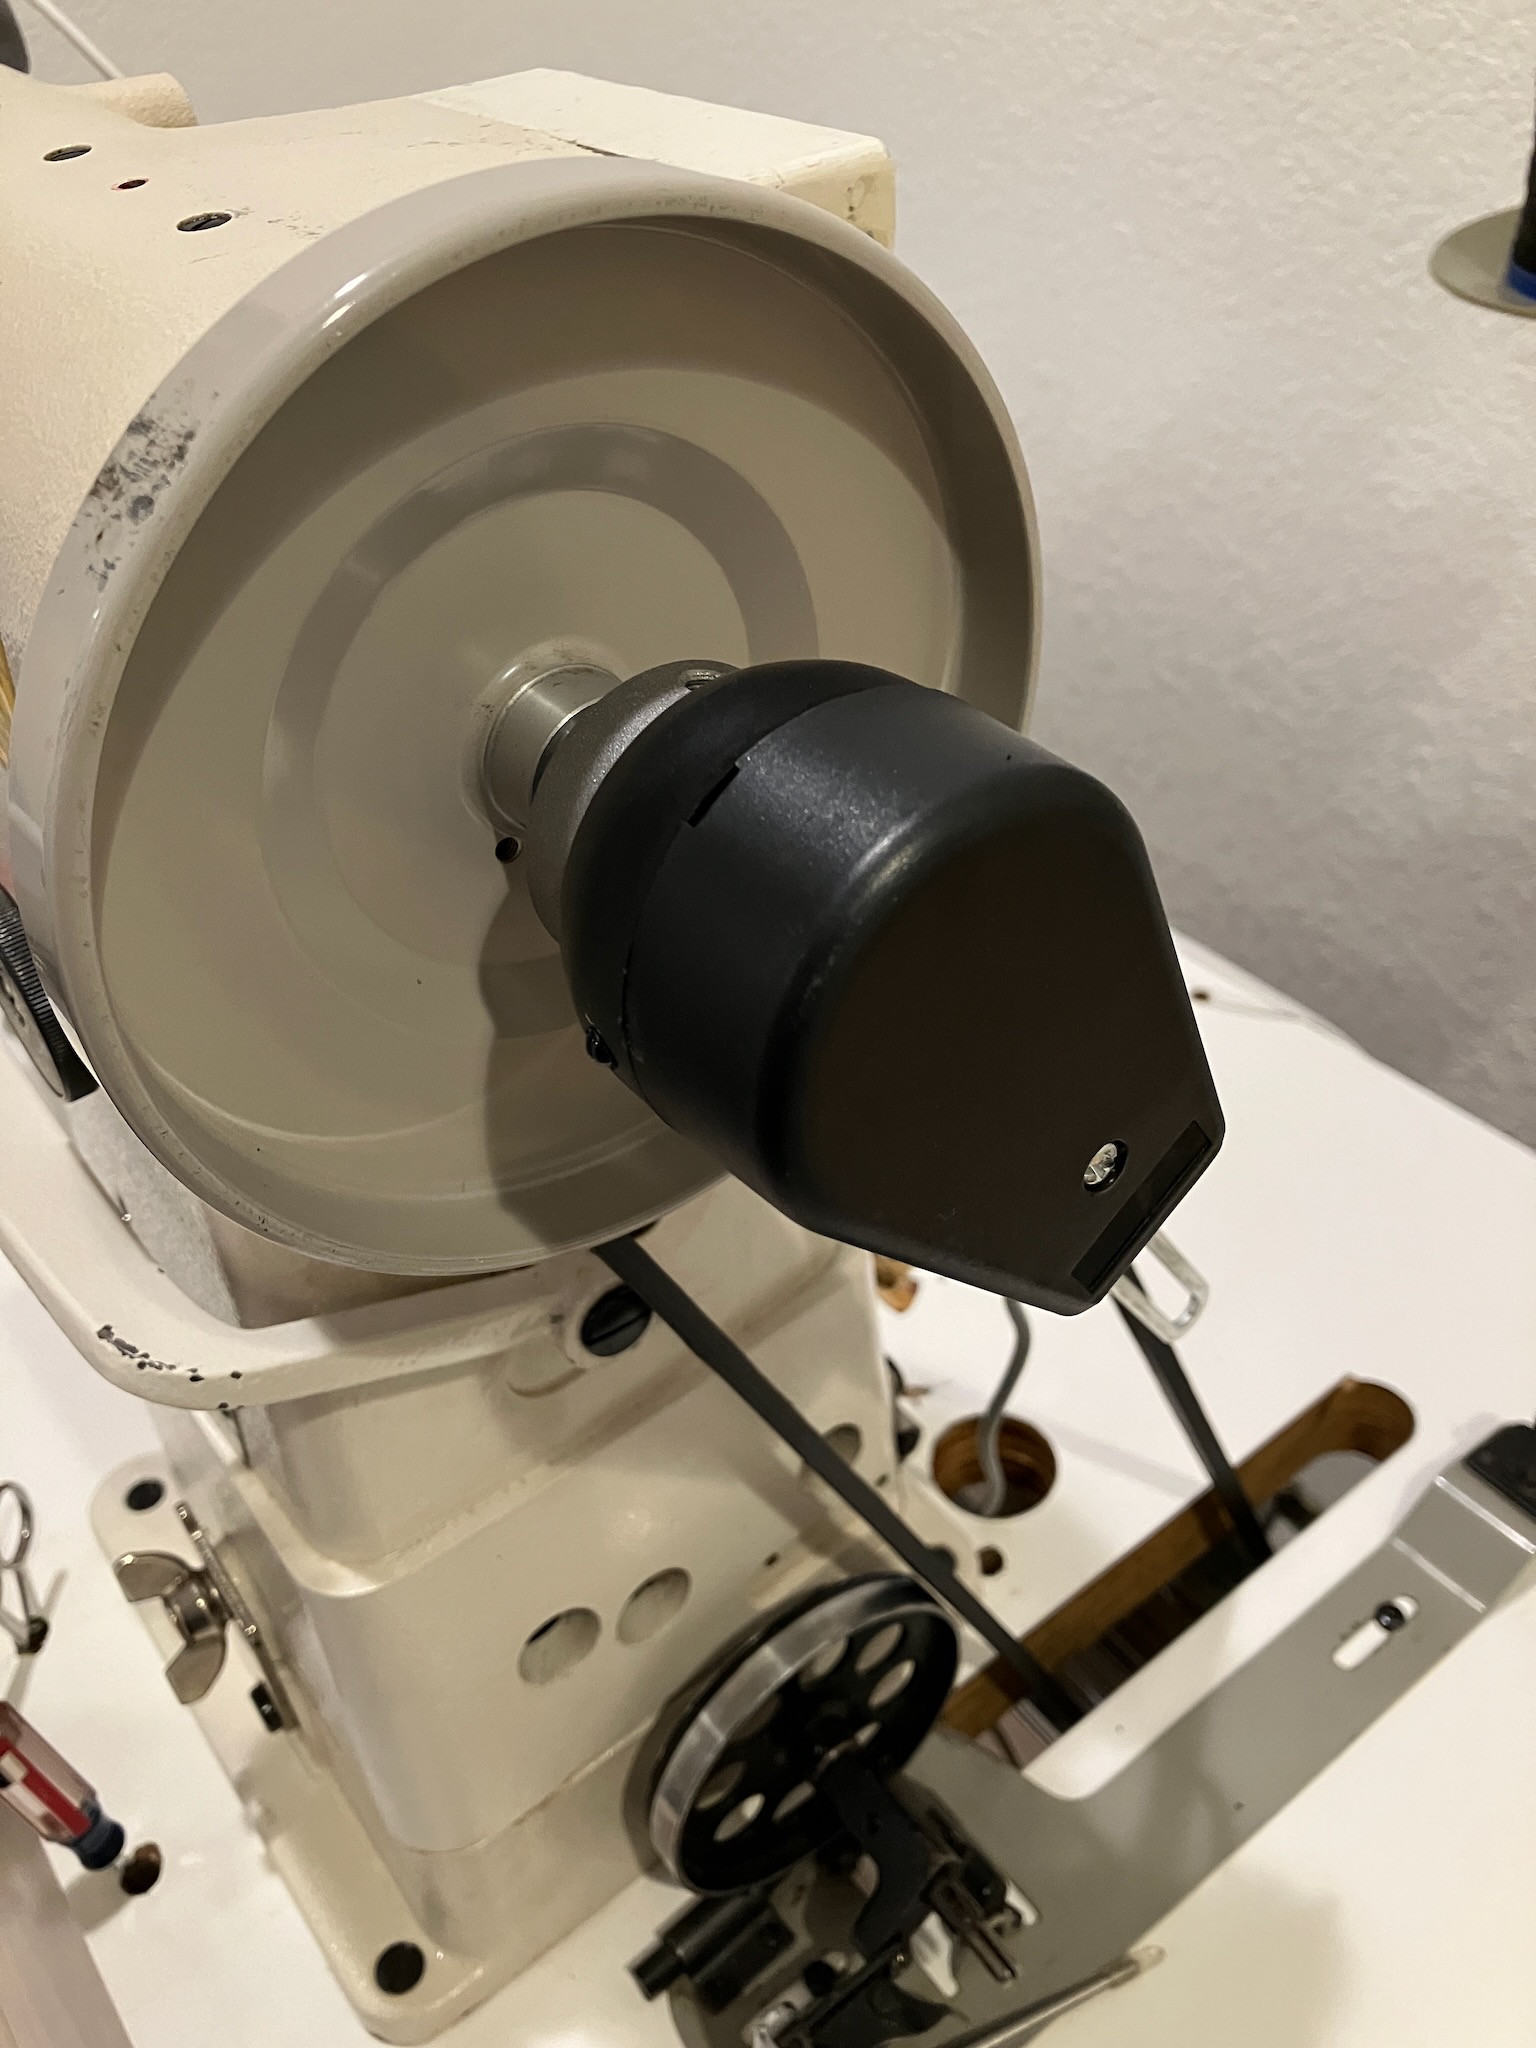
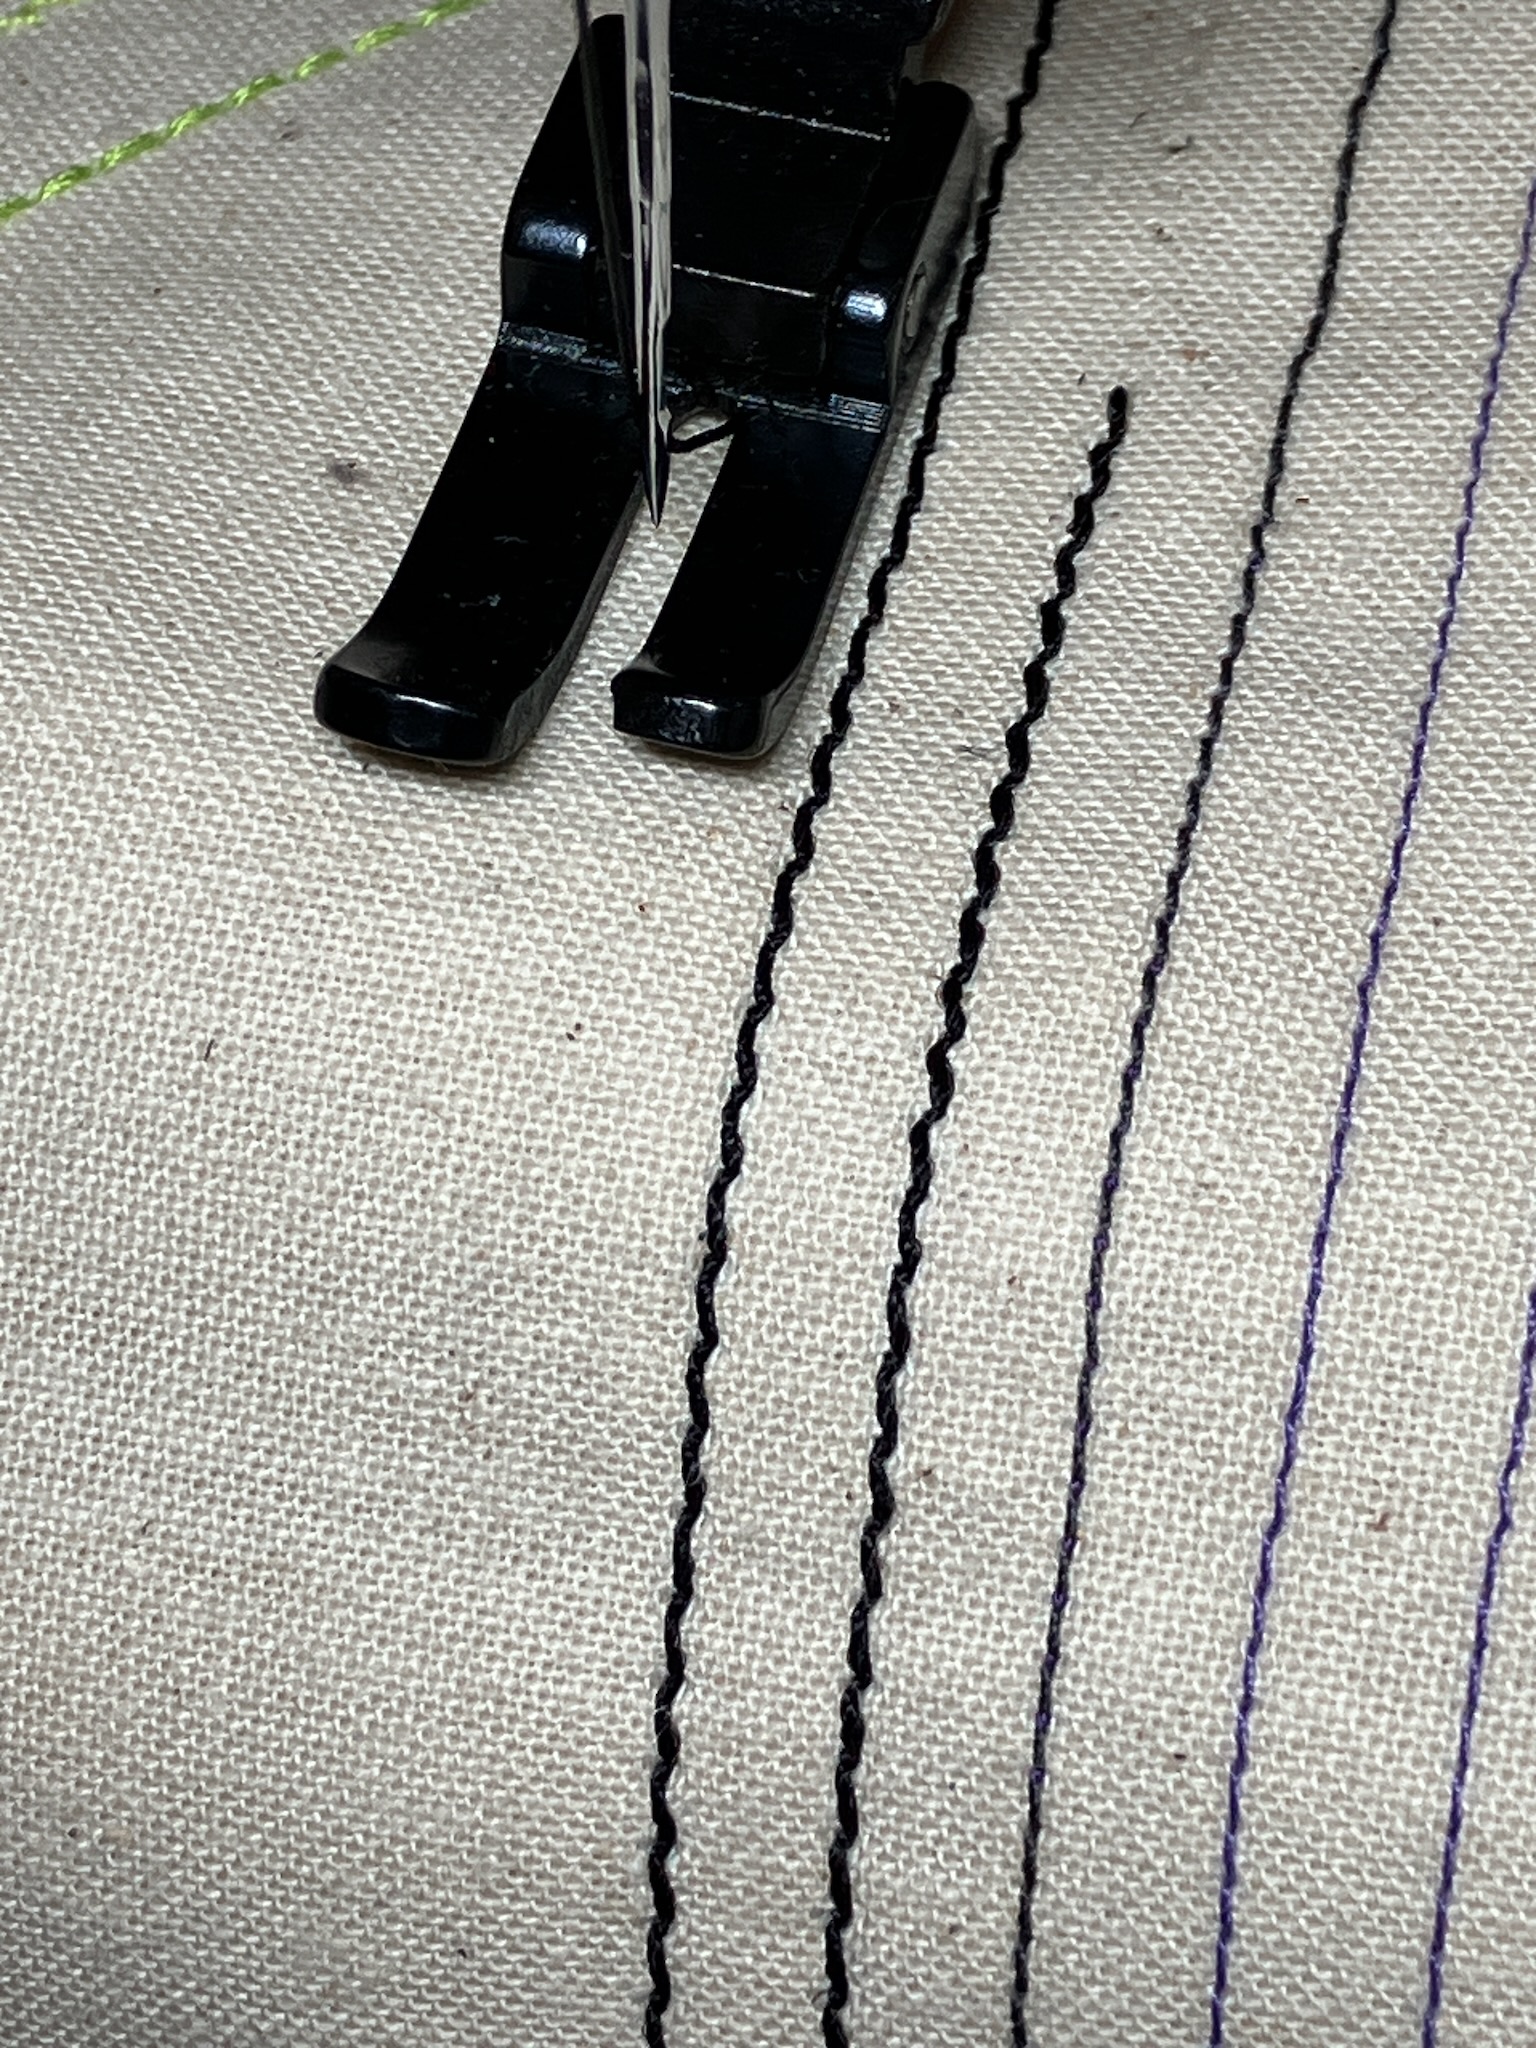
So this is what the seam guide looks like in action.

And whenever I need it out of the way, it just flips up and leaves plenty of space.

Now if you're thinking to yourself "this is all well and good, but what about the Singer 251?" then slow down there, we're getting to that next.

The 251, being a regular high-shank industrial machine, can take a much more ordinary style of seam gauge. This one bolts into place on the presser foot bar, just using the regular screw that holds the presser foot in place.

And much like the other seam guide, it flips up out of the way when the situation calls for it.

Which is very handy. I already had a bed-mounted seam guide for this machine, as well as some magnetic seam guides, but in terms of convenience this design really works well.

Neither of these were necessarily critical upgrades, but they're both very nice to have.

Wednesday, August 14, 2024

Living on the Edge

I've done a lot of work to fix up my Juki LS-321 cylinder arm needle/drop feed sewing machine, but the table it sits on has also needed some attention that it hasn't been getting.

There's three main categories of problems with it. Well, more like four if you count one that I'm not gonna fix: it's sagged a little in the middle over the years due to the weight of the machine.

Or five problems, if you count the glitter.

Ok, but enough of the problems that are never going to be fixed, let's deal with the ones we can do something about. This'll be a long one, so click through to read on.

Wednesday, July 24, 2024

An Obvious Cover-Up

This here is my Brother Nouvelle 1500S. It has an obvious problem.

It's naked.

This will be a bit of a lengthy post, so more after the break.

Saturday, July 13, 2024

Lean On Me

So ever since I brought home my Juki LS-321, it's had a minor setup issue.

You see, industrial sewing machines are designed to tilt backwards for servicing, giving you access to the mechanics underneath, as well as loosening the belt that leads down to the motor.

However, if the machine just tilted all the way back to the table, it would likely crush some smaller parts on the rear of the machine, along with the operator's fingers, and so usually there's a wooden or plastic post mounted in the table behind the machine, like this one behind my Singer 251.

But no such post exists on the table of my LS-321, and oddly there's no sign that a post ever existed back there either, which is a puzzling oversight.

The good news is that these posts are cheap, and very easy to install. You just need to drill of 5/8" hole and slip it in.

Unfortunately this 5/8" drill bit is cheap garbage and drills a bit oversized.

But that's nothing a little hot snot can't fix.

You do need to be careful with this stuff though, it solidifies really quickly when you're sticking the part into a big, cool slab of plywood like this.

But I got it in place just fine, so let's test it out.

It's like the machine is just magically hovering in midair!

And more importantly, it's not smashing the foot lift lever, or my sewing light, or any of the other gubbins back here, into the table. A solid improvement, I'd say.

Monday, July 8, 2024

To Servo Man

My Juki LS-321 came equipped with a clutch motor. It's pretty smooth, plenty powerful, and not incredibly noisy. That said, it doesn't really have the control that a servo motor has, and I'm planning to use this machine for some pretty small and intricate projects. Given the choice, a servo motor would be more appropriate for the task.

But since I had a clutch motor already, I didn't really fancy the idea of swapping to a servo motor, since then I'd have a clutch motor just sitting around taking up space, or I'd have to try to unload it on Craigslist, or whatever. Not a really appealing option.

Fast forward a little bit and a Consew 18 falls in my lap as a head-only purchase, meaning it'll need a motor of its own. So the opportunity presented itself: move the clutch motor from the Juki to the Consew and buy a servo motor for the Juki.

So naturally that's exactly what I did.

These instructions probably make more sense in Chinese, but luckily things aren't too difficult to figure out.

I will have to learn how to unhold a button, though.

Anyway, things are pretty self-explanatory so it's not a big deal.

Before we stick the new motor on, we first need to get the old clutch motor out of the way.

One of the advantages of using a servo motor is that, for the same power (about 550w), the servo motor is much smaller than a clutch motor.

But I perhaps didn't really appreciate how dramatic of a difference it would be.

I'm not sure how much of a noticeable impact it makes once it's installed though, since it just hangs out under the table. And speaking of installing, let's get the motor bracket and motor bolted in place.

And hook up the actuator rod from the pedal to the speed controller.

And mount the actual servo driver.

This servo motor goes up to 5000rpm, which is another advantage I didn't mention earlier. The Juki LS-321 is rated to go up to 2400spm, and with the previous setup it had a small pulley on the 1750rpm clutch motor which resulted in a top speed of around 1050spm. The servo motor on the other hand has a pulley that's only about 10% smaller than the machine's pulley, so the 2600rpm I've configured here translates into 2356spm up at the machine.

And I can get there without sacrificing the slow speed performance, which is really nice.

Speaking of slow speeds, one of the other advantages of a servo motor, or at least a brushless servo motor like this one, is that you can equip it with a needle positioner.

This is basically a simple encoder that you clamp onto the end of the main shaft of the sewing machine, so that the servo driver knows exactly when to stop to put the machine into either a needle-up or needle-down position, rather than just letting the machine stop wherever it happens to stop.

And if you do happen to choose the needle-down position as your default, a simple heel press on the pedal will make the controller spin the head to the needle-up position so you can remove the work.

Of course, if you only attached the encoder to the main shaft, it would likely spin wildly when the machine is running and not report anything sensible to the controller. To fix that, they provide this peculiar little bracket that you can use to keep it steady.

I think it's usually intended to fasten onto a belt cover or something, but I don't really feel like ever installing a belt cover, so I just positioned it so that the threaded rod is nicely wedged inside of this convenient hole in the main casting. It does the job just fine.

On the subject of positioning things: since I put a new motor in and changed the belt geometry, the bobbin winder will have to be readjusted, which is a pretty simple task to do. Just loosen the screws and position it so that the belt doesn't touch the drive wheel when it's disengaged.

And does press up against the wheel when it's engaged.

Simple as that.

Last but not least, I suppose I should probably figure out some place to put the motor's pulley cover. I guess this is as good a place as any to stick it.

And with that the job is done. The machine sews beautifully with its new motor; it's easily controllable down at low speeds, and putting the pedal down makes it spin up over twice as fast as it used to. A very worthwhile upgrade that I'm glad I finally found the opportunity to perform.

Sunday, July 7, 2024

A Delicate, Precision Adjustment

Long time readers will be familiar with my Juki LS-321 cylinder arm needle-feed sewing machine, which admittedly hasn't seen a ton of use since I dragged it home.

But I've got a project coming up where I'd like to use it, so there's no better time to knock a few minor items off the checklist.

Now ever since I got the machine I've been aware that the handwheel pulley is not quite running straight.

And it's honestly a complete mystery as to why that might be.

Anyway, I'd previously determined that the pulley itself wasn't significantly bent, but it was in fact the main shaft of the machine that had a wobble to it.

The total runout near the end here was about 300 microns, which doesn't sound like much, but over this short of a distance it's enough to make the handwheel visibly wobble when the machine is spinning.

That wobble translates into an annoying vibration while the machine is running, which isn't ideal. More importantly, it also makes it more difficult to control the machine using the clutch motor, since the tension on the belt will vary as the pulley wobbles, causing the machine to be much more jumpy than it might otherwise be.

So that's what we'll be fixing today.

The procedure is rather simple, we first need to protect the end of the shaft from getting any nicks or scuffs. A piece of 1/2" copper water pipe does this job nicely.

And then we ever so gently coax this hardened chromed rod back into alignment.

Let's just say that it's a good thing they make these machines with a lot of cast iron.

The end result of this precise adjustment was that I got the runout down to about 10-20 microns, which is plenty straight enough for me, and the sewing is much, much smoother now. Another successful fix.

Tuesday, January 23, 2024

Holding On By A Thread

When I got my LS-321 sewing machine, one of the things missing was the needle bar thread guide.

It's a semi-circle of metal that wraps around the needle bar right at the height of the needle set screw, and guides the thread so that it follows the needle in a more vertical path. This gives the thread a more uniform geometry as the needle pushes through the fabric, which leads to better quality stitches.

Luckily, this part is still available, if only just barely.

I actually ordered this part back in October, but thanks to a combination of shipping errors and scant supply, it took until now to actually show up.

Installing it is quite simple. You just remove the needle set screw, and the needle while you're at it so it doesn't just fall out onto the floor, then slide it up onto the needle bar and reinstall the needle and set screw.

Then when you're threading the machine, you simply need to hook the thread around the left side of the guide and pull it into place, easy-peasy.

And the usual proof that the machine still sews.

This is the last item on the fix-it list for the LS-321, so from here on out it should be ready to just make projects.

Thursday, December 28, 2023

The Guidance We Seek

So my Juki LS-321 has this upper thread guide.

The thread comes off the thread tree, through the long arm of the guide, between the tension disks, then through the short arm of the guide and down into the main tension mechanism on the front of the machine. This essentially accomplishes two things at once: it gets the thread across from the back of the machine to the front, while applying a small amount of tension to keep the thread under control.

The problem is that, being mounted so high up on the machine, and being relatively spindly and exposed, it is rather prone to getting damaged.

Somehow someone who owned this machine before me had managed to chip one of the tension disks, which is honestly kind of impressive and I'm not even sure how they did it, and also cracked the arm itself which is somewhat less unexpected all things considered.

Now these weren't fatal failures; the arm was still basically holding together and the chipped tension disc wasn't causing too many issues, but it was only a matter of time before things would get worse, so a replacement was in order.

Unfortunately for us, this particular mechanism is no longer manufactured, and, given how prone it is to being damaged, it is not readily available as NOS or as a used part salvaged off of other machines.

So where, you might ask, did I find this?

Well, the sewing machine industry is never one to let a good part go to waste. If they've set up a manufacturing line to build a part, they're going to run that line into the ground. And, given they'll have an ample supply of that part, they'll use it across a variety of different machines. Then those machines will get cloned by their competitors who will set up their own manufacturing lines, then those competitors will use those parts across their own variety of different machines, and perhaps you can figure out where we're going from here.

It took a while, but as I was idly surfing through craigslist one day I came across a Brother DB2-B755-3 flatbed sewing machine, much like this one.

And wouldn't you know it, right there on top there's a familiar looking part, and looking it up in the parts manual lists it as Brother part number 144502-0-01.

But there is one tiny difference.

The Brother thread guide uses a tapered pin to fit into the top of the machine, whereas the Juki uses a screw thread with a jam nut. However, while a number of things are broken on the existing thread guide, the post was not one of them. (Well, sort of. The post is bent slightly and shows signs of having been snapped off at one point, but there's enough thread left for it to be mounted securely and the bend isn't really noticeable in practice so we'll just pretend it's perfect)

So, the simple solution is to just reuse it.

They both use a 5mm shaft, and so the parts from one can just be slid onto the other, and vice versa.

Now there are some subtle differences with the new guide.

For one, the long and short arms are at a different angle, essentially a mirror image of each other. You might think this would cause an issue, but actually it works out slightly better: with the long arm still pointed towards the thread tree, the short arm has a better reach out over the front of the machine.

The other minor difference is that the end of the long arm is not bent down to allow the thread from the thread tree to feed in from the top. I double-checked the manual for the Brother machine, and the way they have it illustrated is for the thread to come up from the bottom, wrap around the side, and then up from the bottom again before going between the tension discs counter-clockwise and down through the hole in the short arm.

Neither of these differences are very critical, as we can see in the sample sewing here.

The two lines of heavy black stitches were done on my Juki after replacing the thread guide, and they look pretty much perfect to me.

If you're curious, the three lines of stitching next to them were done on my Singer 251, and the neon green at the top left was me playing around with the stretch stitches on m Brother domestic machine.