You might remember my Juki LS321. If you don't, this is what it looks like.
I've actually been putting it to use lately sewing up small booklets, since it has a very large maximum stitch length and I keep it threaded with some nice chunky Tex70 thread. But that's neither here nor there.
When I'm not sewing through a stack of paper, one of the things that's perhaps a little less than ideal about this machine is that there's no real markings next to the presser foot for you to judge your seam allowance by, nor is there an especially convenient way to attach a seam guide to the bed of the machine.
There's really nothing here but a smooth, featureless cover for the bobbin/hook area.
Thankfully there is a solution for this: a drop-down seam guide.
This bolts to the back of the head of the machine, and the little bearing (which can be swapped for a fixed guide, also included) guides the fabric.
But that does presume that you can mount it to the machine in the first place.
You see, it comes with M6x0.8 screws, which probably fit some more recent models of sewing machines, but definitely don't fit mine. What thread does fit mine? Well, that's where things start to get a little confusing.
Pictured below are three candidates: 1/4-28, 15/64-28 and the aforementioned M6x0.8.
The 15/64-28 is an oddball size of screw that was used by Singer (who, to be fair, designed most of their hardware well before thread sizes were standardized), and is present in a number of locations around the machine. However, it doesn't fit the holes in the back of the head where the seam guide mounts.
1/4-20 (not pictured here) is a very common size outside of sewing machines, but it had no hope of fitting: the thread was very obviously too coarse, and it seemed like the major diameter was probably too large.
M6x1.0 (also not pictured here) is also a very common size outside of sewing machines, but it too didn't seem to fit. Much like the 15/64-28, it would start to thread in but then jam up before getting anywhere.
The 1/4-28 was certainly not going to fit given that the 15/64-28 didn't fit, but it seemed like it might be a reasonable compromise: It felt like the holes were almost surely drilled and tapped for 15/64-28, but had gotten gummed up over the years, and so I either had the option to buy a 15/64-28 tap (which is surprisingly easy to find) to clean out the holes and then find some 15/64-28 screws (which are surprisingly difficult to find) to attach the seam guide, or I could buy a set of 1/4-28 taps and some 1/4-28 hardware and use that to open up the holes by 1/64th of an inch.
Well, you can see what option I went with... Except, something wasn't quite right. A 15/64-28 thread should only be 15 thousandths of an inch smaller than 1/4-28, and in fact a 15/64-28 screw will thread into a 1/4-28 hole with only a little bit of sloppiness in the fit, but trying to line the tap up and get it started in the holes wasn't working out the way I was expecting.
And that's when it occurred to me: I should probably try running a M6x1.0 tap into the holes to see how it feels.
Well here's the M6x1.0 tap after running it in. Just picked up some gunk and maybe a tiny skim of cast iron, but at no point did it feel like it was digging into the existing threads.
So these actually were M6x1.0 holes, but they were just a bit too crapped up with old dirt and dried-up oil so they felt like they were binding when I tried to thread a bolt in.
Well, I guess I bought that 1/4-28 tap set for nothing, but on the bright side I'll have it in my toolbox for some future use. It's almost always better to have a tool and not need it than to need a tool and not have it.
Anyway, the next step was to deal with the bolts. I had a stash of M6x1.0 bolts already, but they were a bit too long, even after running the tap all the way until it bottomed out. Thankfully a little work with a hack saw, a file, and a die got them shortened up appropriately.
The flange-head made things a little bit crowded when I tried to install the bolts next to each other, but luckily I had more bolt holes to choose from.
4 in total, in fact, and the mounting bracket was just wide enough to span two non-adjacent holes.
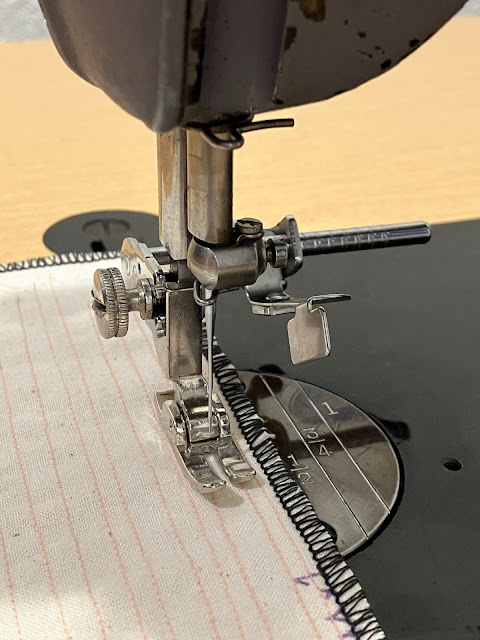
So this is what the seam guide looks like in action.
And whenever I need it out of the way, it just flips up and leaves plenty of space.
Now if you're thinking to yourself "this is all well and good, but what about the Singer 251?" then slow down there, we're getting to that next.
The 251, being a regular high-shank industrial machine, can take a much more ordinary style of seam gauge. This one bolts into place on the presser foot bar, just using the regular screw that holds the presser foot in place.
And much like the other seam guide, it flips up out of the way when the situation calls for it.
Which is very handy. I already had a bed-mounted seam guide for this machine, as well as some magnetic seam guides, but in terms of convenience this design really works well.
Neither of these were necessarily critical upgrades, but they're both very nice to have.


No comments:
Post a Comment