Saturday, December 30, 2023

I Won't Take It Sitting Down

Well, I dunno, I might.

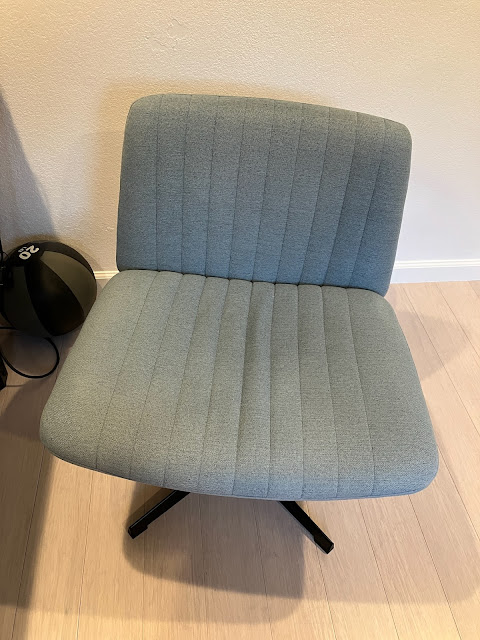
I've been enjoying sitting on the blue chair, but it's been splitting its time between my office and the sewing room, and carrying it back and forth was getting a bit old. So, I now have a pink chair to keep in the sewing room, so that the blue chair can remain in the office full time.

As a bonus, the chair dropped in price a fair bit from when I bought the first one. Nice.

I'm Taking A Stand

For a while now, I've been using this lightweight, inexpensive tripod with my camcorder. Initially it worked ok, but when I added a ring light a few years back, the extra weight and leverage really exposed the flex and play in the head assembly.

It also made it rather awkwardly top-heavy.

Another shortcoming of it was its footprint. The wide stance of a tripod is great for stability, but in tight quarters or when trying to film something from above, it really just gets in its own way.

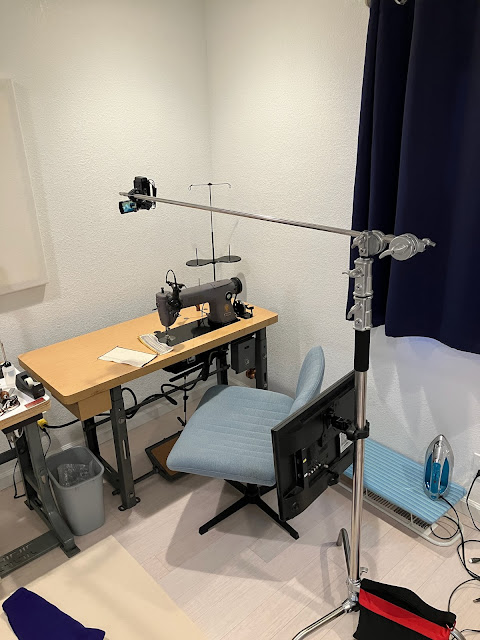
Luckily, the filmmaking world has solved this problem already, by inventing the c-stand.

It's not even remotely lightweight, of course, but weight means stability. The main pole can extend up to I think 11 feet high, and the arm at the side can be positioned pretty much arbitrarily. The footprint is much smaller, which would cause problems with extending that arm out to its full reach, but luckily placing a sandbag on the largest foot easily counterbalances this weight.

Well, I guess it would if it had sand in it. Luckily for me...

So, that's much better.

With that 18lbs of counterweight on the leg, the arm can be extended to its full reach, well clear of the base of the stand.

This is sufficient to reach all the way over me while seated, and frame up a shot of what's on the table in front of me.

With room to spare, even.

I also mounted an old 19" TV to the base of the stand to give me an easier view of what the camera is seeing, although I'm still waiting for the micro-HDMI to HDMI cable to come in, because I accidentally ordered a mini-HDMI to HDMI cable and WHY DOES THERE NEED TO BE TWO DIFFERENT SIZES???

Anyway, viewing the live feed from the camera on this monitor will be much easier than on the tiny built-in screen, especially since with the ring light around it, I'm often staring into the surface of the sun trying to squint at it.

Anyway, this upgrade should open up a whole new world of possibilities for me. Or at least it should once the remainder of the Amazon packages trickle in over the coming week.

Thursday, December 28, 2023

The Guidance We Seek

So my Juki LS-321 has this upper thread guide.

The thread comes off the thread tree, through the long arm of the guide, between the tension disks, then through the short arm of the guide and down into the main tension mechanism on the front of the machine. This essentially accomplishes two things at once: it gets the thread across from the back of the machine to the front, while applying a small amount of tension to keep the thread under control.

The problem is that, being mounted so high up on the machine, and being relatively spindly and exposed, it is rather prone to getting damaged.

Somehow someone who owned this machine before me had managed to chip one of the tension disks, which is honestly kind of impressive and I'm not even sure how they did it, and also cracked the arm itself which is somewhat less unexpected all things considered.

Now these weren't fatal failures; the arm was still basically holding together and the chipped tension disc wasn't causing too many issues, but it was only a matter of time before things would get worse, so a replacement was in order.

Unfortunately for us, this particular mechanism is no longer manufactured, and, given how prone it is to being damaged, it is not readily available as NOS or as a used part salvaged off of other machines.

So where, you might ask, did I find this?

Well, the sewing machine industry is never one to let a good part go to waste. If they've set up a manufacturing line to build a part, they're going to run that line into the ground. And, given they'll have an ample supply of that part, they'll use it across a variety of different machines. Then those machines will get cloned by their competitors who will set up their own manufacturing lines, then those competitors will use those parts across their own variety of different machines, and perhaps you can figure out where we're going from here.

It took a while, but as I was idly surfing through craigslist one day I came across a Brother DB2-B755-3 flatbed sewing machine, much like this one.

And wouldn't you know it, right there on top there's a familiar looking part, and looking it up in the parts manual lists it as Brother part number 144502-0-01.

But there is one tiny difference.

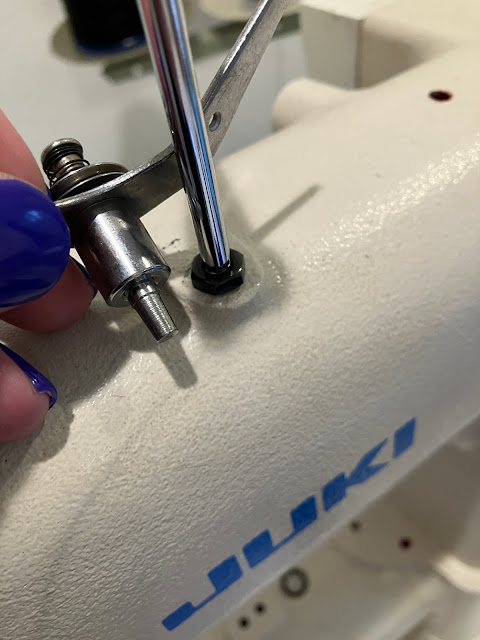
The Brother thread guide uses a tapered pin to fit into the top of the machine, whereas the Juki uses a screw thread with a jam nut. However, while a number of things are broken on the existing thread guide, the post was not one of them. (Well, sort of. The post is bent slightly and shows signs of having been snapped off at one point, but there's enough thread left for it to be mounted securely and the bend isn't really noticeable in practice so we'll just pretend it's perfect)

So, the simple solution is to just reuse it.

They both use a 5mm shaft, and so the parts from one can just be slid onto the other, and vice versa.

Now there are some subtle differences with the new guide.

For one, the long and short arms are at a different angle, essentially a mirror image of each other. You might think this would cause an issue, but actually it works out slightly better: with the long arm still pointed towards the thread tree, the short arm has a better reach out over the front of the machine.

The other minor difference is that the end of the long arm is not bent down to allow the thread from the thread tree to feed in from the top. I double-checked the manual for the Brother machine, and the way they have it illustrated is for the thread to come up from the bottom, wrap around the side, and then up from the bottom again before going between the tension discs counter-clockwise and down through the hole in the short arm.

Neither of these differences are very critical, as we can see in the sample sewing here.

The two lines of heavy black stitches were done on my Juki after replacing the thread guide, and they look pretty much perfect to me.

If you're curious, the three lines of stitching next to them were done on my Singer 251, and the neon green at the top left was me playing around with the stretch stitches on m Brother domestic machine.

Thursday, December 21, 2023

We Have To Go Deeper

Recently I had a bit of tragic misfortune befall my kitchen recycling bin.

One of the handles, which I use quite a lot, finally snapped after many long years of faithful, reliable service. I suppose I had been expecting this to happen, as this bin was made out of a more rigid plastic than the type I usually associate with garbage bins, and so a brittle fracture like this was perhaps inevitable.

Thankfully, new recycle bins aren't too hard to come by, though the change in colour might take a little getting used to.

This is not a compost bin, it is a recycle bin.

Anyway, the new bin is a bit bigger which is nice. It still basically fits in the same space as it gained more in depth (as in front to back, not height) than it did in width. I wasn't exactly hurting with the old bin, but I would occasionally find things stacking up by the end of the week.

Of course, this does leave me pondering a conundrum, a puzzle almost identical to one that has vexed me since time immemorial. Ever since I was a young child, I've always wondered: can you throw out a garbage can?

I may not find the answer to that exact question, but soon I will know if you can recycle a recycling bin.

Tuesday, December 19, 2023

Third Time Lucky

So I mentioned in a previous blog entry that I'd had a little bit of difficulty getting a set of accessory presser feet for my Singer. For whatever reason there's some manufacturer out there who thinks that doing even basic QA is way too much effort, and is shipping out presser feet that are just fundamentally not fit for purpose.

In order to try to avoid a repeat of this disappointment, I decided to try again by ordering from an actual sewing machine supply company rather than from House Bezos. What arrived was... well, it was better but it wasn't great. The feet were still off kilter compared to my original Singer foot, and they were also still inconsistent amongst themselves, so even if I wanted to adjust my presser foot bar to compensate for their misalignment, I'd have to adjust it between swapping out any two feet, which is just absurd.

So I sent those back too, and decided to try one last time. This time I went back to the magical everything store and ordered a kit from a different manufacturer, this time one with an actual name, and a factory in Taiwan (which is not part of China, thank you very much).

And finally I got a set of feet that actually lined up. Well, mostly. They were still just a smidge off, but they were all 100% consistent with each other, so I was able to tweak the presser bar just a smidge to compensate, and now I can switch between all of these feet and maintain perfect alignment, which is what I was after from the start.

Somewhat curiously, this brand doesn't offer a left-piping foot for high shank machines like this. It does offer a right-piping foot, but since the piping is usually fed through on the same side as the bulk of the material, that would mean stuffing all that material through the throat space of the machine rather than having it out in all the free space to the left of the machine. Luckily I do have a set of left-piping feet for my Juki cylinder arm machine, which is the machine I plan to use for bag making and upholstery anyway, so it's not a big loss. I just found it a little bit curious.

Anyway, with all this trouble I've been through trying to get presser feet that actually work, I guess Jeff Bezos himself decided to send me a little xmas gif to make up for it.

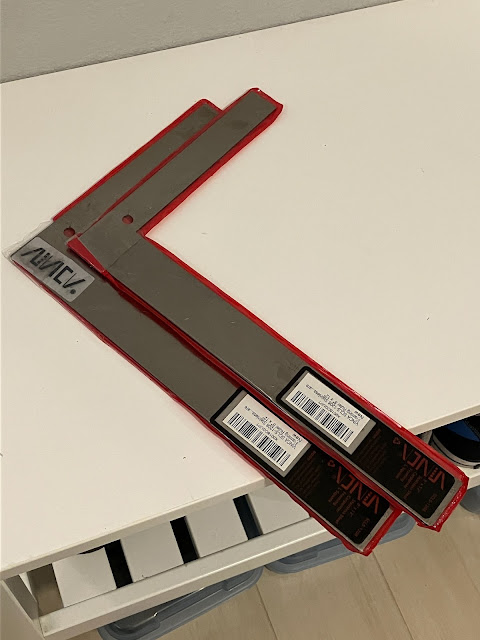
I had ordered a single small-sized (8 inch by 12 inch) L-square, but when the package arrived there were two of them stuck together pretending to be just one. Well, it'll be handy having an extra!

My Throne

Not too terribly long ago, I picked up this chair from the House of Bezos to use as my work chair at home.

It's been serving that function quite well but, being made in some distant and mysterious land, it hasn't necessarily been wearing as well as one might hope. It's luckily nowhere near a catastrophic failure like my Ikea chair suffered, when basically all of its fabric disintegrated, but I'd been noticing that my butt was finding the bottom of the seat padding more often than I'd like.

So to fix this, I ordered up some new foam to refresh the seat; some good high-quality stuff that should stand the test of time. I hope.

Now reupholstering a chair like this is going to need some staples, so let's see how our supply is doing.

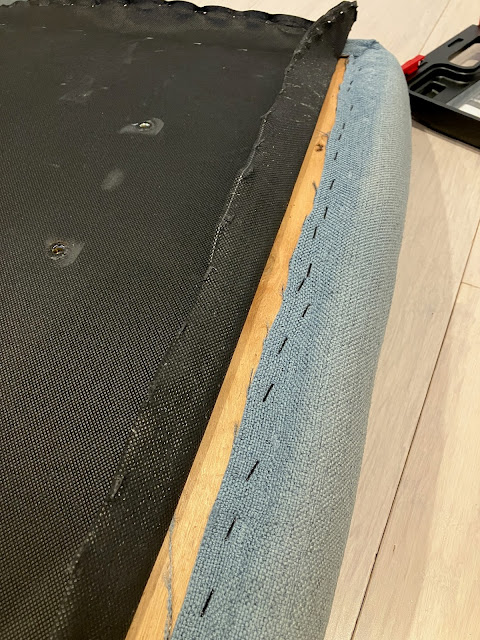
Hmm, well, I'm going to need a few more than that, but at least we can get started. First off, I'm going to tack the dust cover in place a little ways inboard of where the top fabric is stapled down, so that I don't have to worry about it shifting around and having to realign it with the bolt holes for the back and legs later.

Hmm.

Hmmmmmmm.

Right then, picking up where we left off, the dust cover is now secured inboard of the edges, so we can start pulling the staples around the outside ('round the outside, 'round the outside).

There really is no easy way to pull staples. I did, however, manage to perform the task without putting a screwdriver-shaped hole in my hand.

But before getting too carried away with pulling staples, it'll help things later to mark out a few center points to line things up to later, as well as marking the front just in case things get a bit upside-down.

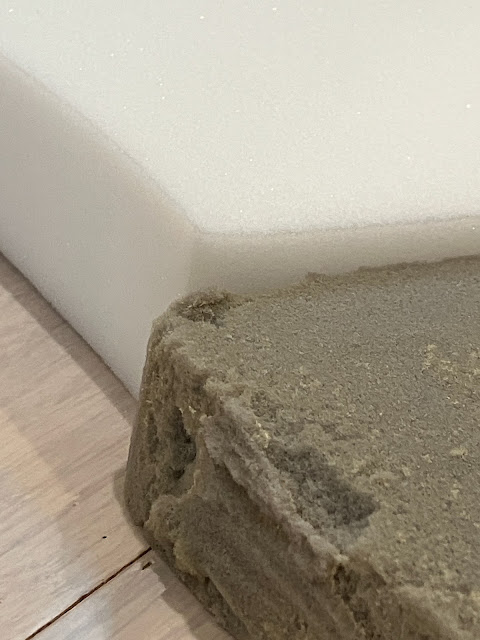
With one side of staples removed, we get our first look at the foam, which is... a colour. This is just the outer layer of foam that's used to round out the edges, the main foam is still yet to appear a bit further into the excavation.

There's some contact cement holding these layers together, though not very much. Really it's just a sufficient amount to be annoying without actually holding the layers securely together. I suppose I should be glad that the cement wasn't better applied as it would make this disassembly much more difficult.

Also a piece of the plywood seat chipped off near the front. I'll glue that back down later.

With a little bit more peeling, the main seat foam is released from the wrap.

Like I said, they didn't exactly go overboard on the glue.

The new foam I got is 2 inches thick, and I think the original foam pad is probably 4cm, so I'm gaining a little bit of extra thickness here. The foam density is actually very similar between the two, and I was kind of surprised at how the original foam had held up; I was really expecting to see it starting to crush and disintegrate, but instead it was still in pretty good shape.

But we've come this far, so we're gonna see it through. Marvellously the seat pad is just ever so slightly wider than 24 inches, so I had to cut this rotated the silly way and waste a bit more foam than I would have ideally liked.

But it is what it is. I marked the line in pen, and sliced out the new chunk of foam. This is not easy to do without specialized foam-cutting tools, I might add.

But I made it work.

What I also made work was the glue application. I would not be skimping on this one.

The 94 is not one of 3M's foam-specific glues but it has the benefit of me already owning a partially-used can. Remember to use a respirator, because gluing your lungs shut is not a good life plan.

I didn't take a ton of pictures of the reupholstery process because for some reasons my fingers were sticky with glue, but the result looks pretty good.

Oddly, despite matching up the center marks I had drawn, the fabric still ended up shifted a little to one side. I'm not really sure how to explain that, but it's not terribly distracting and the important part is that the seat feels great to sit on.

Now the fabric itself is showing a little bit of wear, so I suspect I might eventually have to revisit this chair's upholstery again sometime in the future, but hopefully that'll be a few years down the road. For now, I'm just going to sit on it.

Friday, December 15, 2023

A Window Into The Soul

And by "soul" I mean "lubrication system".

This window is meant to show the active flow of oil through the sewing machine, to reassure the operator that the machine is being properly lubricated while in use. However, it was showing a wee tiny bit of age, to put things lightly.

The plastic of the window had started to degrade to the point where oil was leaking through it, somehow; the little white cup behind it had gained a crust of caked on oil residue; the gaskets were no longer properly gasketing; and one of the screws was so badly stripped on its head that I didn't dare reinstall it for fears that it might never come out again.

Luckily for us, it's new parts day!

Let's take care of a little housekeeping before we get into the major restoration task of the day.

This screw right here is a bobbin case screw. It is tiny and easy to lose, but one should never have the opportunity to lose it as it's not actually meant to ever be removed.

It fits in this hole in the bobbin case and sets the tension for the spring that holds the thread from just unspooling wildly and creating a huge tangled mess.

Sometimes it should be loosened a little, sometimes it should be tightened a little, but it should basically never be fully removed.

Luckily with the screw back in place, proper tension could be achieved once more.

The ideal tension is attained when the bobbin is just barely self-supporting when hanging from a thread, but will spool out more thread if given a little jiggle.

With this bobbin case fixed, I'm up to 3 perfectly functioning bobbin cases.

Having multiples can be handy when working with different weights of thread; you can set the tension on one bobbin case for a light thread, and another for a heavier thread, and switch back and forth very easily.

So, on the subject of screws, back to the oil window. This here is the screw whose head was stripped out.

And perhaps you can see from this photo why I was reluctant to reinstall it. This is a somewhat specific and peculiar screw, and is listed under the Singer part number 50257J and is no longer generally available. However, by sheer coincidence (and because sewing machine companies have been building various different machines out of the same parts bin for over 120 years) it happens to be almost identical to the screws used to hold the needle plate onto my Juki LS-321, part number SS-2090840-SP which is available... for about $6 each. HOWEVER, the Juki LS-321 is actually a clone of a Singer 153W (also dreadfully out of date) but which was cloned by Consew as the 227R, which is actually still in production. It uses part number 13023 which is available for about 53 cents each.

And that is much more reasonable.

Now you'll note that I said "almost identical". In the above picture, you'll see I ordered 6 screws; 4 for the oil window, and 2 for my Juki's needle plate, since I figured I might as well freshen those up while I was at it.

However there is some difference here that I haven't quite been able to narrow down. I think perhaps the angle on the underside of the head is maybe not quite the same, but the end result is that when installing the new screws, they bottom out before the head has snugged down against the needle plate.

Luckily these original screws on my Juki are in pretty good condition, so it's no major loss that I can't replace them. The important thing is that I have new screws to install in my Singer.

But before we can put those new screws in, we need to take the old screws out, and it makes sense to also clean things up while we're at it.

Because this looks absolutely disgusting.

And that's after chipping off some of the worst of the build-up.

Thankfully the only part here that needs much attention is the oil window cup, which is an enamelled steel part. So, into the ammonia it goes, and with a little wire brushing things are looking as good as new.

The window and gaskets haven't just magically revived themselves here, these are the new ones I ordered, also for a very reasonable price.

Getting things back into place was a bit of a trick. The stack-up is: gasket, oil window cup, gasket, oil window, bezel. This doesn't seem to daunting until you realize that, uncompressed, the two gaskets and oil cup already take up the entire depth of the recess that they're supposed to squeeze into, leaving the oil window with nothing to locate onto.

Luckily I was able to get things in without too much difficulty by starting the screws on the bezel with the oil window roughly in place, and then when the window started compressing the gaskets I could tap it in from the sides to where it was not interfering with the main casting anywhere around the edges, after which I could drive the screws home.

This looks so much better already. But what would look even more amazing is seeing it in action.

Truly magical.

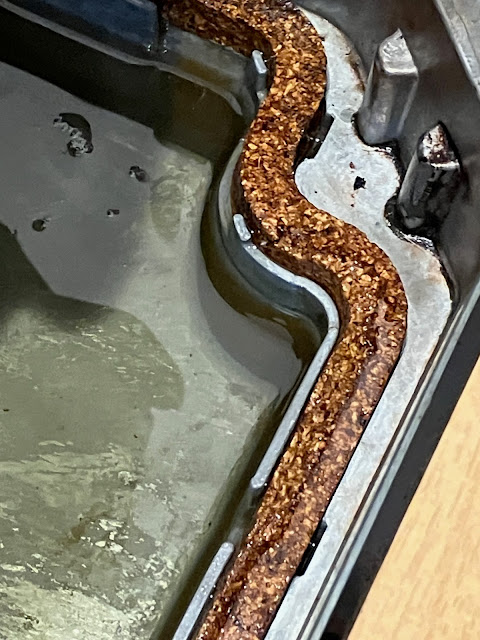
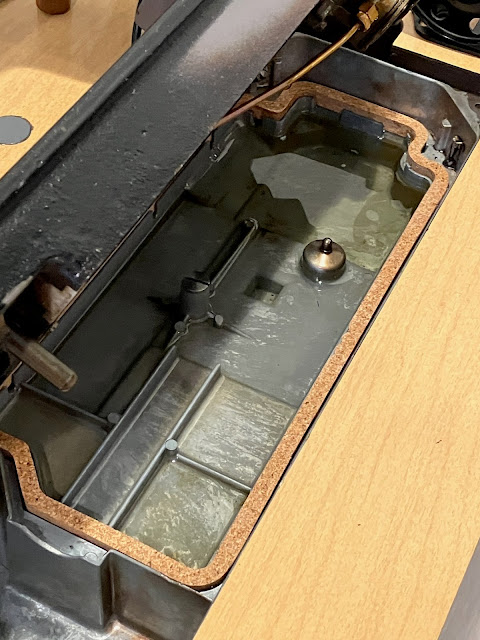
But those aren't the only gaskets that need replacing. Also on the list is the oil pan gasket, which, despite its name, doesn't really seal the oil in. Rather, it mostly just provides a cushioned surface for the sewing machine head to rest on.

But it tends to get a little abuse as people do stuff like drop needles and pins down there to get crushed in between the machine and the oil pan.

Yes, that is the impression of a bobby pin that you see there.

But this is one part that hasn't changed in decades, so finding a replacement is cheap and easy.

And boy howdy doesn't that look much better.

It also raises the machine back up to the correct level for the bobbin slide to open.

Not that I tend to open it. The bobbin is easy enough to install and remove by just reaching around from underneath and navigating by feel.

So that brings us to the conclusion of another repair session, and the machine is, once again, looking better than ever.

I do think I might replace the gasket for the top cover, which is also readily available, as there's a bit of oil seepage there, but it's not really critical.

Oh, and also visible in this shot: I finally got around to cutting a piece of cork pad for the foot pedal.

With that, I'll leave you with this parting thought:

I never thought I'd see the year "2023" printed in dot matrix on tractor feed paper.