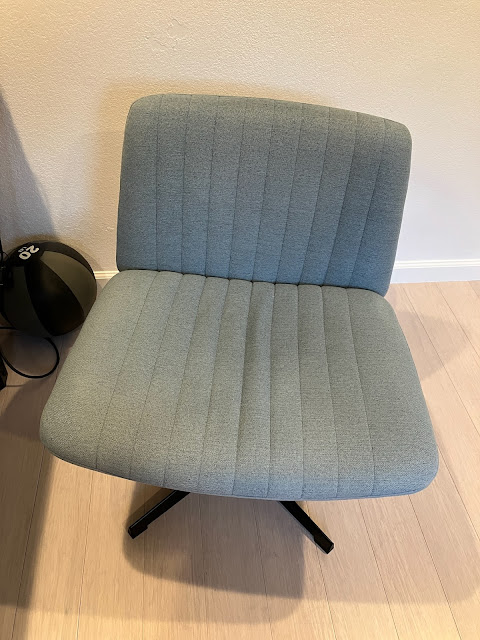
Not too terribly long ago, I picked up this chair from the House of Bezos to use as my work chair at home.
It's been serving that function quite well but, being made in some distant and mysterious land, it hasn't necessarily been wearing as well as one might hope. It's luckily nowhere near a catastrophic failure like my Ikea chair suffered, when basically all of its fabric disintegrated, but I'd been noticing that my butt was finding the bottom of the seat padding more often than I'd like.
So to fix this, I ordered up some new foam to refresh the seat; some good high-quality stuff that should stand the test of time. I hope.
Now reupholstering a chair like this is going to need some staples, so let's see how our supply is doing.
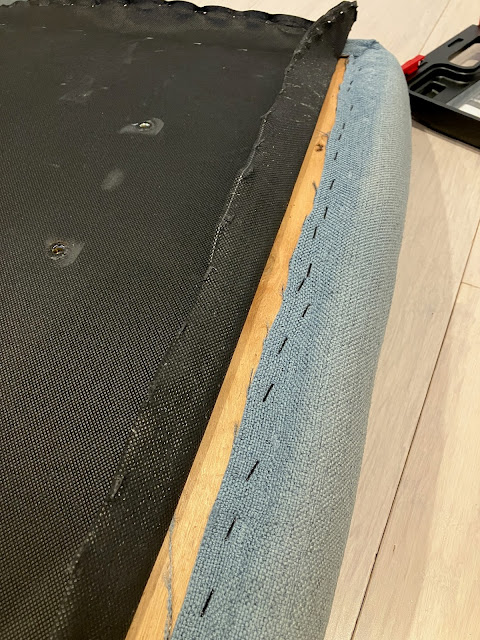
Hmm, well, I'm going to need a few more than that, but at least we can get started. First off, I'm going to tack the dust cover in place a little ways inboard of where the top fabric is stapled down, so that I don't have to worry about it shifting around and having to realign it with the bolt holes for the back and legs later.
Hmm.
Hmmmmmmm.
Right then, picking up where we left off, the dust cover is now secured inboard of the edges, so we can start pulling the staples around the outside ('round the outside, 'round the outside).
There really is no easy way to pull staples. I did, however, manage to perform the task without putting a screwdriver-shaped hole in my hand.
But before getting too carried away with pulling staples, it'll help things later to mark out a few center points to line things up to later, as well as marking the front just in case things get a bit upside-down.
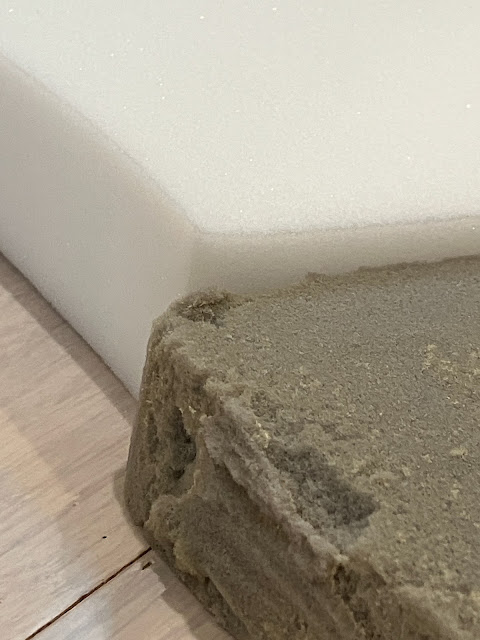
With one side of staples removed, we get our first look at the foam, which is... a colour. This is just the outer layer of foam that's used to round out the edges, the main foam is still yet to appear a bit further into the excavation.
There's some contact cement holding these layers together, though not very much. Really it's just a sufficient amount to be annoying without actually holding the layers securely together. I suppose I should be glad that the cement wasn't better applied as it would make this disassembly much more difficult.
Also a piece of the plywood seat chipped off near the front. I'll glue that back down later.
With a little bit more peeling, the main seat foam is released from the wrap.
Like I said, they didn't exactly go overboard on the glue.
The new foam I got is 2 inches thick, and I think the original foam pad is probably 4cm, so I'm gaining a little bit of extra thickness here. The foam density is actually very similar between the two, and I was kind of surprised at how the original foam had held up; I was really expecting to see it starting to crush and disintegrate, but instead it was still in pretty good shape.
But we've come this far, so we're gonna see it through. Marvellously the seat pad is just ever so slightly wider than 24 inches, so I had to cut this rotated the silly way and waste a bit more foam than I would have ideally liked.
But it is what it is. I marked the line in pen, and sliced out the new chunk of foam. This is not easy to do without specialized foam-cutting tools, I might add.
But I made it work.
What I also made work was the glue application. I would not be skimping on this one.
The 94 is not one of 3M's foam-specific glues but it has the benefit of me already owning a partially-used can. Remember to use a respirator, because gluing your lungs shut is not a good life plan.
I didn't take a ton of pictures of the reupholstery process because for some reasons my fingers were sticky with glue, but the result looks pretty good.
Oddly, despite matching up the center marks I had drawn, the fabric still ended up shifted a little to one side. I'm not really sure how to explain that, but it's not terribly distracting and the important part is that the seat feels great to sit on.
Now the fabric itself is showing a little bit of wear, so I suspect I might eventually have to revisit this chair's upholstery again sometime in the future, but hopefully that'll be a few years down the road. For now, I'm just going to sit on it.


2 comments:
Is machine-washing the upholstery while it's disassembled a reasonable thing to have done?
It's not unreasonable, but the fabric is not hemmed around the edges so it would tend to fray if you just tossed it into the wash without doing anything to stabilize the cut edges.
Post a Comment