Saturday, July 27, 2024

It's The Pits

So plum season is over, and actually has been for a few weeks now, which means that it's time to do something with this gallon bag of perfectly ripe plums that I've had stashed in my freezer.

And maybe the other two bags I collected this year too.

And by "do something" I mean "make plum jam" using this pectin I bought.

I decided to go with a low/no sugar pectin because jam is basically just fancied up sugar even when you don't add a bunch extra, and I figured I could do without the added calories.

Anyway, time to get these plums thawed, so the first bag goes in a sink full of hot water.

And we'll prep some other implements while we're waiting.

As you may recall from previous blog posts, I do enjoy a smooth jam that actually spreads, instead of having random golf ball sized chunks of fruit in the jar, thus I'll be making full use of the food processor.

So once the plums are thawed, I squish the pits out of them and put the flesh and peel in the food processor.

Then I give them a buzz to get them nicely pureed, and put them in the square tub while I work on pitting the next batch.

This produces about 2 quarts of puree for one gallon bag full of plums.

And a nice pile of pits.

Now the ratio specified on the pectin container works out to 15g of pectin to each pint of prepared fruit, which means that I have theoretically enough pectin for 5 quarts of fruit. So I guess we'll see how that works out.

And yes, I know I'm using mixed units. Deal with it.

In the meantime, it's full steam ahead with the other two bags.

And after some more pit-squishing, we get just a little less than 6 quarts of puree.

Well that's close enough to 5, it's probably fine. There's also probably a fair bit of air whipped into this. Either way, I'm glad to be done with the pitting.

And so we're on to the cooking. I'm splitting this in half since I don't want to deal with a bunch of sticky fruit boiling over, so into the pot goes half the fruit, plus 2 cups of water as specified in the instructions.

And half the jar of pectin is standing by waiting for the jam to come to a boil.

Then it gets stirred in and boiled for a full minute.

And then we fill the pint jars with the spaghetti sauce. I mean jam. The jam. We fill the jars with the jam.

Then repeat the process with the second batch.

I actually have enough proper canning jars that I could have used them for the extra, but I wanted to stop at 12 for the sake of keeping things even. The extra jar and the bowl will go in the fridge to get eaten first, since the reused jar isn't guaranteed to seal right, and the bowl is obviously just a bowl.

Speaking of sealing, it's time to process the jam to make it shelf stable, so out comes the canning kit.

And in go the jars.

10 minutes of cooking after it comes to a boil is about right for down here at sea level, and since these plums are very acidic we don't need to worry about pressure canning.

Once the 10 minutes is up, they come out to cool on a rack while the next batch goes in.

And second verse, same as the first.

Meanwhile the bowl of jam has been chilling in the fridge, so let's see how the pectin is doing with firming it up.

Hmm, yeah, it's probably fine.

In conclusion, I think this worked out pretty well. I did notice that the fruit was oxidizing pretty quickly, going from a bright red to a more muddy brown as I was pitting and pureeing, so I might try adding a bit of citric acid to the mix next time. If I do that, I'll definitely bump up to the "low sugar" recipe instead of the "no sugar" one, since this jam is quite tart as it is, and adding more acid might be a bit much.

But I've got plenty of time and 13 and 1/2 jars of jam to get through before I need to make any decisions about that.

Friday, July 26, 2024

Poking Holes

So I had at one point considered holding out on buying a drill press, just biding my time until I finally get a knee mill, which will absolutely do the same job as a drill press does.

But then I stopped considering that.

In hindsight, a benchtop drill press is compact enough, and cheap enough, that I really shouldn't have worried about the extra shop space it would take up, and it's still very convenient to have a drill press around alongside a mill (whenever it is I finally get one).

So, let's get this unpacked and set up.

It's always a good sign when the styrofoam is broken, but nothing seems to be damaged or missing, so we're still off to a good start.

Hmm, I don't have a friend handy, and few if any of my foes are trustworthy. It's a good thing that I am an army of one.

Anyway, this shouldn't be too hard. The foot bone connects to the - leg bone. 🎶

Then the table goes on, complete with its sticky layer of cosmoline.

Pro tip: Boeshield T-9.

The head goes on next.

And then we check the runout on the spindle.

Actually, on second thought, let's just assume it's fine. It's probably fine.

I already had the drill press vise, as it's a very useful workholding tool even without a drill press.

The t-nut clamp kit will be arriving tomorrow. It's not critical to completely bolt down the vise, but it's nice to have at least one bolt through it to keep it from helicoptering if the bit should catch.

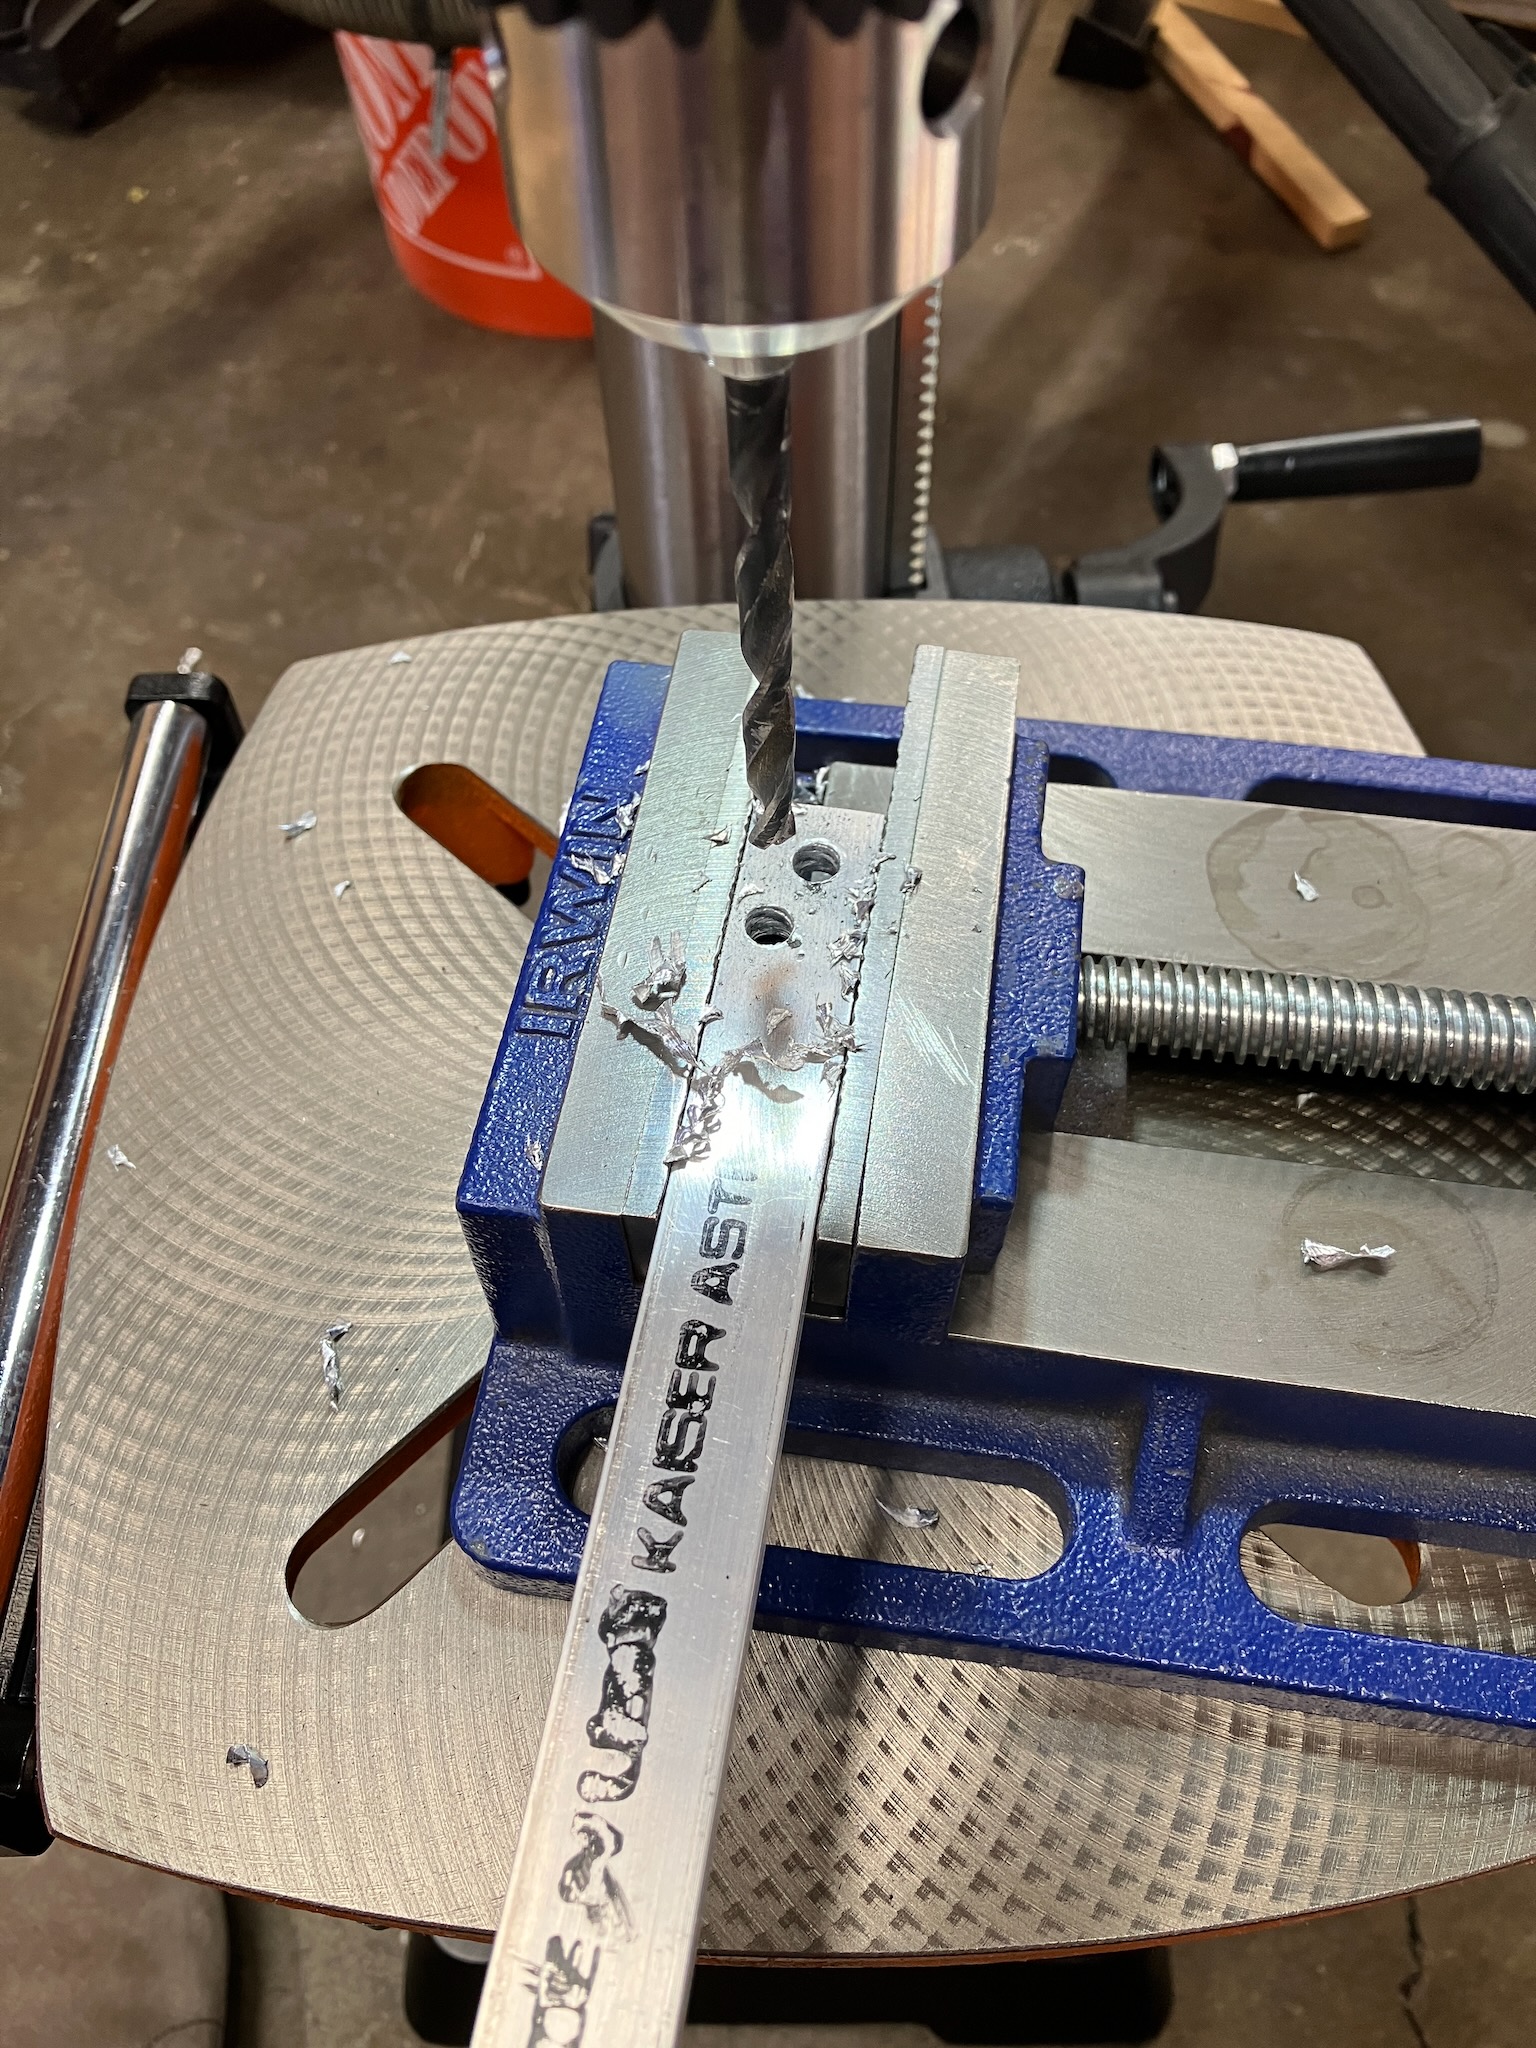
And just to be sure, it does poke holes in things.

Granted this aluminum-havarti alloy is softer than the head of an oil pan bolt, but it's still nice to have actual evidence that the drill press can push a bit through it.

Wednesday, July 24, 2024

An Obvious Cover-Up

This here is my Brother Nouvelle 1500S. It has an obvious problem.

It's naked.

This will be a bit of a lengthy post, so more after the break.

Sunday, July 21, 2024

File It Under Files

A while back I bought a set of files. Just a basic, cheap set; nothing too special. But apparently I went a bit too cheap as they didn't come with a full set of handles.

I finally got fed up with not having handles on nearly half of these files, so I bought a set of file handles. Just a basic, cheap set; nothing too special.

Though I may have, once again, gone a little too cheap.

It's not the end of the world though, and the set doesn't look half bad now.

But I can't just leave well enough alone.

Taking the handle off the file, gluing it back up, and tossing it back in the bag while I hammer a different one on was my first instinct, but as it so happens getting a handle off of a file is kind of an exercise in futility.

So, plan b: mix up way too much epoxy putty (the only amount you can ever mix up) and smush it into the cracks.

I thought of leaving it like this, with just the putty in the crack itself, but that would have left a ridge on the file handle, so I decided to get a bit fancier and feather it out.

I'll give it a light sanding when it's cured and probably leave it as is, though I might give it a quick shot of clear finish if I feel so inspired.

Monday, July 15, 2024

A Chill In The Air

So I was trying to track down the source of some water hammer noise recently, and narrowed the culprit down to the water dispenser in my fridge. For some reason the tubing slaps back and forth inside the fridge whenever there's even the slightest amount of water hammer in the system. I didn't make any progress on actually fixing that, but I did notice something peculiar when I was poking around.

These are the refrigerator condenser coils, and this picture was taken after vacuuming a bit of dust off the front of them to verify that I was, in fact, looking at the refrigerator condenser coils, because all I saw before that was a fuzzy grey mass.

Anyway, a little bit of vacuuming later and things were looking a lot better, though not yet 100%.

The coils were unfortunately stacked a bit too close together to get all the way to the back with the crevice tool on my vacuum, so I had to call in the big guns.

This thing is apparently called an appliance duster. Basically it's just a semi-floppy plastic paddle with a microfiber towel wrapped around it. I don't know what other appliances it's intended to be used on, but it works great for dusting fridge coils.

It's not spotless, sure, but it's good enough for another 20 years.

Saturday, July 13, 2024

3-2-1 Contact

So for pretty much as long as I've lived here, the AC compressor has had a bit of a rough time starting, particularly in very hot weather. Early on I checked the start/run capacitor and it seemed to test fine, so I basically just ignored it since it was still basically working. Later, after it didn't show any signs of magically fixing itself, I added a hard start kit, which is basically an extra start capacitor that switches in when the compressor motor is starting up to give it an extra boost, then switches back out once the motor spins up so as not to fry the start windings. That seemed to improve things a little bit, but there were still times when the AC would just growl and stall instead of starting up properly.

Now despite their outward appearance, a modern AC outdoor unit only really consists of a few parts: the compressor, the fan, the refrigerant plumbing, a start/run capacitor for the compressor and fan (either a combined unit or two separate caps), and a contactor, which is a fancy name for the high current relay that turns the whole thing on.

Given I'd ruled out the capacitor as the issue, and given that replacing the compressor would basically mean getting a whole new HVAC system at this point, I decided to tackle the only other part that could be to blame: the contactor.

And it's comforting to know that it has a definite purpose.

Thankfully these things are stupid cheap. This one was a whole $14 delivered to my door. And since it was delivered to my door, the next logical step is to install it.

Make sure to turn the power off to the AC unit first. And, if you're smart, turn the power off to the furnace as well so that you don't blow the fuse on the 24v control circuit if you accidentally short out the relay leads when the thermostat calls for cooling.

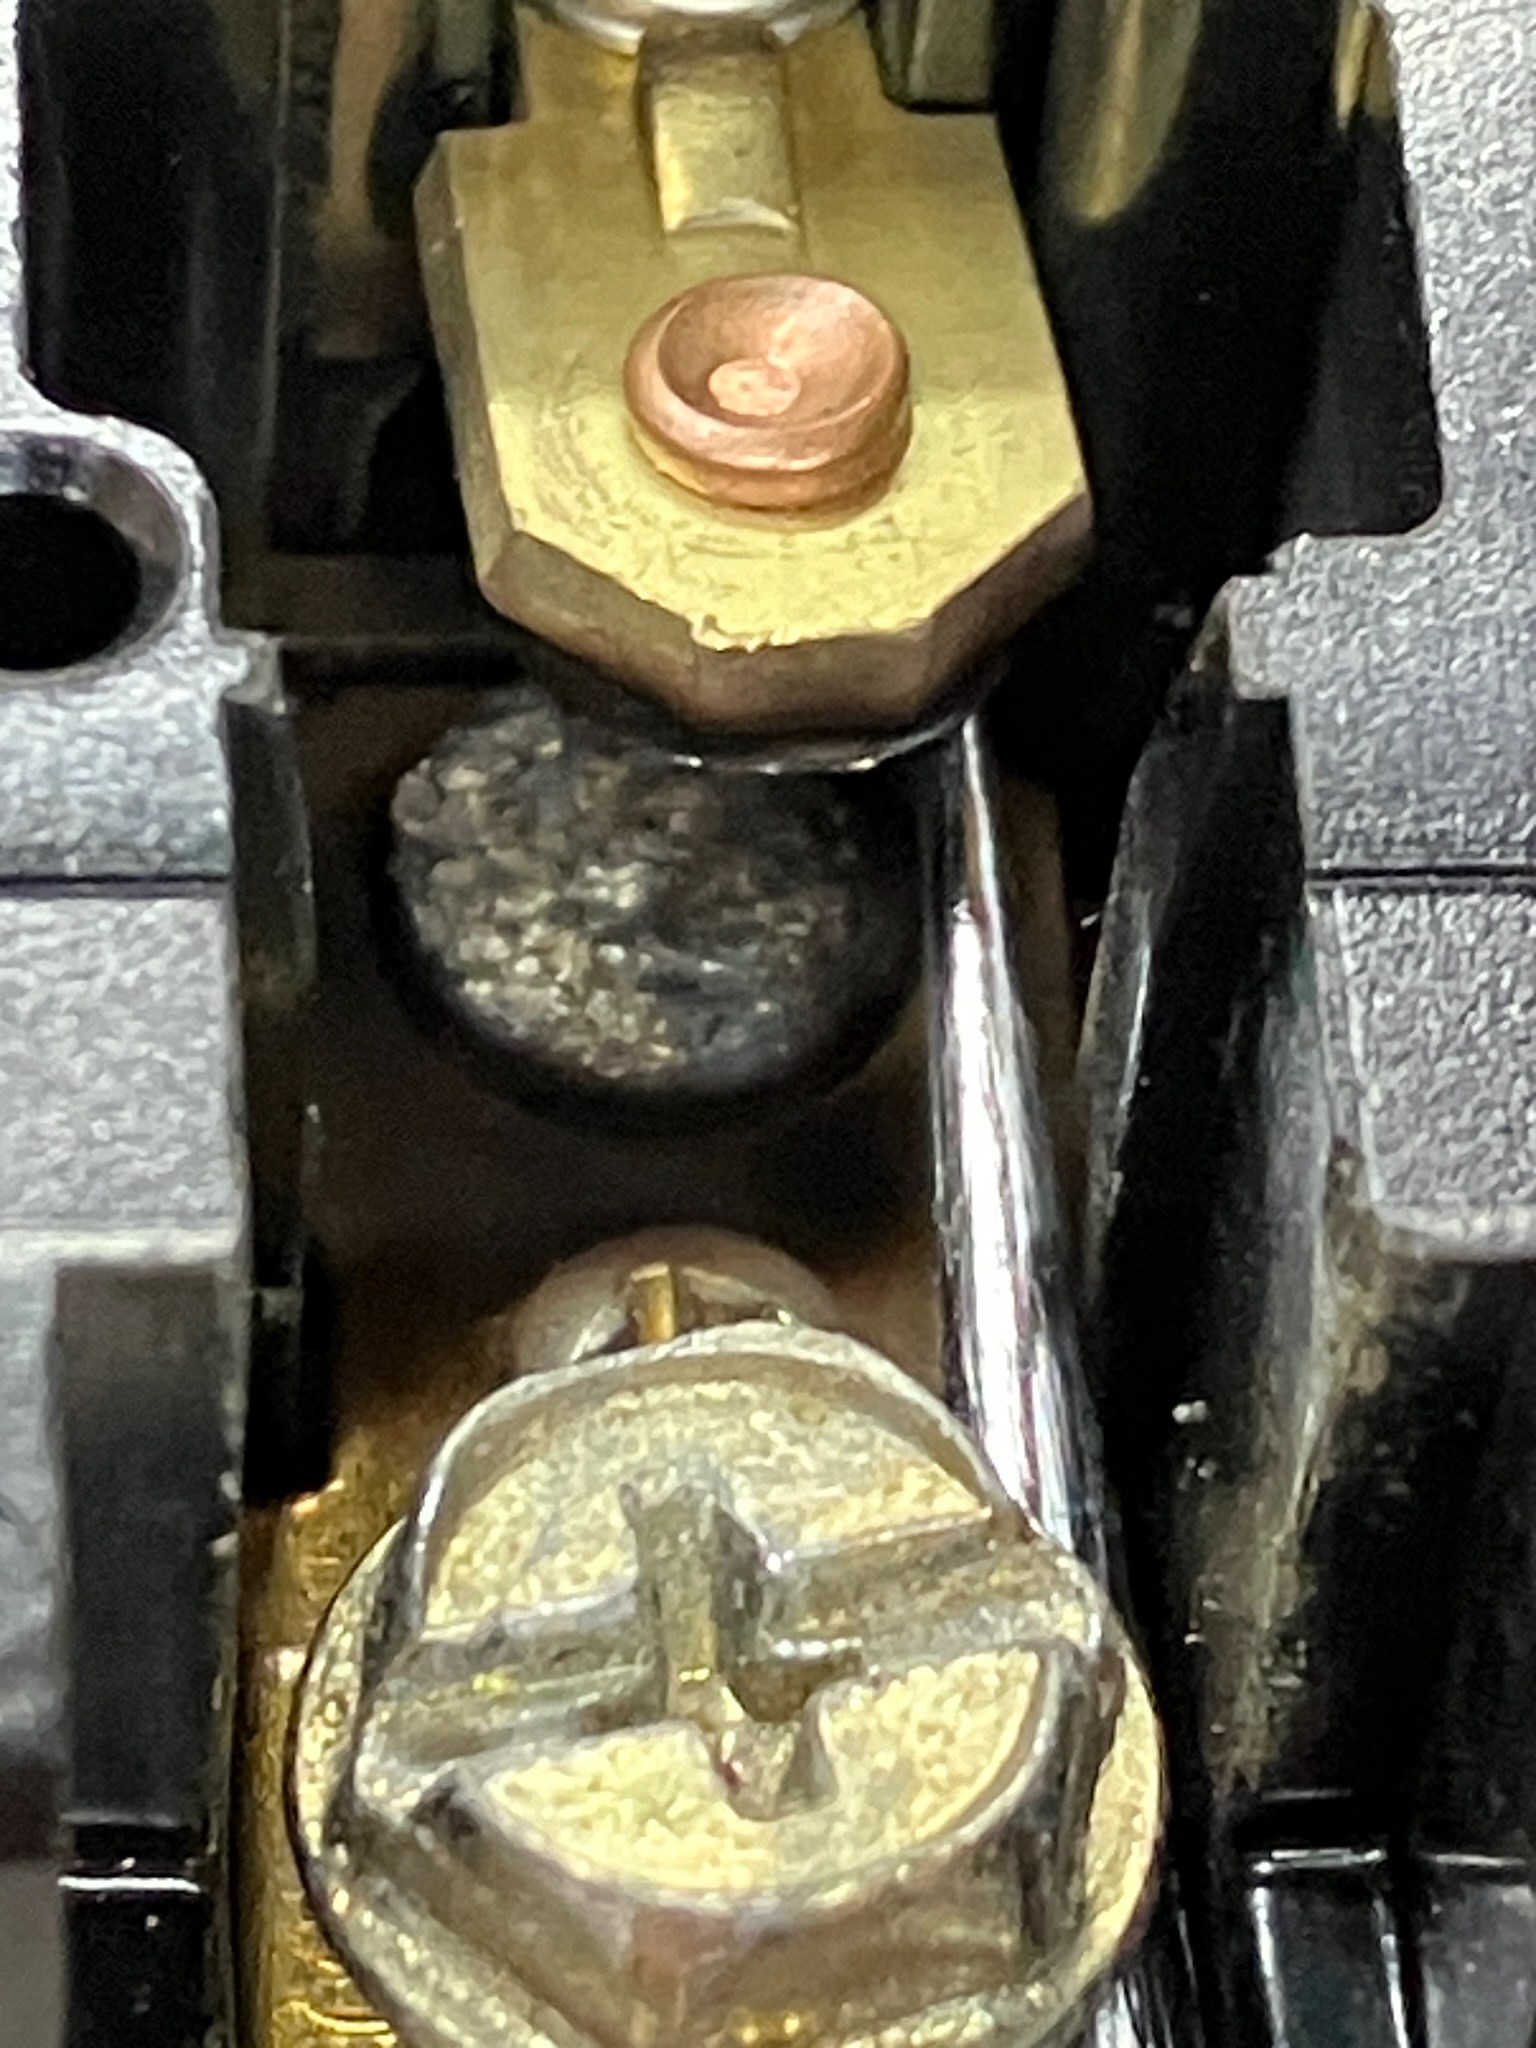
A quick peek in-situ shows that these contacts have probably seen some shit.

Anyway, we're just replacing like-for-like, so out with the old and in with the new.

Then button everything up, switch the power back on, and...

... yeah, remember what I said about shorting out the relay leads?

It's a very effective way to blow a fuse.

Thankfully I have a big box of replacements.

And you know, the 35A fuse is the same colour as the 3A fuse, and would probably blow a lot less easily...

Ok, just kidding, I put the 3A fuse in.

Ahh, much cooler.

Now that the old contactor is out, we can have a closer look at the terminals.

Ok, sure, it's possible I could get in there with some emery cloth and clean up those contacts and put this one back in service, but for $14 this is just going in the trash. I'll be happy to pay that again in another 20 years once the new one wears out.