I recently decided that I want to have cake. Part of this was due to picking up a package of chocolate croissants to toast nibble on with my afternoon coffee, and part of this was due to learning about the fascinating world of toasting poundcake. Part of it is that cake is just fucking delicious. Whatever the reason, I wanted it.
Now while I could have made an actual poundcake, I have strong moral objections to modern recipes which call for ingredients other than one pound each of eggs, butter, flour and sugar, while at the same time recognizing that those bastardized abominations do, in fact, produce a far superior cake. Instead, I opted for an olive oil cake, which results in a cake in the same general genre without the baggage of historical inaccuracy.
Of course, I say I made an olive oil cake, but the truth is I had a bottle of walnut oil left over so I actually used that instead. We'll just keep that as a little secret between us, nobody else needs to know.
It all starts with preheating the oven (which I obviously didn't take a picture of) and greasing the cake tin.

Which, as you'll notice, is already a deviation from the recipe, which calls for a 9 inch round. As such, I actually waited until I was about half way through the prep before I greased these, just so I could be certain that I'd be using two and not just one. I wanted to use these 1lb loaf tins in order to steer things back towards the poundcake aesthetic, which means making a cake-loaf.
Anyway, with that time skip out of the way, we get to the real first step: zesting and juicing one lemon.

This isn't the perfect type of rasp for zesting a lemon, as the zest tends to get stuck in between the punched rasp teeth, but it does nicely pulverize the zest which is actually quite good for this type of recipe. A toothbrush is a vital tool when it comes time to get the zest off of the rasp. As for juicing, a fork does the job nicely, a reamer is not required.
Next up, the dry ingredients get mixed together. Not much to say about that.

Now to the eggs. One of the other requirements I had going into this is that the recipe had to use three eggs. Not four, not two. The reason being that eggs are only sold in certain multiples of 6, and I don't want to end up keeping a bunch of excess eggs in my fridge for months at a time. With a three-egg recipe, I can use up a half dozen eggs with two batches.

Remember to crack your eggs into a bowl one at a time, just in case an unwelcome surprise is hiding inside one.

With the wet ingredients together (sugar is almost always considered a wet ingredient), it's time to beat the mixture until it forms light, creamy ribbons.

This handheld mixer was perhaps the best $20 I've spent recently. I think this photo was taken after the step where you emulsify the oil into the mixture, but I can't quite remember. Either way, make sure to do that.
Next up we do the dry-wet-dry-wet-dry additions.

And with a little gentle folding to avoid taunting the gluten (I was using AP flour in order to give the cake a bit more structure so it would be less likely to fall apart when toasting), it'll look a little something like this.

Into the loaf pans it goes.

And then we let the magic happen.


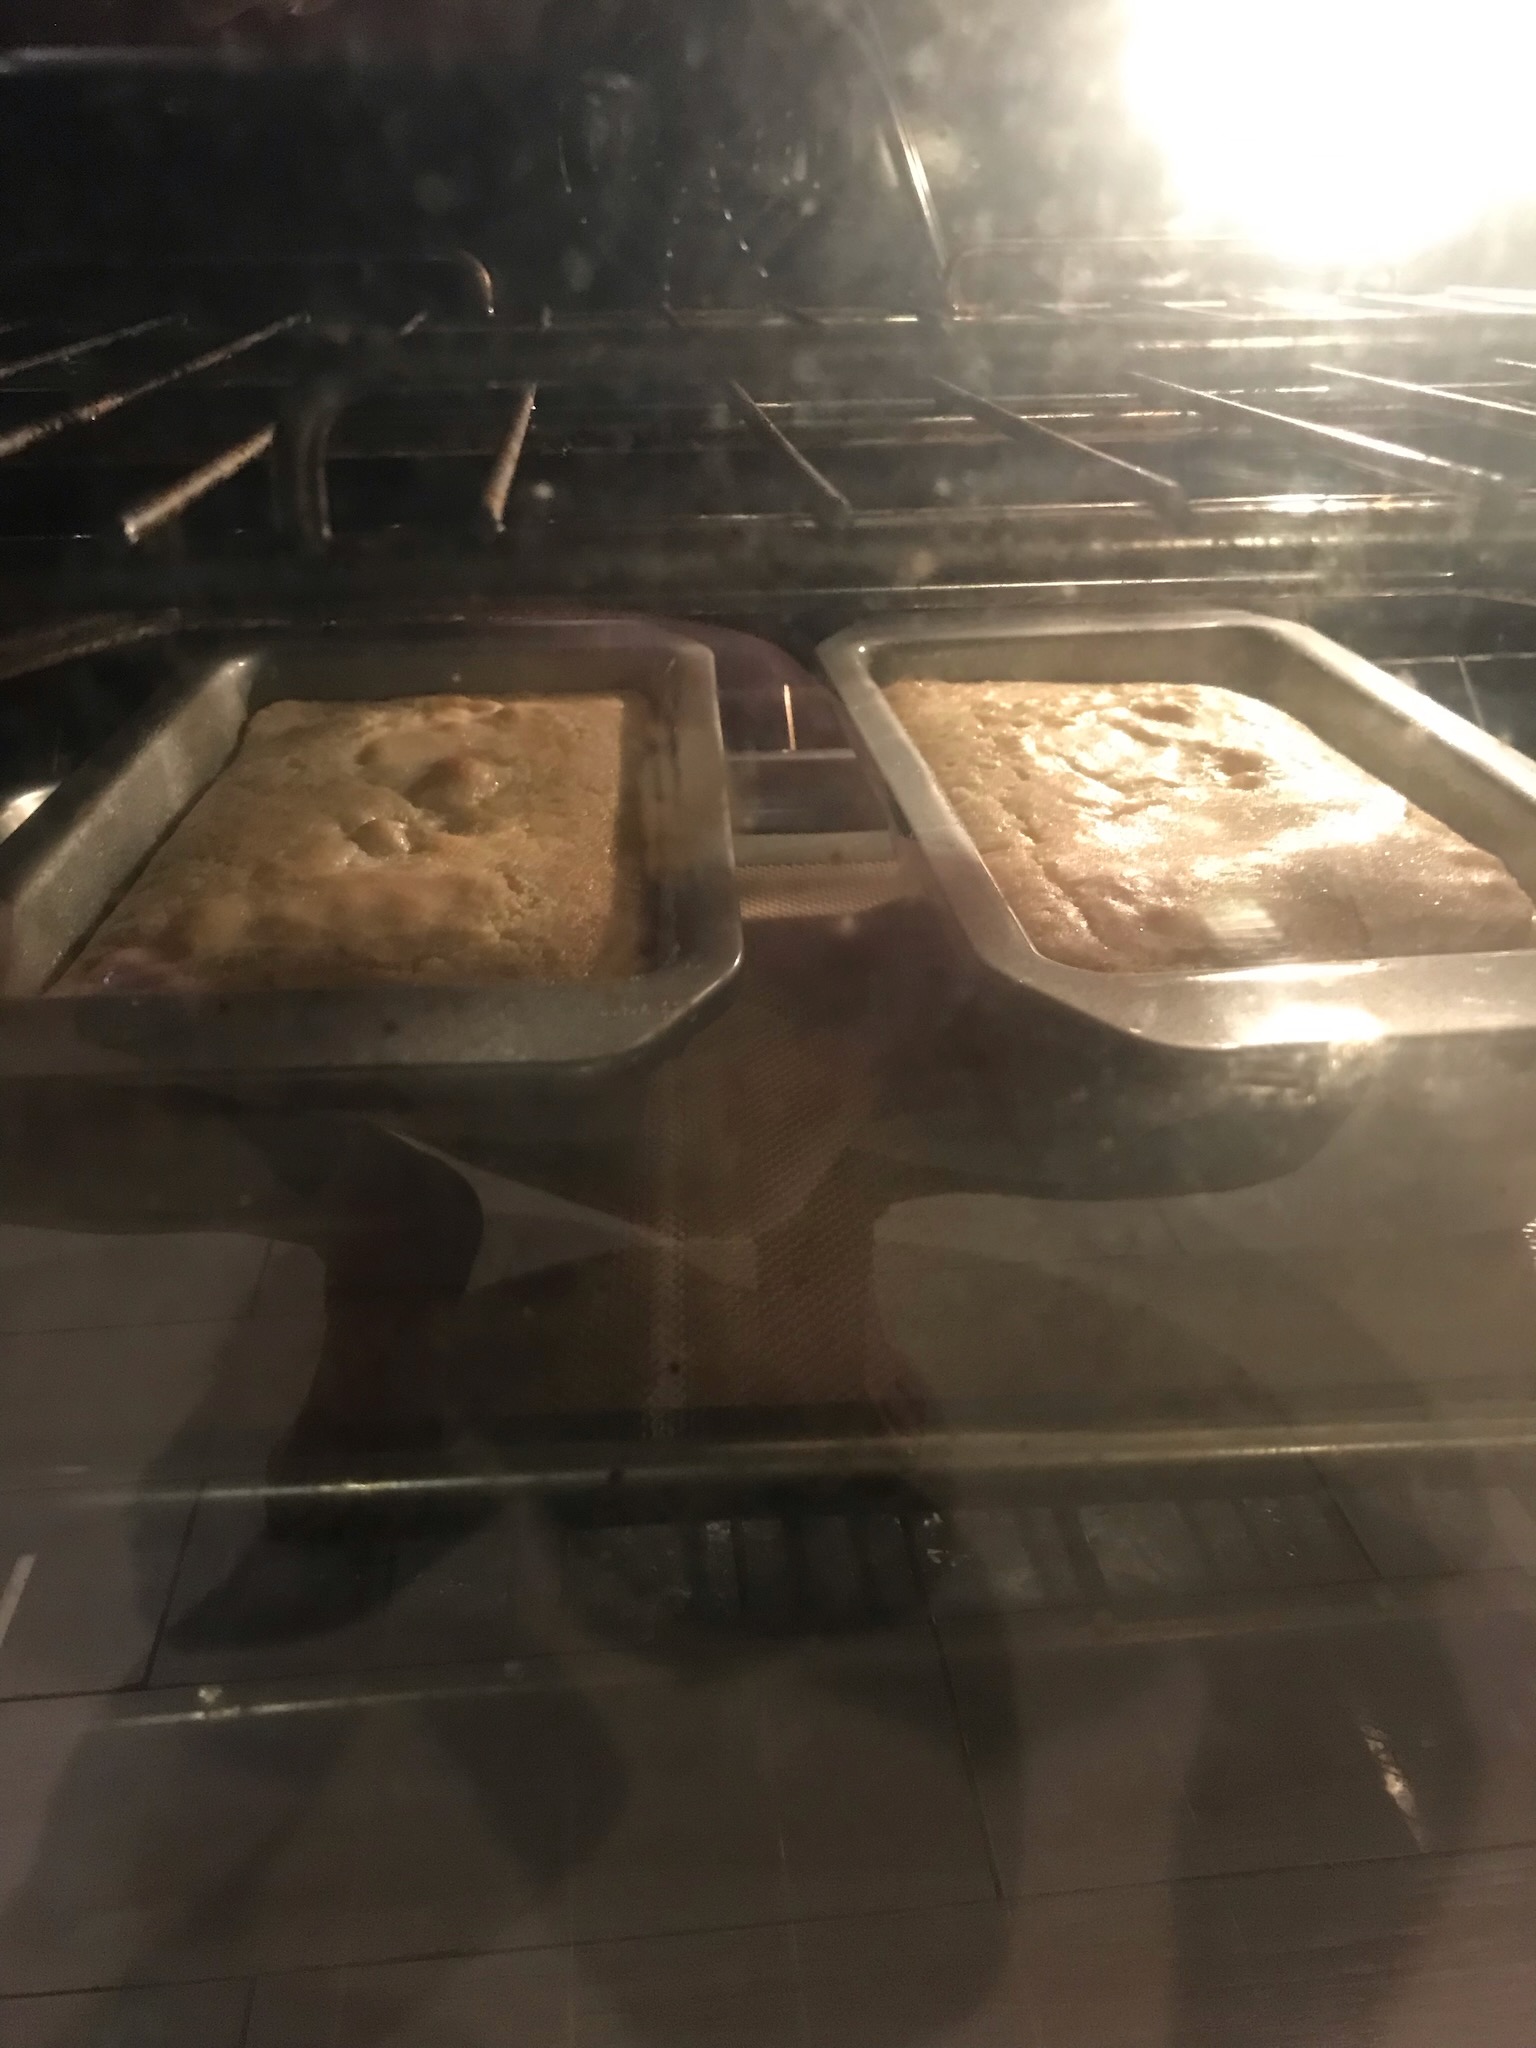


Until the internal temp measures around 190°-200° freedom degrees. And looks a little something something like this.

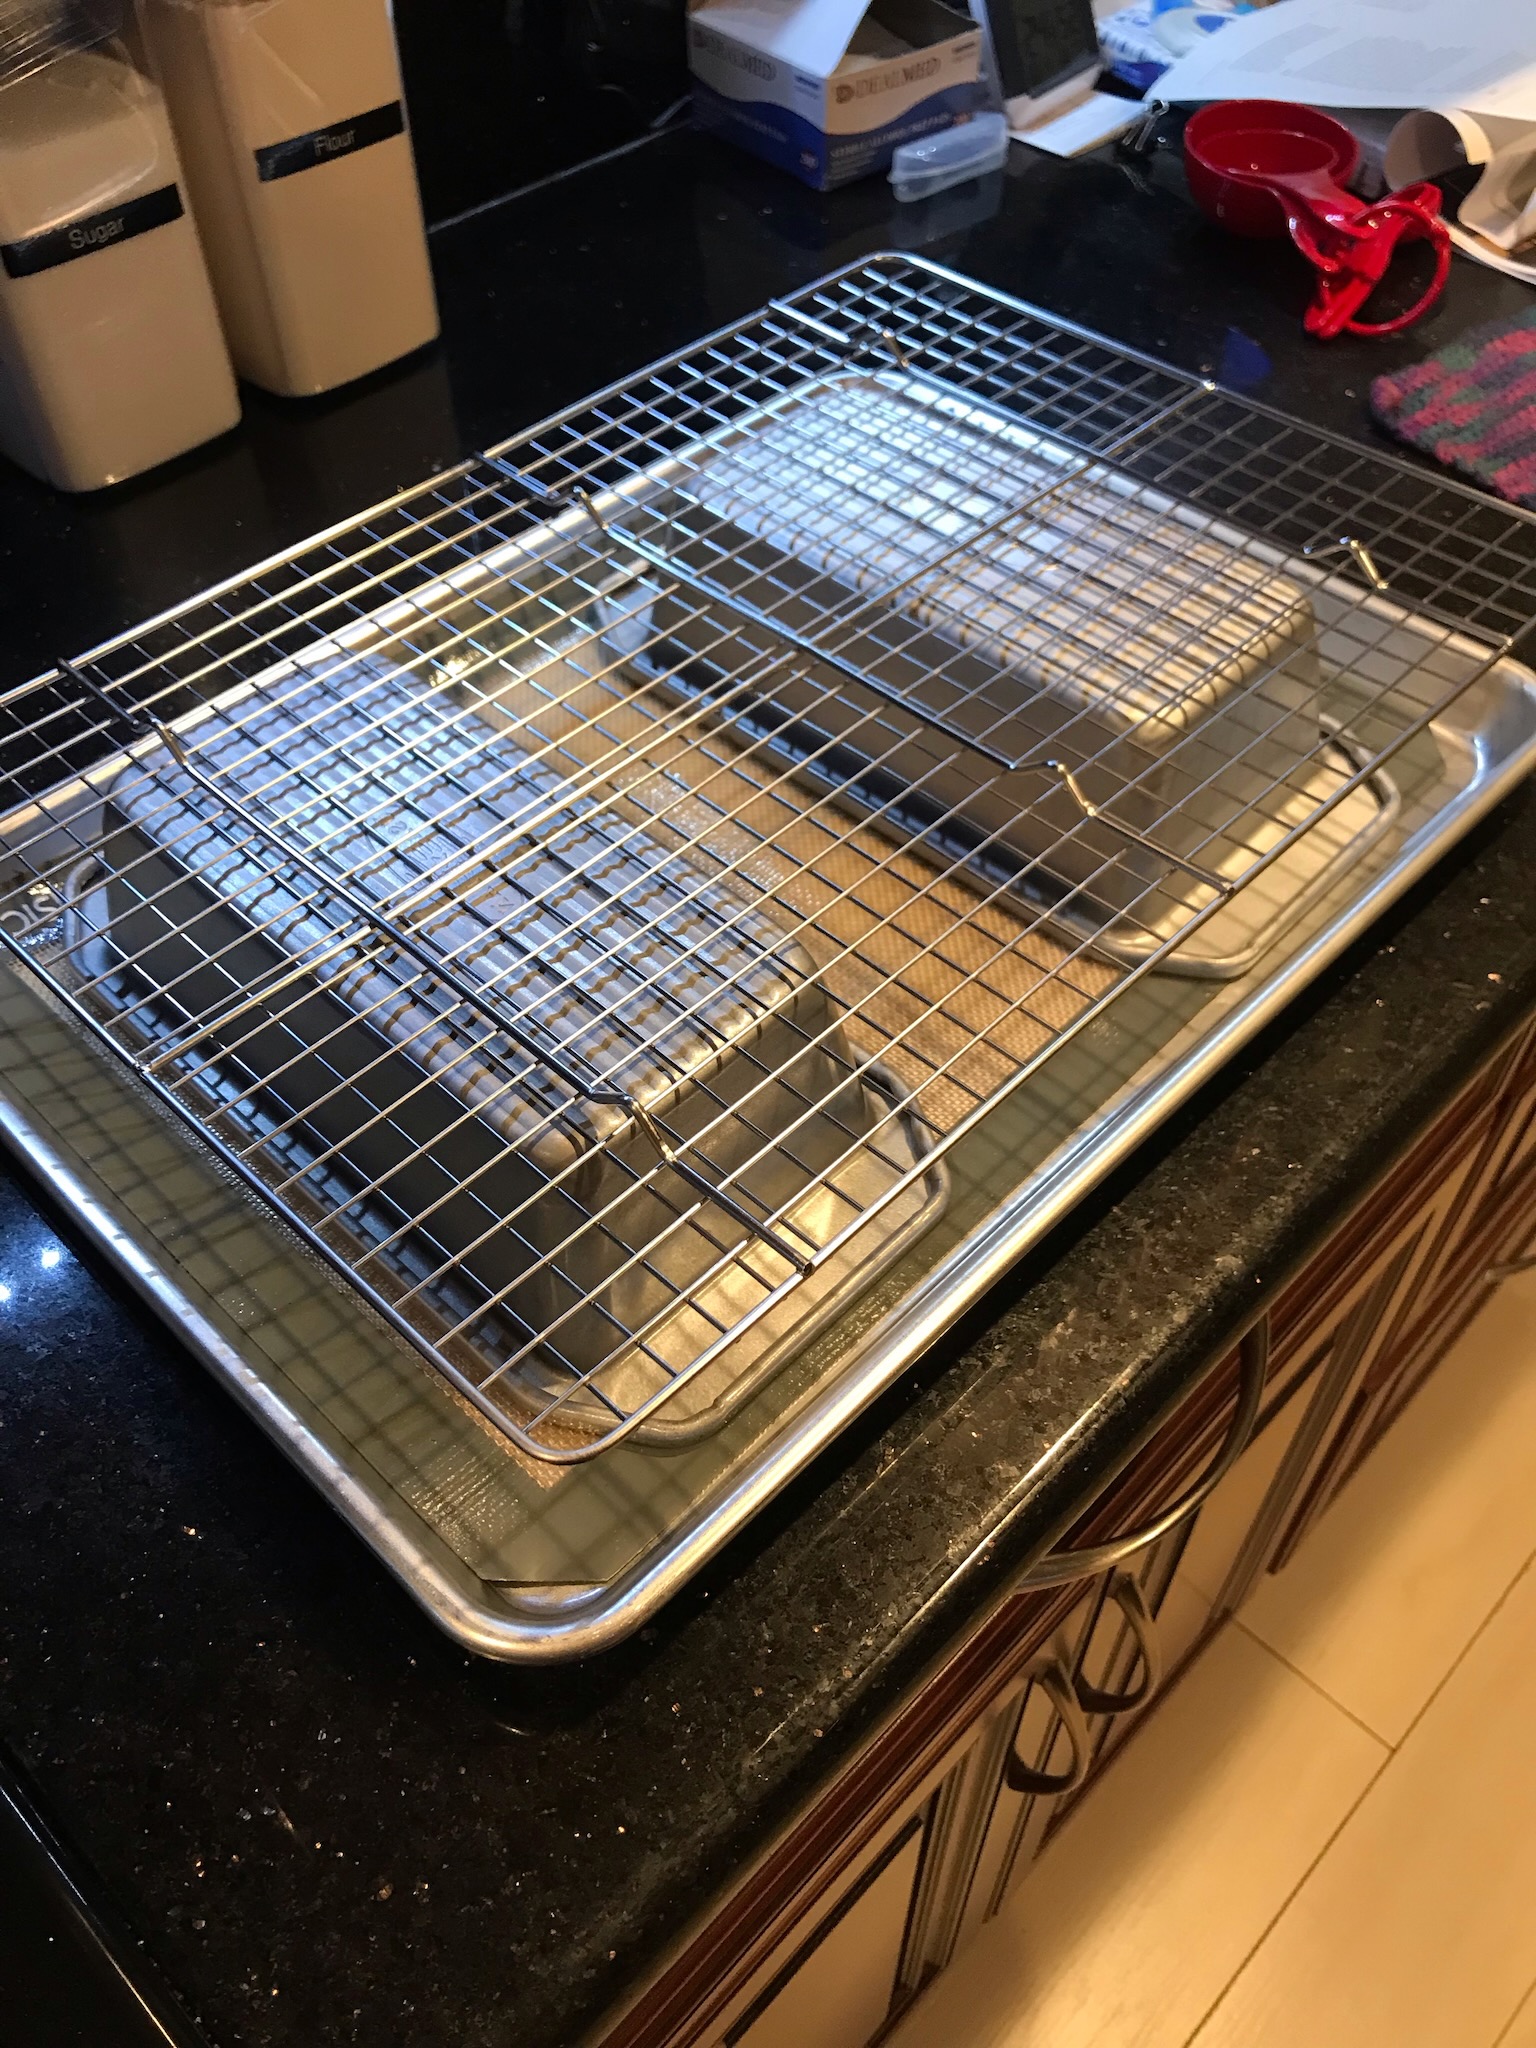
Then it's on to a rack until it's cooled enough to not burn your fingers.

At which point it's time to pop them out of the tins. To do this, simply make a cake-sandwich and invert it.
Then remove the tins.

And use the same technique to revert.

Once it's cooled completely, enjoy delicious cake.

I know I will.
No comments:
Post a Comment