So I was goofing around with my new sewing machine a little, playing with the tension, and it seemed a bit peculiar to me that even backing the tension way off resulted in the thread being held back with a fair bit of force. It occurred to me that, over its lifetime, the machine may have gotten a bit of wear and gunk build-up on the tension discs, and so I pulled off one set to have a look.
Well, not only is there glitter there, because of course there's glitter there, but there's also even a bit of rust, or something very rust-like.
Thankfully, I have just the solution for this type of problem.
A bit of metal polish cleans things up right quick.
But this is only the secondary set of tension discs, which holds back the thread when the presser foot is up (raising the presser foot removes the preload from the main tension discs, and without at least some tension the thread could tangle). So how do the main tension discs look?
Glittery. Of course.
But with a bit more polishing they cleaned up just fine.
The tension seems a little better now, but we'll see how things go when I do some proper sewing.
Moving right along, a package finally came in with some new presser feet. I held off on ordering these ones until the straight stitch foot came in, so that I could make sure that I had found the right type. I had, so I bought a reasonable set of accessory feet.
We've got a left and right zipper foot, plus a cording/welting foot. The latter has a groove cut in the bottom to help align welt cord while you sew.
They come in different sizes for different size welt cords, which I hadn't noticed until after I ordered, but luckily the size I ended up with, 1/8th of an inch, will work perfectly for sewing welt cord around the seams of small bags. I'll probably pick up a larger one later if I feel the need to do upholstery work (5/32 of an inch is the most popular size for that).
However, before we get ahead of ourselves, there's a slight problem to deal with.
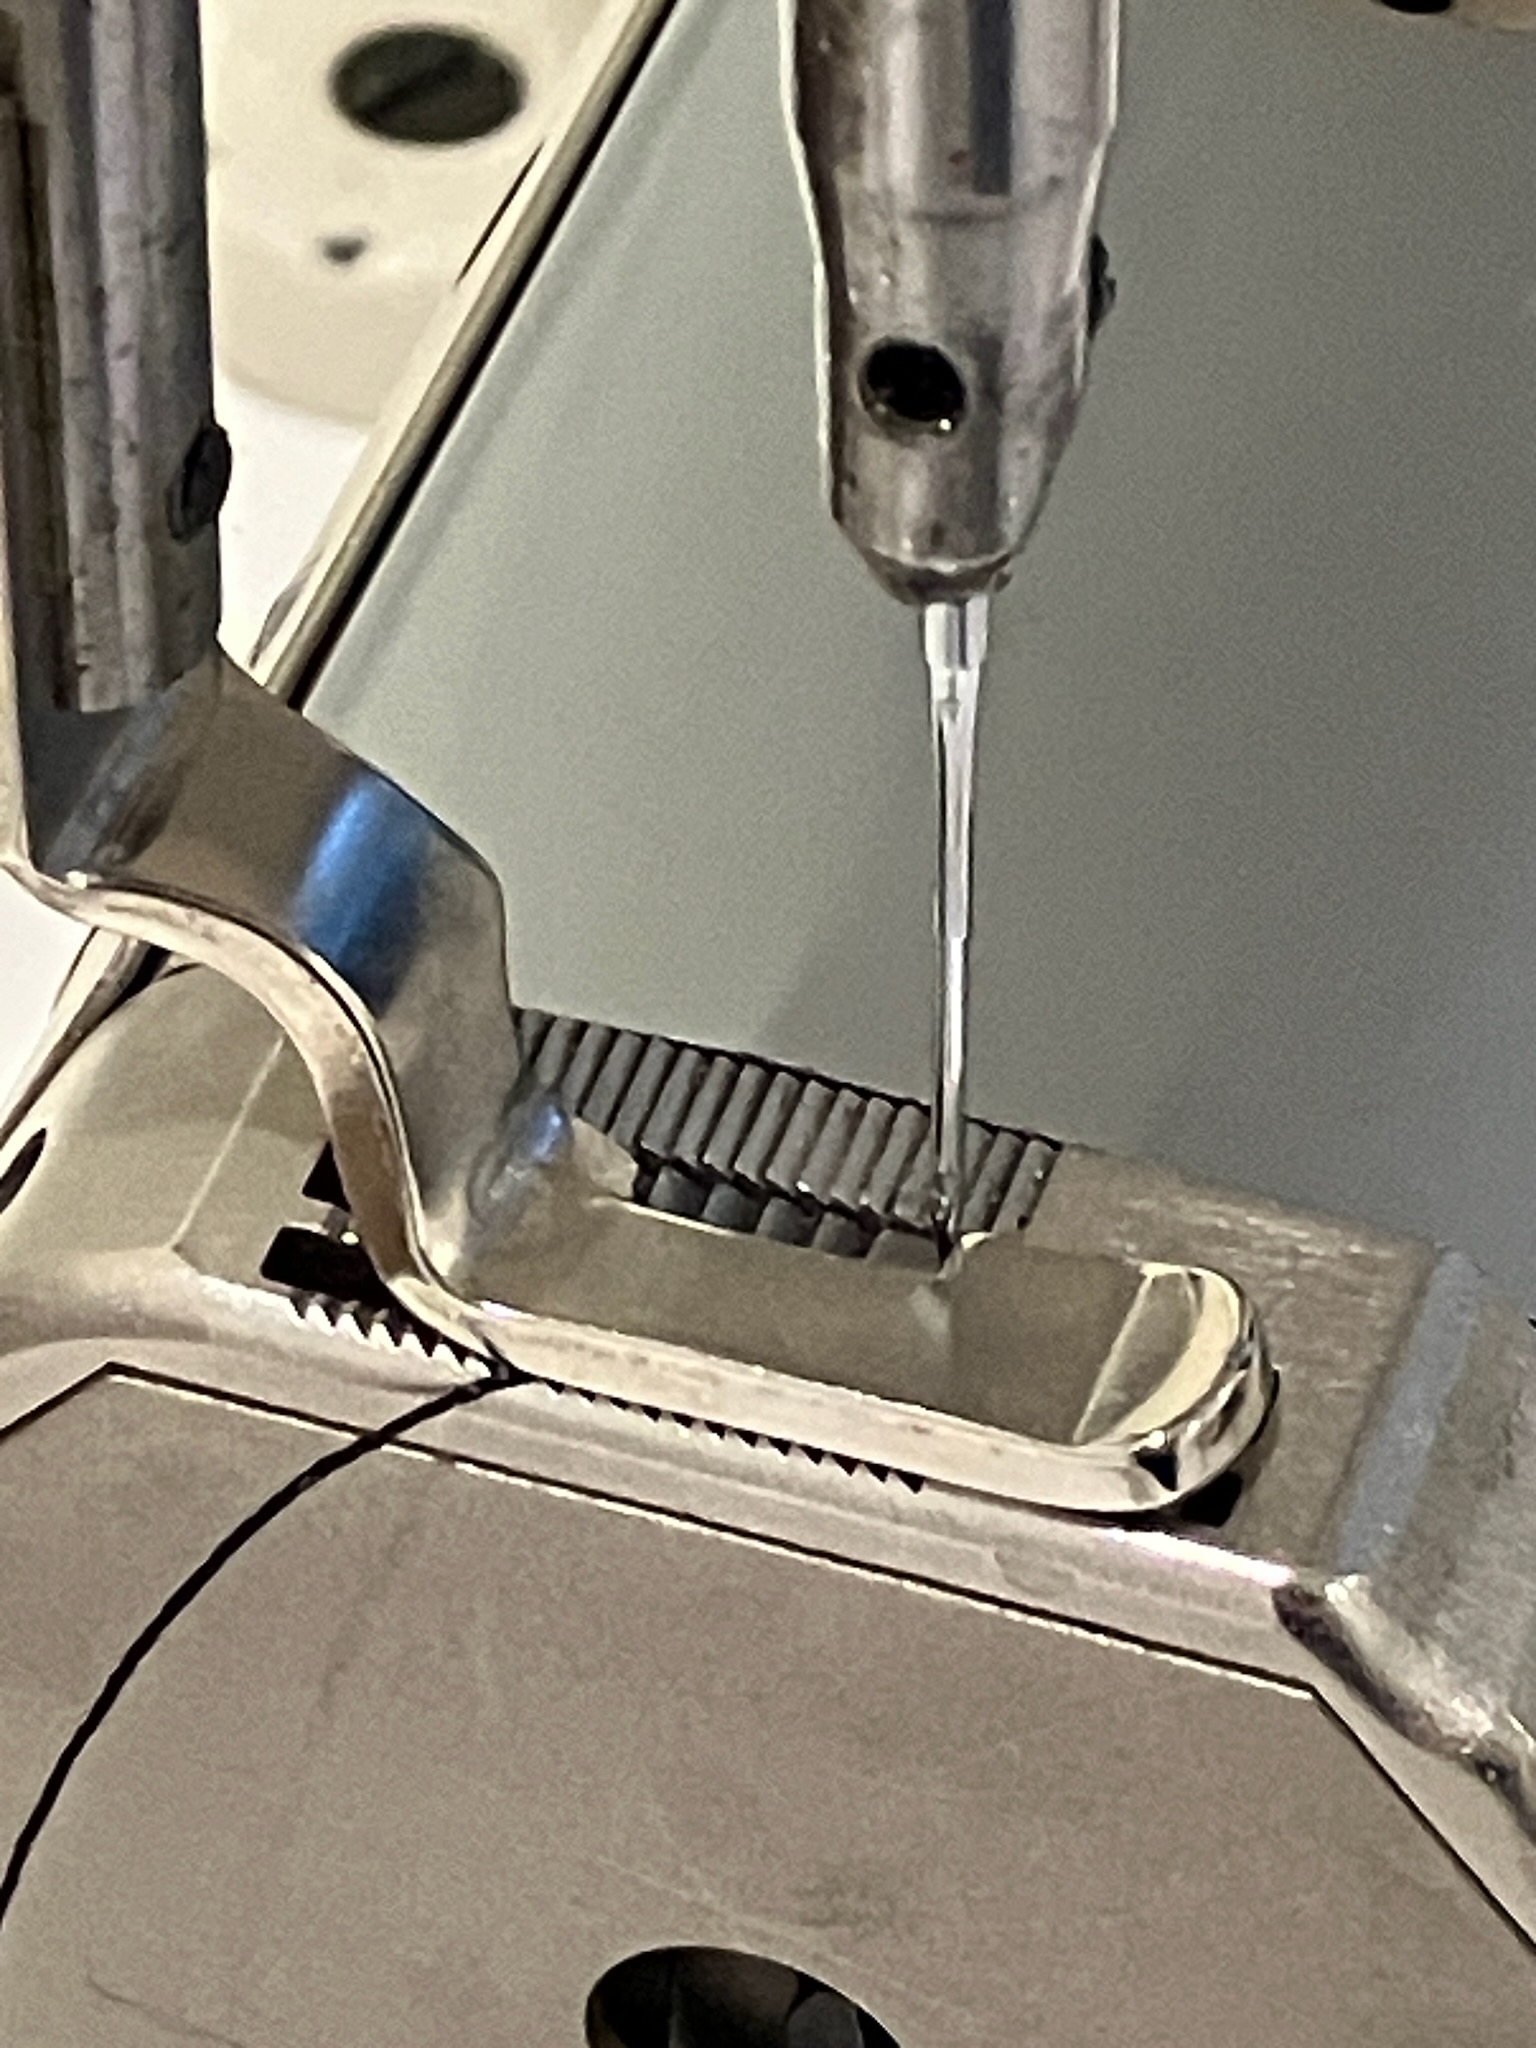
That would be the needle hitting the front of the welt cord foot. This being a needle-feed machine, the needle bar swings back and forth in time with the feed dogs to ensure a consistent, even feeding of the fabric as you sew, and so an elongated hole is required in the presser foot to accommodate this.
Here we can see the needle as it comes up on the upstroke, much further back in the slot of the presser foot.
But obviously not as far back as it ought to be.
Was the welting foot manufactured incorrectly? Or designed for a different machine? Well, let's see how the zipper feet look.
Yeah, the needle is still too far forward. We can also see on the upstroke that things just aren't where they should be.
Now when I'd done the machine timing previously, I had observed that the needle was reasonably well timed with the feed dog (the needle passes through a small hole in the feed dog when it makes the stitch, so the two have to move in sync). Seeing that, I had assumed that they were correctly adjusted, but now I was not so sure.
Thankfully, there's an easy way to be sure.
There should be exactly 14.25mm of space, on this model at least, between the needle bar and the presser foot bar.
And, well, I don't have to hold up a light behind that to see the gap. So, I have more timing to do.
I didn't take pictures of this part, but interestingly enough setting this timing is incredibly easy. There's a pinch bolt on the shaft that controls the angle of the needle bar frame, accessible through a little window in the upper part of the casting, near the rear inspection plate. I of course discovered this shortly after needlessly unscrewing the inspection plate, but whatever, it is what it is.
Loosening that screw allows the needle bar frame to swing freely, and then I just need to set it to exactly 14.25mm and tighten down the pinch bolt.
Of course, as you might imagine, this will throw off the timing between the needle and the feed dogs, because remember that the needle needs to go down through a tiny hole in that feed dog, and the two must move in sync.
Luckily this is also an easy process: by tipping the machine head back, you can access a pinch bolt on the lower shaft, and loosening that allows the feed dogs to freely slide back and forth. So you just line things up so the needle falls directly through the hole, a smidge towards the front of the machine, then tighten the pinch bolt back up.
But we're not done yet. The needle also needs to be in time with the hook, and we just moved the needle back in the machine by a fair amount, meaning that the hook will be meeting the needle a bit later in its rotation, and so it won't arrive in time for the tip of the hook to pass by the top of the needle eye.
But, again, this is also an incredibly easy adjustment to make. There's three set screws on the bevel gear driving the hook spindle, and you simply loosen those off and rotate the hook so that it meets the needle at the correct point in the cycle, such that the tip of the hook passes the needle just above the eye. Then you tighten down the middle set screw first, then the two other set screws, alternating back and forth to ensure that the bevel gear isn't pushed to one side or the other.
And while I was in there, I also gave the bobbin case opening lever a quick tweak, because I might as well cover everything. Well, everything except adjusting the feed dog height, but it's probably fine, I don't need to worry about it.
And the result?
It's a little close but clearance is clearance. I'll take it.
On the upstroke of the cycle, we can see that there's still more than enough room in the back of the slot.
So I'd say we're good to go now. Just need to double check that the zipper feet will clear too.
And they do. This is on the longest stitch length, 6mm, and the needle is placed exactly where it should be.
So, getting back to where we left off, one of the other goodies I picked up was some bonded nylon thread.
And by "some" I mean "a great deal" I guess. Amusingly, this spool cost about $15, and holds 6000 meters of heavy duty Tex70 bonded nylon thread. $15 will also buy you a 6-pack of standard name brand domestic sewing machine thread, for a sum total of 400 yards. I'll leave it up to you to draw your own conclusions from that.
The most important part for me, though, is that this is properly bonded thread. Unlike the polyester thread, a lifetime supply of which is also pictured above, this new spool of thread won't separate its plies when you twist it, which makes it much, much easier to handle and way better to sew with.
And that leads us right into the next purchase, which is a device commonly known as a "thread zapper".
This being the mysterious Chinese non-brand clone of it, because it was cheaper than the official one and the official one had surprisingly bad reviews. Basically it's just a battery hooked up to a little loop of nichrome (probably) wire. You press the button, the wire heats up, and it quickly melts through the thread (assuming it's an artificial fiber, I don't think you'd have much success trying to melt through cotton) and simultaneously fuses the plies together, which helps prevent the ends from unravelling.
I'm happy to report that it seems to work quite well, for the few times I've tried it so far. Time will tell if it continues to perform, but things look promising at least.
I do have a few more goodies that I bought which I haven't gotten to yet, but I think this should be enough excitement for one day.