Sunday, March 28, 2021

Whole Once More

 Valve stems came in for Blackbirb. Replaced the one in the front just to keep things fresh, then installed the rear tire to make things whole again.

I had thoughts about the tire possibly being a bit big for the bike around the rear triangle, as I moved up from a 2.1 to a 2.25, but there's still plenty of room.

Yup, fits fine. Should be plenty of room for mud and muck picked up by the tire to make it through the gap.

Friday, March 26, 2021

Black and Round

On Sunday I decided to take a little test ride on Blackbirb to break in the new aero bar, and ended up riding a little loop around Calero County Park and Rancho CaƱada del Oro OSP, for a bit over 40 miles. This is quite a decent distance to ride on a mountain bike, but it turned out quite well.

Other than, that is, the part where I got a pinch flat on the rear tire. I was coming down the steep part of Cottle trail quite quickly and hit some rocks that were apparently a bit more jagged than I had assumed, and one of them was pointy enough to bite through the rubber.

Unfortunately the sealant had dried out and was no use, and the gash was a bit on the big side so I'm not sure it would have sealed anyway. Either way, this tire was getting worn down well past its use-by date, so I picked up a fresh new pair and they just came in today.

Unfortunately while I was sitting on the side of the trail stuffing an inner tube in my rear wheel, a process that requires removing the tubeless valve, I somehow managed to misplace that rather important but luckily inexpensive component. I didn't notice until I got home, so there wasn't much point going back out to find it, and thus I just ordered a new pair.

That shipment hasn't arrived yet, so in the meantime I just swapped the tire on the front.

Looks all pretty and new!

In addition to being new, it's also a slightly updated version of the tire with a fancier rubber compound, better puncture protection, and better tubeless compatibility. It's also slightly larger because they no longer sell the size I had previously (thus I'm now running 2.25 instead of 2.1 inches, which isn't a dramatic difference but still slightly larger nonetheless).

I'm planning to keep the old front tire as a spare, though with any luck I'll never need to use it.

Saturday, March 20, 2021

Leafy Greens

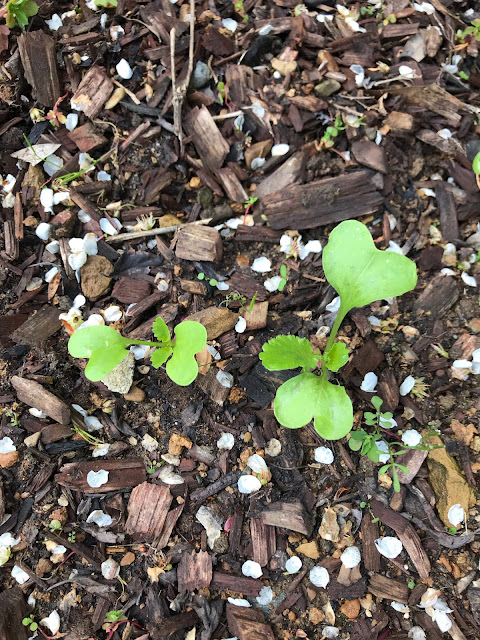
The daikon are finally putting out some adult leaves after milking their embryonic leaves for a surprisingly long time.

It's always encouraging to see things coming along nicely like this.

Depending on how things go with this vegetable experiment, I might put in some raised beds in the large mulch area in the back yard, since it gets a lot more sun than this patch of dirt and currently doesn't have much of anything in it. Either way growing vegetables in this patch won't be a long term thing, as I'm eventually planning to plant a tree in there to replace the plum (which is in an awkward spot) and the really ugly half-dead shrub that occasionally has leaves and purple flowers on it.

In other news, the Yarrow is doing well in its second season.

Mmm, green.

And I owe it all to this Inanimate Carbon Rod

When I originally got Blackbirb, my XC mountain bike, it came with an aluminum handlebar. This is the usual standard equipment for bikes at the price point that I paid for it, but they do leave a little to be desired compared to carbon fiber.

The biggest thing is they tend to carry a little extra weight, though certainly not as much as a steel bar might.

But there's also issues of vibration damping and compliance, and tradeoffs with overall stiffness. With a carbon bar these things can be engineered more precisely, but with aluminum it tends to be limited a bit by the material.

Thankfully a mountain bike handlebar is a very simple form, usually just a slightly bent tube with a bit of a thicker section in the middle. This means that it's quite inexpensive to manufacture no matter what material you're making it from, so upgrading to carbon isn't a big hit to the wallet. But it is a big hit to the weight of the bike.

(The new bars have slightly more sweep angle to them, so I had to prop them up on a jar to keep the ends from resting on the counter while I weighed them. Yes I zeroed the scale for the weight of the jar.)

Lightness, compliance and rigidity was only one part of the equation for me, as I also wanted to be able to mount a mini aerobar to my bike, and it clamps to the bars on either side of the stem. On a lot of mountain bike bars, the taper starts very close to the stem clamp area and so the aero bars can end up trying to clamp onto that tapered area rather than a nice straight cylindrical section, leading to a sub-optimal mounting situation. These bars made by Salsa Cycles, on the other hand, are specifically designed with a wide center section for mounting accessories to, such as aerobars.

Speaking of which, I should put the aerobars on the scales too.

Oddly these aerobars are listed on the product page as being 276g, and given the difficulties I've had with the bolt heads pulling through the mounting holes it does make me wonder if it's missing a bit of carbon in the layup. Hmm. Hmmmmm.

I did manage to get this aerobar mounted successfully though, after two others failed during assembly, so here's hoping that what little carbon is actually in there is enough to keep them together.

So in the end the combined weight did go up by, like, 155g, but I think the improvement in functionality of having the second, more aerodynamic hand position for riding long flat sections will be worth the tradeoff. And it's certainly less weight than it would have been to just stick the aerobars onto my aluminum handlebars.

The Fan Club

It's safe to say that I've got some really big fans.

For the longest time I've been just using some household fans to keep me cool when I'm riding my bike on the trainer, but while they deliver a pleasant breeze in the context of just sitting around doing nothing, they really fall short when it comes to high intensity exercise.

So it was high time I upgraded, and I got this pair of industrial strength high velocity fans, and the difference is night and day. They move so much air that it's actually almost too cold when I start my workout, and where before I'd usually be dripping with sweat by the time I was 10 minutes in, I'm now staying almost dry for the full hour.

They're surprisingly quiet for what they are too; I'm finding that the noise from the fans themselves is about the same level as the wind noise of the air whipping past my ears. It's not like I'm trying to exercise next to a vacuum cleaner or something. So that's nice.

All in all, well worth the price to upgrade.

As for why my mountain bike is temporarily on the trainer, this will be covered in the next post.

Saturday, March 13, 2021

Check Your Carbon

So I just picked up a ControlTech Impel Mini clip-on aerobar to put onto Blackbirb, my XC mountain bike, in order to make it a bit more amenable to doing longer gravel-style rides.

You see, mountain bikes tend to be a bit miserable when riding for long distances over relatively flat terrain since the wide flat bars only really give you a single hand position to work with, and that position tends to catch a whole lot of wind. Attaching a mini aerobar gives you a second hand position to alternate with, and one which makes you a lot less of a human parachute.

But the trouble I ran into had nothing to do with the riding positions, but rather with this particular aerobar instead.

I opted for a carbon one to save weight, as I didn't want to A: have to lug even more weight up the hills, and B: make the steering feel heavy and awkward. But carbon, while it is a familiar material at this point, apparently still isn't a completely solved science.

I discovered this as I was using my torque wrench to tighten the clamping bolts to the recommended 5nm. On one side this went great, but on the other side I noticed that as I was tightening one of the bolts, the head was sinking down to Davy Jones' Locker. That's not good.

I removed the bolts to examine the situation and found the culprit pretty easily.

The bottom of the counterbore for one of the bolt holes was defective. It was full of dry carbon weave; the resin didn't properly penetrate and left a bunch of voids.

Needless to say, this is not ideal. I don't think this would have caused a complete catastrophic failure if the bolt somehow managed to pull all the way through the bar, as the clamp on the other side was plenty sturdy, but it's not really an experiment I want to be a guinea pig for.

Thankfully I bought it off Amazon, so the return policy is super easy, and I expect I'll see the replacement show up on my doorstep in a day or two. I wasn't planning on doing any rides immediately, as I also ordered a new carbon handlebar to take even more weight off the front end, and that's not going to be in until later this month thanks to the perpetual bike parts back orders that are happening these days.

Update:

Received a second unit from Amazon and both of the forward counterbores had voids in them this time, and collapsed when assembling to 5nm. Not good.

To their credit ControlTech offered to send a free replacement bar no-questions-asked when I emailed them, so hopefully they'll be able to cherry-pick a good unit to send out to me.

Monday, March 8, 2021

Generating a Shed, or Shedding a Generator

When I purchased my generator not too very long ago, I also purchased a generator cover for it. My thought was, at the time, that it would keep the rain off, but may well not keep the critters out.

As it would happen, it did indeed keep the rain off, and it did indeed not keep the critters out. Eventually I found a stash of seeds tucked away in the engine block, I'm pretty sure put there by the local scrub jays. It was at least better than having a bunch of squirrels chewing on the wires, but all the same it was not ideal.

It was clear that I needed a generator shed.

I did a bit of measuring and determined that a roughly 30 inch cube would be suitable for containing this particular generator with a bit of room to spare, so I gathered up some scraps of dimensional lumber (the material of choice for sheds the world over) and started building.

Now there's a difference between shitty 2x4 construction and nice 2x4 construction, and that difference is in joinery. A shitty 2x4 construction uses butt joints held together with nails and screws. This kind of joinery rarely stays square, rigid and tight under even a small amount of use and abuse. A nice 2x4 construction steps things up a little.

For this project I chose to use half-lap joinery. It's not especially fancy, but the difference it makes is really incredible. Where a regular 2x4 frame would flex without bracing, a half-lap buttered up in wood glue will hold strong until the end of time.

The best part is it doesn't even take all that much time. Just an extra few saw cuts on each corner in exchange for not having to figure out what angle to drive a screw or nail through at to secure an awkward butt joint, not having to figure out what offsets things will end up at when they overlap, not having to awkwardly hold things in place while trying to sink the fasteners home.

Just set the pieces in place, pop a few brads in to hold them there, and twiddle your thumbs until the glue dries.

But that's the frame, let's talk about the skin.

There's a whole world of woods out there to choose from, with varying prices, properties, and availability. Since this was going to be an outdoor project, something rot and insect resistant was priority number one. Since it wasn't really going to be a piece of fine furniture, a low cost wood was priority number two. Since I'm lazy, getting something pre-cut in regular sizes was going to be priority number three.

When it comes to cheap, pre-cut, outdoor-friendly woods, it's hard to go wrong with cedar fence boards. The saw-cut surface makes for a perfect match for a rustic aesthetic. The fact that they come soaking wet means you can assemble them tight and just wait for them to dry out to form expansion gaps. The fact that fence boards are cheap as chips meant I didn't end up spending more money on the shed than I did on the generator itself.

Of course all that expansion and contraction can make things a bit tricky when it comes to construction. Wood glue in this case is right out, and in its place comes a much more flexible material: construction adhesive.

The gummy, flexible nature of the bond means that the wood can flex and move without tearing itself apart, or tearing itself loose from the frame it's bonded to. And, given that this is solid wood exposed to the elements, it's going to be doing a lot of flexing and moving.

The brad nails are still the fastener of choice to hold the planks in place while the glue sets, though. They're thin enough that they'll bend harmlessly when the wood moves and not impede anything.

Now as much as cedar is rot resistant, it's important to give it a fighting chance. The first and perhaps most important step is to not let the wood sit against the ground where it will be wet for an extended period of time, and that goes double for the end grain. With that goal in mind, I installed a set of adjustable furniture feet, which will also help keep the shed from rocking when it's finally moved into place.

The second step is to give it a finish to try to keep at least some of the water out. In this case, I used a wiping varnish commonly sold as "teak oil", even though it contains no teak products and is not a drying oil like boiled linseed oil or 100% tung oil. It's basically just a thinned down varnish. I applied a single, heavy coat, and this picture of the underside shows a nice before and after contrast with the above.

And the rest of the shed, soaked down with wiping varnish. Also with a door installed, because I didn't stop to take a picture of the door before putting finish on.

We aren't done yet, of course. The shed still needs a handle for opening the door.

That one will do nicely, and some sort of catch to keep the door closed. I opted for a pair of heavy duty magnetic catches.

Now there's some things I planned for very carefully with this build, and some things where I just winged it. I knew there was something like three feet of space between the chimney and the fence, and as luck would have it that was just barely enough.

Of course, had it been too wide I could have just hoisted it up and carried it over my head, but that would have required a lot more effort to do. Speaking of fitting...

The generator does fit, with just enough room to spare on each side to make loading and unloading easy. I have to say the end result looks quite handsome in its place.

I think it's safe to say this project is a success.

Sunday, March 7, 2021

A Ride Into History

I decided to take a little motorcycle ride this afternoon, and in particular through an interestingly historic area.

There's a lot of old history around here, but some more recent history too. In this case, the history is a stolen road, which some residents up in the hills tried to take from the public by posting a bunch of signs and putting up locked gates. The whole saga is documented here and to this day the gates are still there (though unlocked and open).

My goal for this ride wasn't so much to see the gates (which was, nonetheless, interesting to see), but instead to check out another gate on the edge of some MidPen Open Space land.

What I wanted to find out was whether this gate was another fake, or whether it was actually a legally closed/restricted area. As it turns out, and as was confirmed by the friendly MidPen park ranger, this particular road is, in fact, legitimately closed. Or at least as legitimately as MidPen can close something. Which is probably pretty legitimately.

The ride itself was quite an adventure too, as it was mostly on gravel, and I was riding Rabbit Season which is a bike very much not entirely suited for going off pavement. That said, it handled it quite well, and with little drama, though the ride was much rougher than it might have been on a more dirt-oriented motorcycle.

But a dirt-oriented motorcycle is something for the future. Probably next spring, who knows.

Saturday, March 6, 2021

More Greening

Needed to make a Home Despot run today so I picked up another plant while I was there, as there was still a bit of a hole in my front yard.

The purple shrub in the back casting a shadow is making it look less empty than it really is, but trust me, it's empty. It needs filling.

And to fill it, I picked up a lovely blue Lithodora.

It should spread out to about 2 feet total and stay pretty low, so it should be perfect for this spot near the edge of the plantings. Won't block anything behind it.

And here's what it looks like in its new home... sort of.

The light wasn't really cooperating. It's in there, though, trust me.

Depending on how it looks as it grows in, I might pop in another few to fill the space a bit more. But that'll probably be next spring at the earliest.

Update: better photo.

Friday, March 5, 2021

Spring has Sprung

The plum has emitted its sex-leaves.

Figured I should go out and take a picture before it rains and all these blossoms get annihilated.

Thursday, March 4, 2021

On the Outside, Looking In

I forgot to take an exterior picture of the tint job yesterday, so I nipped out this afternoon to rectify that.

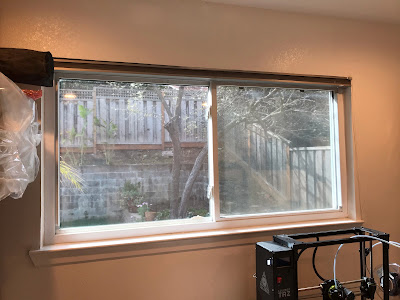
Basically it doesn't look like anything at all, until you walk right up to the window and realize that you can't really see in.

Of course, the situation works in reverse when it's dark outside and the lights are on inside, but that isn't really a problem for my use case.

Wednesday, March 3, 2021

Turn the Dark Up

My craft room / office and the room that will eventually become a guest bedroom both have south-facing windows, with nice views into my back yard. This presents a conundrum, as the sunlight coming in during the day is really quite a bit too bright, but I also don't want to block the view of the great outdoors.

There are a few solutions to this problem, but I decided to go for tinting the windows. I ordered a few rolls off of Amazon and started the install process.

It looks dramatic but once the other piece goes in, your eyes adjust and the tint doesn't look so dramatic.

Of course, this photo makes it look a bit darker on account of it also being later in the evening, so let's fast-forward to the next day and see what it's like in full sun.

There we go! It looks almost the same as the first photo, or at least like a much more subtle change. But the reduction of light is quite welcome and I'm no longer getting blinded by the reflection of the sunbeam on the floor.

I didn't take any in-process pics of the guest room install, but I did take an "after" pic of the completed tint.

Again, it doesn't look like much until you compare it with how much light pours in without the tint.

And yes, I'm planning to fix the screens at some point.