Saturday, July 13, 2024

Lean On Me

So ever since I brought home my Juki LS-321, it's had a minor setup issue.

You see, industrial sewing machines are designed to tilt backwards for servicing, giving you access to the mechanics underneath, as well as loosening the belt that leads down to the motor.

However, if the machine just tilted all the way back to the table, it would likely crush some smaller parts on the rear of the machine, along with the operator's fingers, and so usually there's a wooden or plastic post mounted in the table behind the machine, like this one behind my Singer 251.

But no such post exists on the table of my LS-321, and oddly there's no sign that a post ever existed back there either, which is a puzzling oversight.

The good news is that these posts are cheap, and very easy to install. You just need to drill of 5/8" hole and slip it in.

Unfortunately this 5/8" drill bit is cheap garbage and drills a bit oversized.

But that's nothing a little hot snot can't fix.

You do need to be careful with this stuff though, it solidifies really quickly when you're sticking the part into a big, cool slab of plywood like this.

But I got it in place just fine, so let's test it out.

It's like the machine is just magically hovering in midair!

And more importantly, it's not smashing the foot lift lever, or my sewing light, or any of the other gubbins back here, into the table. A solid improvement, I'd say.

Walking Shoes

So we're back on the Consew 18 again today.

When I got the machine the needle bar thread guide was nowhere to be seen. Or, well, most of it was nowhere to be seen. There was still a tiny chunk of it remaining, plus the screw holding it in place.

Luckily these thread guides are very cheap, and the replacement one just arrived.

And so on it goes.

It's not an especially critical part, but it is good to have, since it keeps the thread in line with the groove on the needle.

Anyway, that's not the only parts that arrived, I also got the new feed dog, needle plate, and inner and outer walking foot.

The machine came to me with what I'm gonna call the "mattress kit" installed.

It's basically a feed dog and foot set that primarily grips the fabric on the right-hand side of the needle, leaving a lot of clearance on the left to be able to feed in welting cord, or get right up close to the edge of a mattress to sew it closed, or sew in zippers, or whatever else. This is all fine and dandy, but for the projects I have in mind I'm not always going to be dealing with a lot of seam allowance, so having the feed be primarily on the right hand side of the needle isn't going to necessarily work too well.

You can see in this photo how the 56882 outer foot will only grip to the right side of the needle, whereas the 56896 foot spans both sides. The 56883 and 5792 inner foot are also slightly different, but the changes there aren't notable enough to point out here (mostly the left side of the foot is bevelled so as to provide clearance for welting).

So the new feed dog is pretty easy to install, just two screws and it's in place.

And then the needle plate is installed over top of it.

This needle plate is green because it's teflon coated. It only costs a few dollars more than a standard steel plate, and makes sewing sticky materials like vinyl way, way easier, even given the fact that this is already a walking foot machine.

Now we just need to install the new feet and... uh...

You know, it occurs to me that the mattress kit comes with 5 parts, not 4. There's the feed dog, the needle plate, the inner and outer presser foot and... a shorter outer presser foot bar.

Part number 6319 instead of 4744. Note that these are all Singer part numbers, the corresponding Consew part number for the regular outer presser foot bar is 6335.

Well fiddlesticks. At least the good news is that this part is still available, though for a bent piece of metal with 3 holes in it, it's not exactly cheap.

But what is cheap is this little round red piece of felt, which sits over the upper thread guide.

Its whole purpose in life is to simply allow you to stick a spool of thread on this post rather than feeding thread from a cone in a thread stand, without wearing a hole in the paint here.

Will I ever actually use it? Who cares, it cost me 23 cents.

Well, I thought I'd have this machine sorted today, but it looks like it'll be at least one more blog post before it's all set up the way I want it.

Monday, July 8, 2024

To Servo Man

My Juki LS-321 came equipped with a clutch motor. It's pretty smooth, plenty powerful, and not incredibly noisy. That said, it doesn't really have the control that a servo motor has, and I'm planning to use this machine for some pretty small and intricate projects. Given the choice, a servo motor would be more appropriate for the task.

But since I had a clutch motor already, I didn't really fancy the idea of swapping to a servo motor, since then I'd have a clutch motor just sitting around taking up space, or I'd have to try to unload it on Craigslist, or whatever. Not a really appealing option.

Fast forward a little bit and a Consew 18 falls in my lap as a head-only purchase, meaning it'll need a motor of its own. So the opportunity presented itself: move the clutch motor from the Juki to the Consew and buy a servo motor for the Juki.

So naturally that's exactly what I did.

These instructions probably make more sense in Chinese, but luckily things aren't too difficult to figure out.

I will have to learn how to unhold a button, though.

Anyway, things are pretty self-explanatory so it's not a big deal.

Before we stick the new motor on, we first need to get the old clutch motor out of the way.

One of the advantages of using a servo motor is that, for the same power (about 550w), the servo motor is much smaller than a clutch motor.

But I perhaps didn't really appreciate how dramatic of a difference it would be.

I'm not sure how much of a noticeable impact it makes once it's installed though, since it just hangs out under the table. And speaking of installing, let's get the motor bracket and motor bolted in place.

And hook up the actuator rod from the pedal to the speed controller.

And mount the actual servo driver.

This servo motor goes up to 5000rpm, which is another advantage I didn't mention earlier. The Juki LS-321 is rated to go up to 2400spm, and with the previous setup it had a small pulley on the 1750rpm clutch motor which resulted in a top speed of around 1050spm. The servo motor on the other hand has a pulley that's only about 10% smaller than the machine's pulley, so the 2600rpm I've configured here translates into 2356spm up at the machine.

And I can get there without sacrificing the slow speed performance, which is really nice.

Speaking of slow speeds, one of the other advantages of a servo motor, or at least a brushless servo motor like this one, is that you can equip it with a needle positioner.

This is basically a simple encoder that you clamp onto the end of the main shaft of the sewing machine, so that the servo driver knows exactly when to stop to put the machine into either a needle-up or needle-down position, rather than just letting the machine stop wherever it happens to stop.

And if you do happen to choose the needle-down position as your default, a simple heel press on the pedal will make the controller spin the head to the needle-up position so you can remove the work.

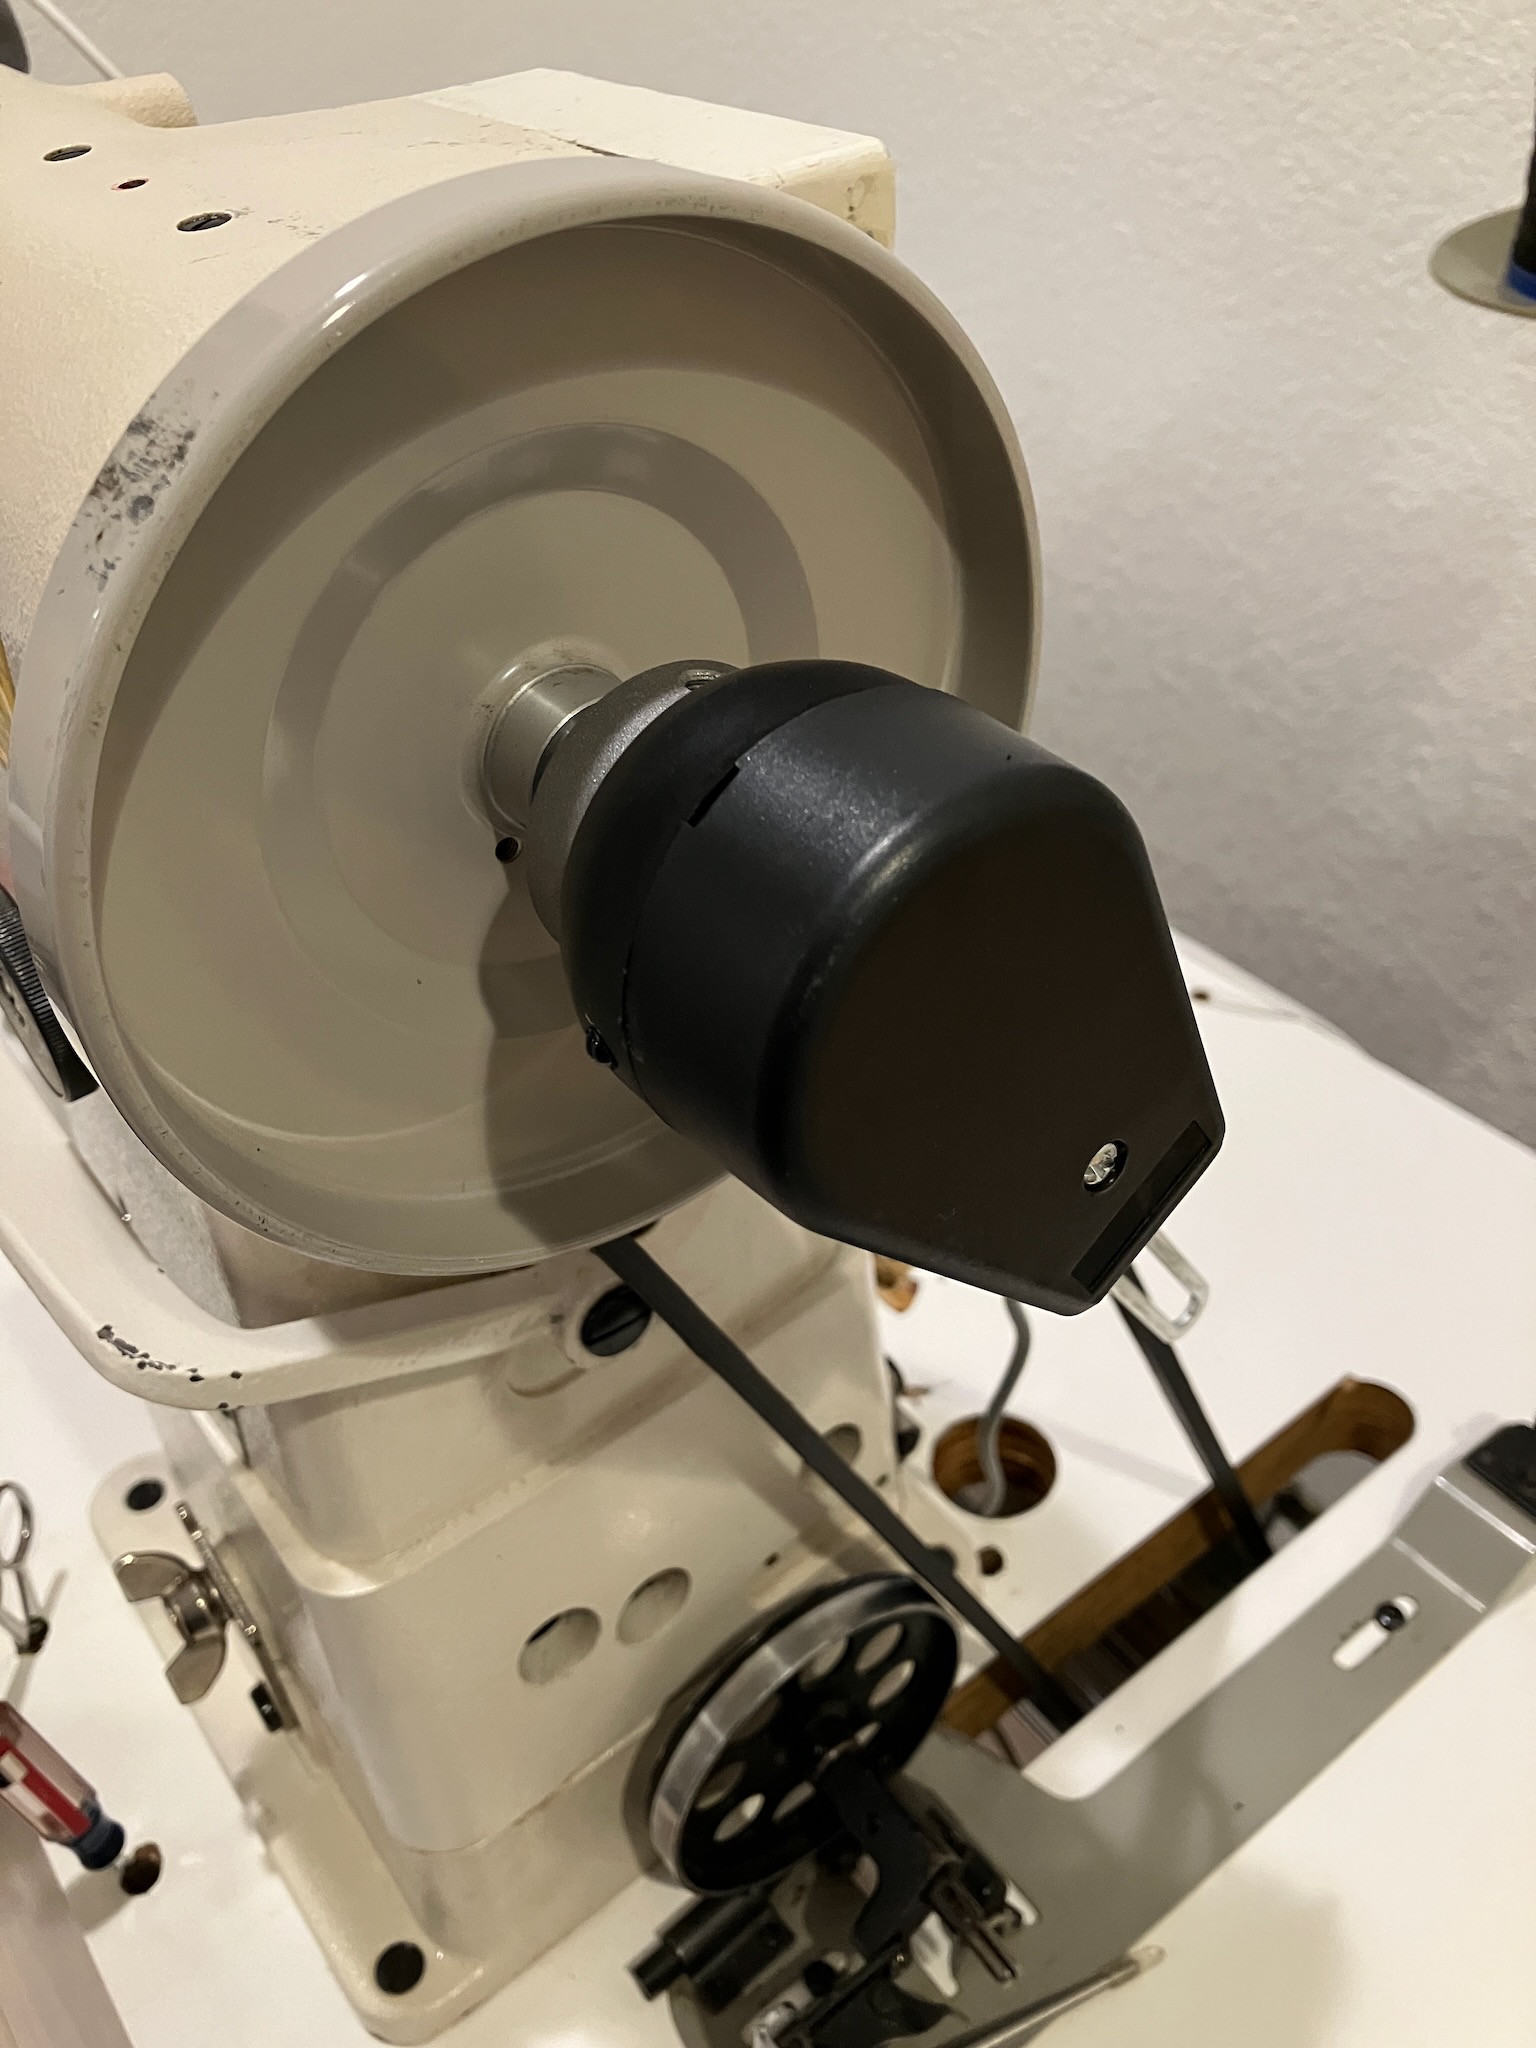
Of course, if you only attached the encoder to the main shaft, it would likely spin wildly when the machine is running and not report anything sensible to the controller. To fix that, they provide this peculiar little bracket that you can use to keep it steady.

I think it's usually intended to fasten onto a belt cover or something, but I don't really feel like ever installing a belt cover, so I just positioned it so that the threaded rod is nicely wedged inside of this convenient hole in the main casting. It does the job just fine.

On the subject of positioning things: since I put a new motor in and changed the belt geometry, the bobbin winder will have to be readjusted, which is a pretty simple task to do. Just loosen the screws and position it so that the belt doesn't touch the drive wheel when it's disengaged.

And does press up against the wheel when it's engaged.

Simple as that.

Last but not least, I suppose I should probably figure out some place to put the motor's pulley cover. I guess this is as good a place as any to stick it.

And with that the job is done. The machine sews beautifully with its new motor; it's easily controllable down at low speeds, and putting the pedal down makes it spin up over twice as fast as it used to. A very worthwhile upgrade that I'm glad I finally found the opportunity to perform.

A Complete Breakfast

I woke up this morning to find a little green friend had made a meal of one of the local scarabs.

It may be a bit of a messy eater, but I don't mind.

This little fella is welcome on my doorstep any day of the week.

Sunday, July 7, 2024

A Delicate, Precision Adjustment

Long time readers will be familiar with my Juki LS-321 cylinder arm needle-feed sewing machine, which admittedly hasn't seen a ton of use since I dragged it home.

But I've got a project coming up where I'd like to use it, so there's no better time to knock a few minor items off the checklist.

Now ever since I got the machine I've been aware that the handwheel pulley is not quite running straight.

And it's honestly a complete mystery as to why that might be.

Anyway, I'd previously determined that the pulley itself wasn't significantly bent, but it was in fact the main shaft of the machine that had a wobble to it.

The total runout near the end here was about 300 microns, which doesn't sound like much, but over this short of a distance it's enough to make the handwheel visibly wobble when the machine is spinning.

That wobble translates into an annoying vibration while the machine is running, which isn't ideal. More importantly, it also makes it more difficult to control the machine using the clutch motor, since the tension on the belt will vary as the pulley wobbles, causing the machine to be much more jumpy than it might otherwise be.

So that's what we'll be fixing today.

The procedure is rather simple, we first need to protect the end of the shaft from getting any nicks or scuffs. A piece of 1/2" copper water pipe does this job nicely.

And then we ever so gently coax this hardened chromed rod back into alignment.

Let's just say that it's a good thing they make these machines with a lot of cast iron.

The end result of this precise adjustment was that I got the runout down to about 10-20 microns, which is plenty straight enough for me, and the sewing is much, much smoother now. Another successful fix.

Saturday, July 6, 2024

A Little Sprinkle

So one of the upgrades I made this week to my irrigation system was installing a water hammer arrestor. For whatever reason, the hammer has evaded arrest and is still at large. However, while I was poking around the valves this morning I did notice a slight hissing noise that was indicative of a leak, and given that there was no sign of water dripping anywhere it was clear that the leak was going through one of the sprinkler valves.

These are a coaxial diaphragm valve, and the way they work is that the incoming water passes up through the center of the valve and out around the edges. The diaphragm itself holds a small disc with a washer which, in the off state, is pressed down against a seat cutting off the water flow. The pressure behind the valve is maintained by a small bleed port in the middle of the small disc that allows higher pressure water to leak into that chamber, and the large area of the diaphragm ensures that the downward force from the pressure in the chamber exceeds the upward force from the incoming water. To turn the valve on, a second bleed port leading from the chamber into the outlet tube is opened, releasing the pressure in the diaphragm chamber, which allows the disc to lift off of the seat and thus unblock the flow of water.

So let's pop open the valve and see what that looks like.

Making sure to turn the water off first, of course.

So here we can see the valve disc supported by the diaphragm, including the rubber washer that had a bit of grit embedded in it that I cleaned away before taking the photo. On the left side you can see the bleed port that allows the valve to be opened, and in the background you can see where the valve seat is in the center, as well as a white plastic support cone that keeps the water pressure from bursting the diaphragm.

Removing the diaphragm, we can see a small spring which assists the valve in closing, and an adjustable plastic spacer that limits how far the valve is allowed to open. A knob on the top can be wound in or out to control how much water flow goes through the valve. Importantly we can also see the bleed port, which naturally needs to be clean and free of debris.

If the diaphragm is damaged or the rubber washer is worn out and/or hardened, a replacement diaphragm can be installed at this point for about $10 or so.

Once the valve is put back together, we need to get the air out of the diaphragm chamber, and we do that by opening up the bleed screw on the right hand side, and letting it burp out any air bubbles. If this step is skipped, the valve won't operate correctly.

So, after spending 10-15 minutes cleaning crud out of the valves, they're both back in service and there's no sign of any more leaking. I'm also hoping that this might have some effect on the water hammer, but honestly I have no idea at this point. I was really expecting the water hammer arrestor to work.

Thursday, July 4, 2024

The Way The Cookie Crumbles

So my chocolate chip cookies have been working out ok, but one thing I wanted to change was how thin and crispy they were baking up. This is largely due to substituting some of the white flour for buckwheat, which has a lot less structure to it and thus doesn't hold the cookie's shape as much when it's baking.

Thus, this time around I added an extra 20g of flour, and the difference is quite easily noticeable.

It should be pretty obvious to tell which cookie is from the old batch. They're still somewhat far from being food stylist chocolate chip cookies, which I'm pretty sure are actually just shortbread with chocolate chips shoved into them, but that's not really what I'm aiming for anyway. I want them to be crunchy and caramely with that burnt molasses flavour. If I'm going to eat a cookie, it damn well better punch me in the tastebuds with flavour, looks be damned.