Saturday, November 21, 2020

Less Milky

Even though the finish on the sound bar mounts looked not awful in photos, it bugged me looking at them in person. So, not being one to leave well enough alone, I sanded the finish back to bare wood and started over.

This time I began by applying a few coats of gloss oil based poly. This did two things: one, being an oil based finish it worked a lot better to soak in a bit and bring out the "wet wood" colour, and two: being gloss meant it didn't have any matting agents to make the finish cloudy as the layers were built up.

I topped it off with a finish coat of the satin water poly to knock down the shine, and the result is a much, much nicer looking piece.


Definitely much better.

Saturday, November 14, 2020

You Can Never Break The Chain

 So BlackBirb managed to wear through its first chain after just 1000 dusty miles. That dust is basically what did it in; I'd often find myself out on a long ride only to hear the chain start to sing a dry, grinding song of its people due to the dust having stripped away the chain lube, even though I'd just given it a fresh coat before heading out.

But still, 1000 miles isn't bad for a mountain bike chain. It's also not amazing, so for the new chain I grabbed the SRAM Eagle XX1 chain, which has been tested to last a really absurdly long time compared to most other chains on the market. And it damn well better, given it was $80 vs maybe $25 for the chains I usually get.

There's a couple colour options at this price level, because of course there are. Gold, copper, oil-slick or black. I was tempted to go with the oil-slick because it's needlessly blingy, but BlackBirb has a nice murdered out black/red colour scheme going and I didn't want to throw too much chaos into that, so I went for the black instead.

Oddly all four chain colours come with an oil-slick coloured quick link. So I get a little hint of chaos, just enough to keep things spicy. As a bonus, I managed to not accidentally install the quick link backwards this time, like I did on Purple Haze (it doesn't actually make much difference, it's just a little embarrassing).

Thursday, November 12, 2020

Playing With My Wood

When it came time to not use the god-awful built-in speakers on the 42-inch TV I bought shortly after moving to California, I made the obvious choice and got a 2.1 sound bar and sub combo. This worked quite well and the audio quality was pretty nice, but since I didn't opt for wall-mounting the TV, placing the sound bar below the screen meant that it interfered with with the TV's stand in an annoying way.

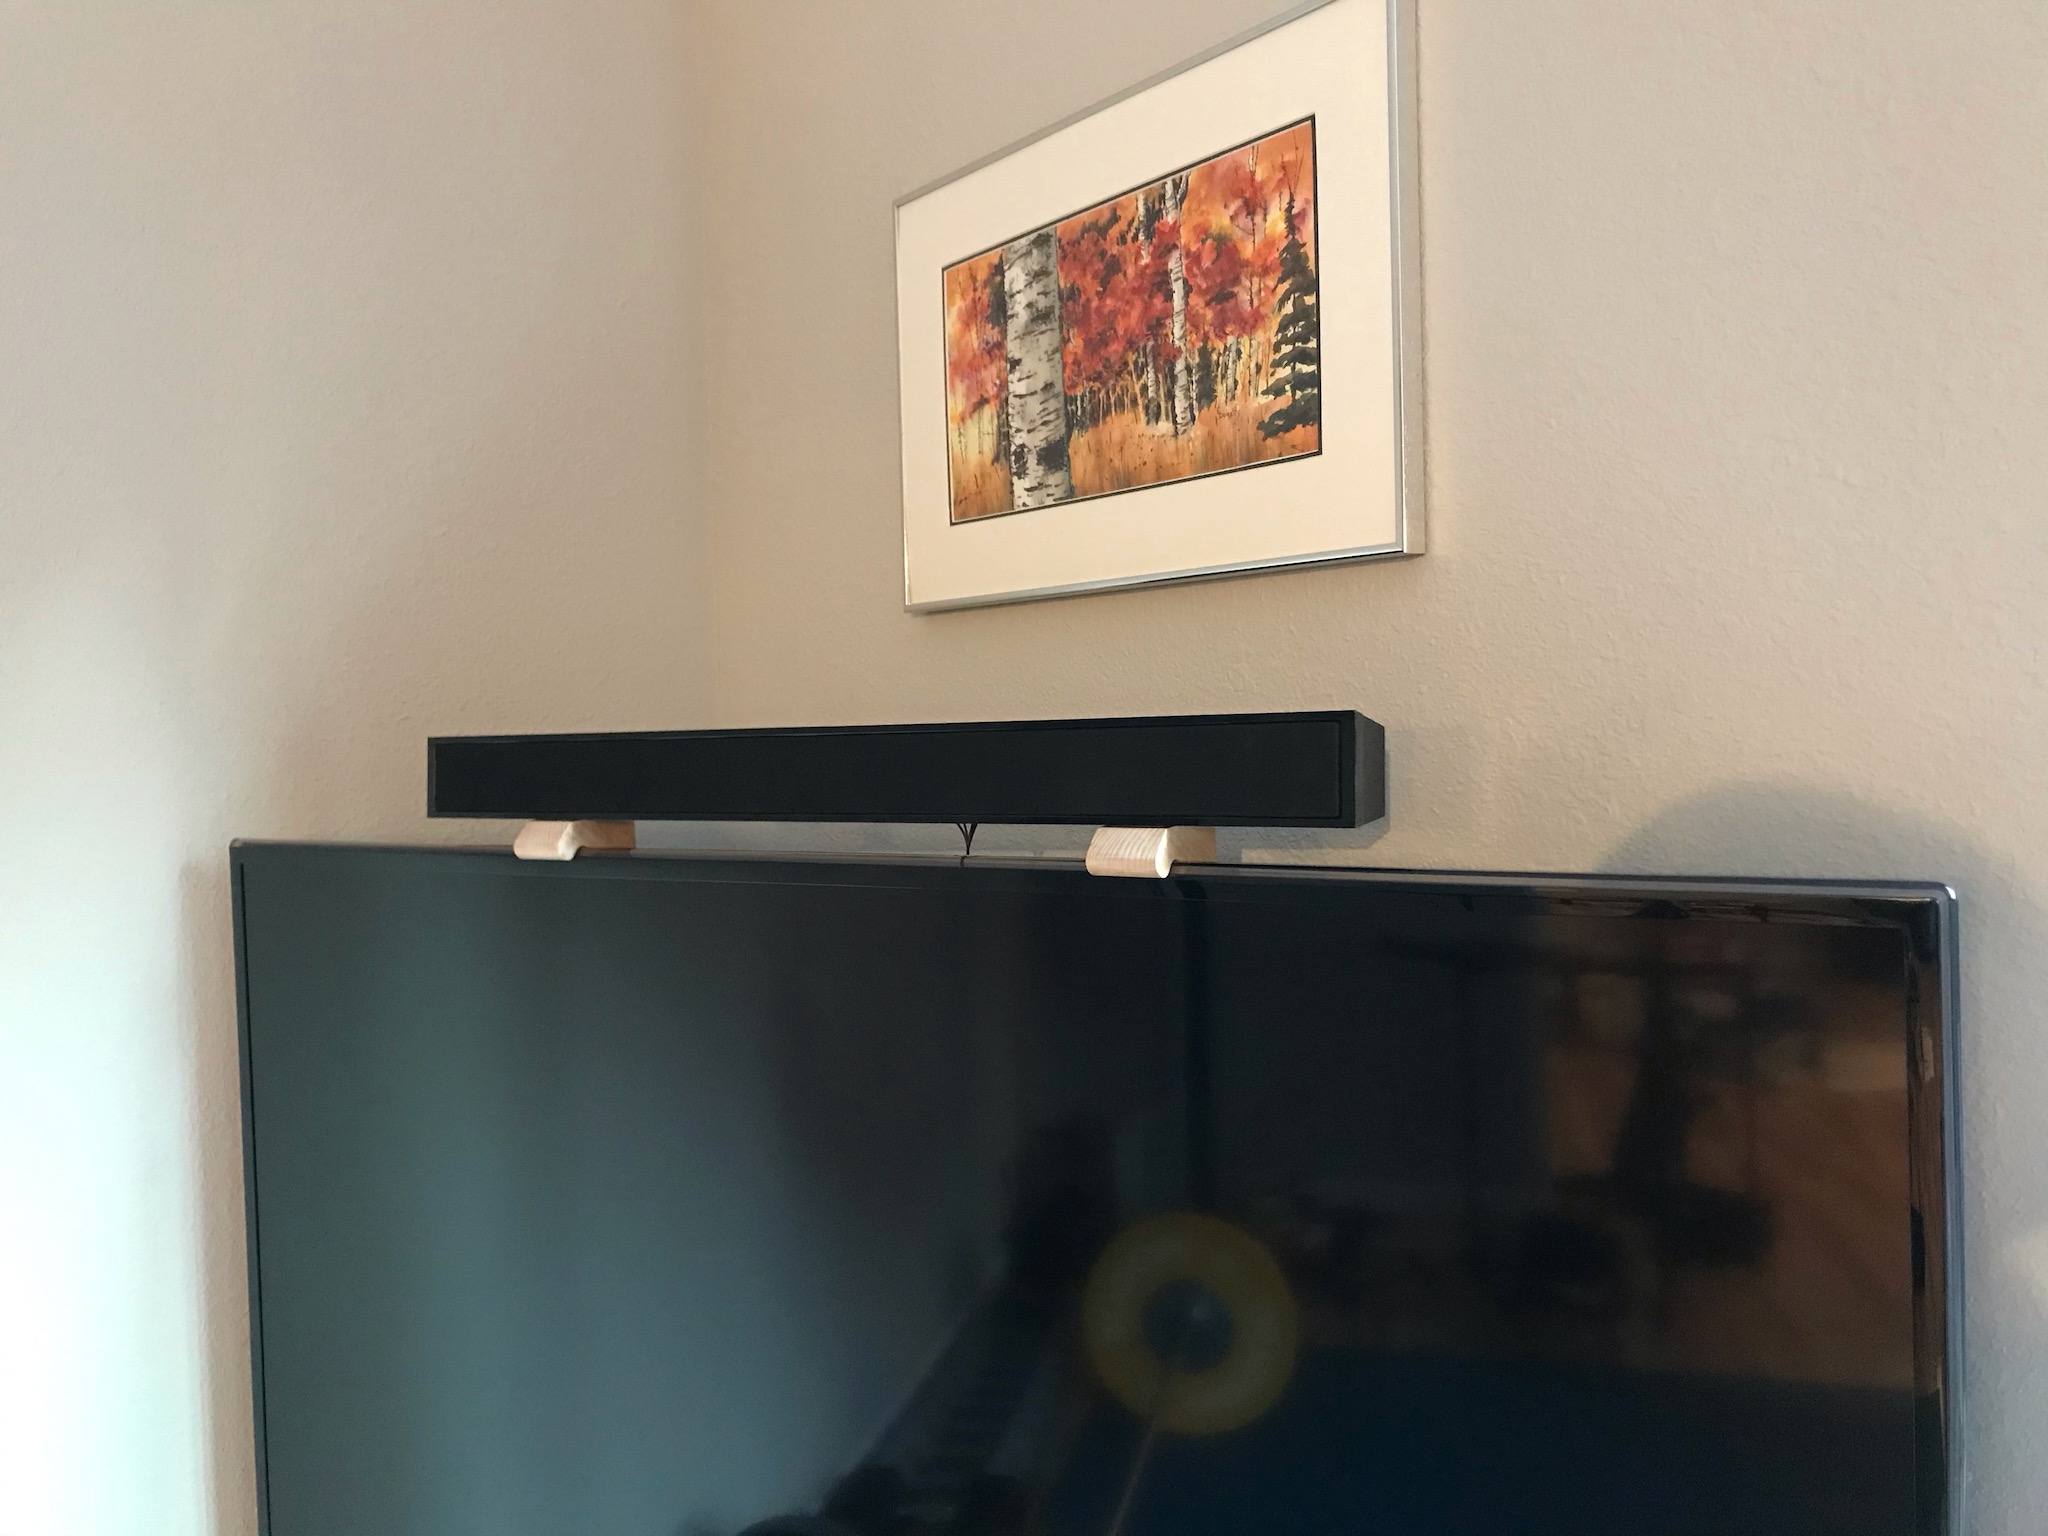
So fast-forward to when I got my 3D printer, and I solved the problem by designing and printing a pair of brackets that sat on top of the screen to hold up my sound bar there. Neato. Problem solved.

But now I have found myself replacing my 42-inch set with a 65-inch panel, and the profile of the top of the screen is different enough between them that the old bracket won't work on the new TV. I had considered modeling and printing a new set of mounts, but since I now have a workshop-in-the-making I decided instead to carve a set of mounts out of wood.

Through a highly technical CAD modeling process (cardboard-aided design), I traced out the profile of the top of the panel and transferred the shape to an off-cut of european beech I sliced off of one of the planks for my workbench top.

I then fired up the band saw to cut it out and somehow managed to destroy a blade while setting the tension. Well, it's a good thing I have a spare I guess.

Anyway, I made a rough cut first to separate the two pieces, then stacked them on top of each other with some double-stick tape and made the finish cut that way to ensure that they were as close to identical as anything gets in woodworking.

Some finishing with some rasps, files, a card scraper and some sand paper smoothed things out, and then it was time to lay on the finish.

I went with a satin water poly, since I happened to have a tub of it, and unfortunately ran into some clouding problems. Apparently this is a thing that can happen with water poly, and while there's a few different suggestions sprinkled around the internet for how to avoid it, I'm not sure any of them strike me as particularly scientific. Either way, I pressed on with the finishing and decided that the finish being a bit too blonde and milky wasn't going to be the end of the world. However, in future, I'll probably pick a different finish for european beech to bring out more color in the wood.

With an oil-based finish it should turn a nice peach color rather than just looking like generic pale wood. It's also possible that the color might just darken with age after a while, I suppose I'll find out eventually.

With that taken care of, it was time to put the brackets to use.


Very nice.

Monday, November 9, 2020

Feeling Frosty

 Well I suppose I got my furnace fixed up just in time, as I woke up this morning to a bit of a frigid scene outside!


But it's cozy and warm inside, and that's what matters.

Saturday, November 7, 2020

Embiggening

 So Tyler dropped by today to borrow the Pedovan in order to bring home a new fake xmas tree and a shiny new OLED TV. In payment for this vital service he dropped off his old TV, which, at 65 inches, is a fair upgrade from my 42 inch set that I've been rocking since, I dunno, sometime in 2012 or 2013.

The perspective makes it look less dramatic, but it is in fact a decent size upgrade.

Crawling In My Crawlspace

 So today I finally decided to get around to putting in an ethernet jack next to where my computers are, rather than relying on wifi for connecting to the wild world of the internet. Not that wifi has let me down at all, it's been rock solid reliable and very fast, but nothing beats a hard line.

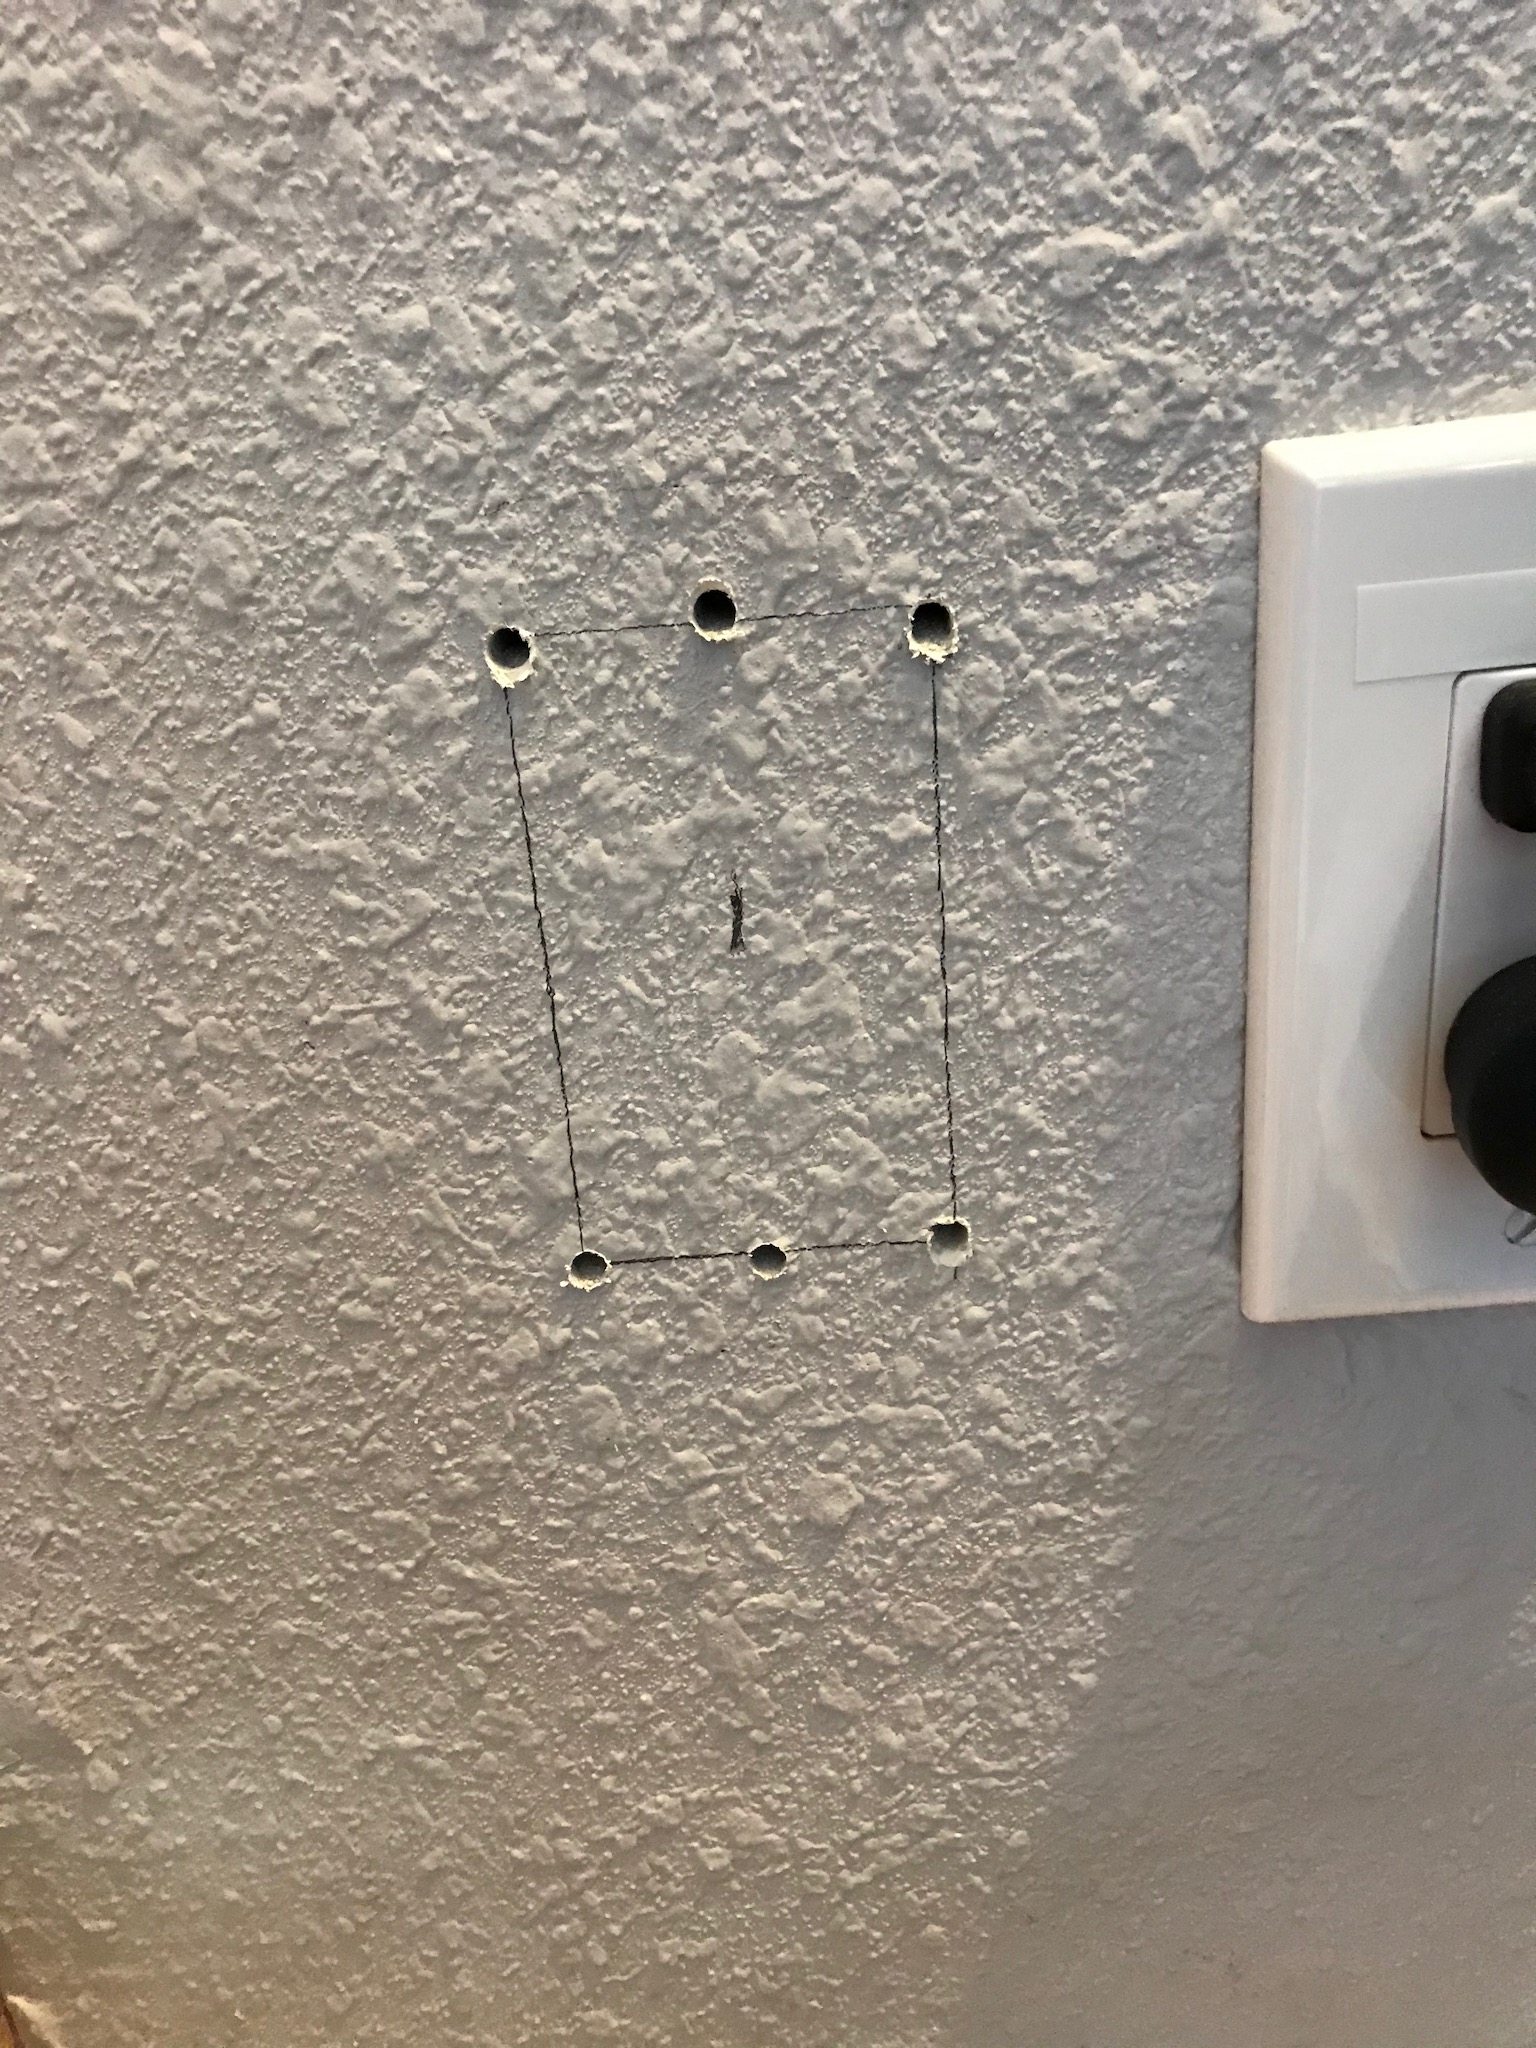
Step one, mark out the location for the jack.

I used the location of a light switch on the far side of the wall to make sure I wouldn't end up cutting a hole right into the middle of a stud, and that plan ended up turning out quite well.

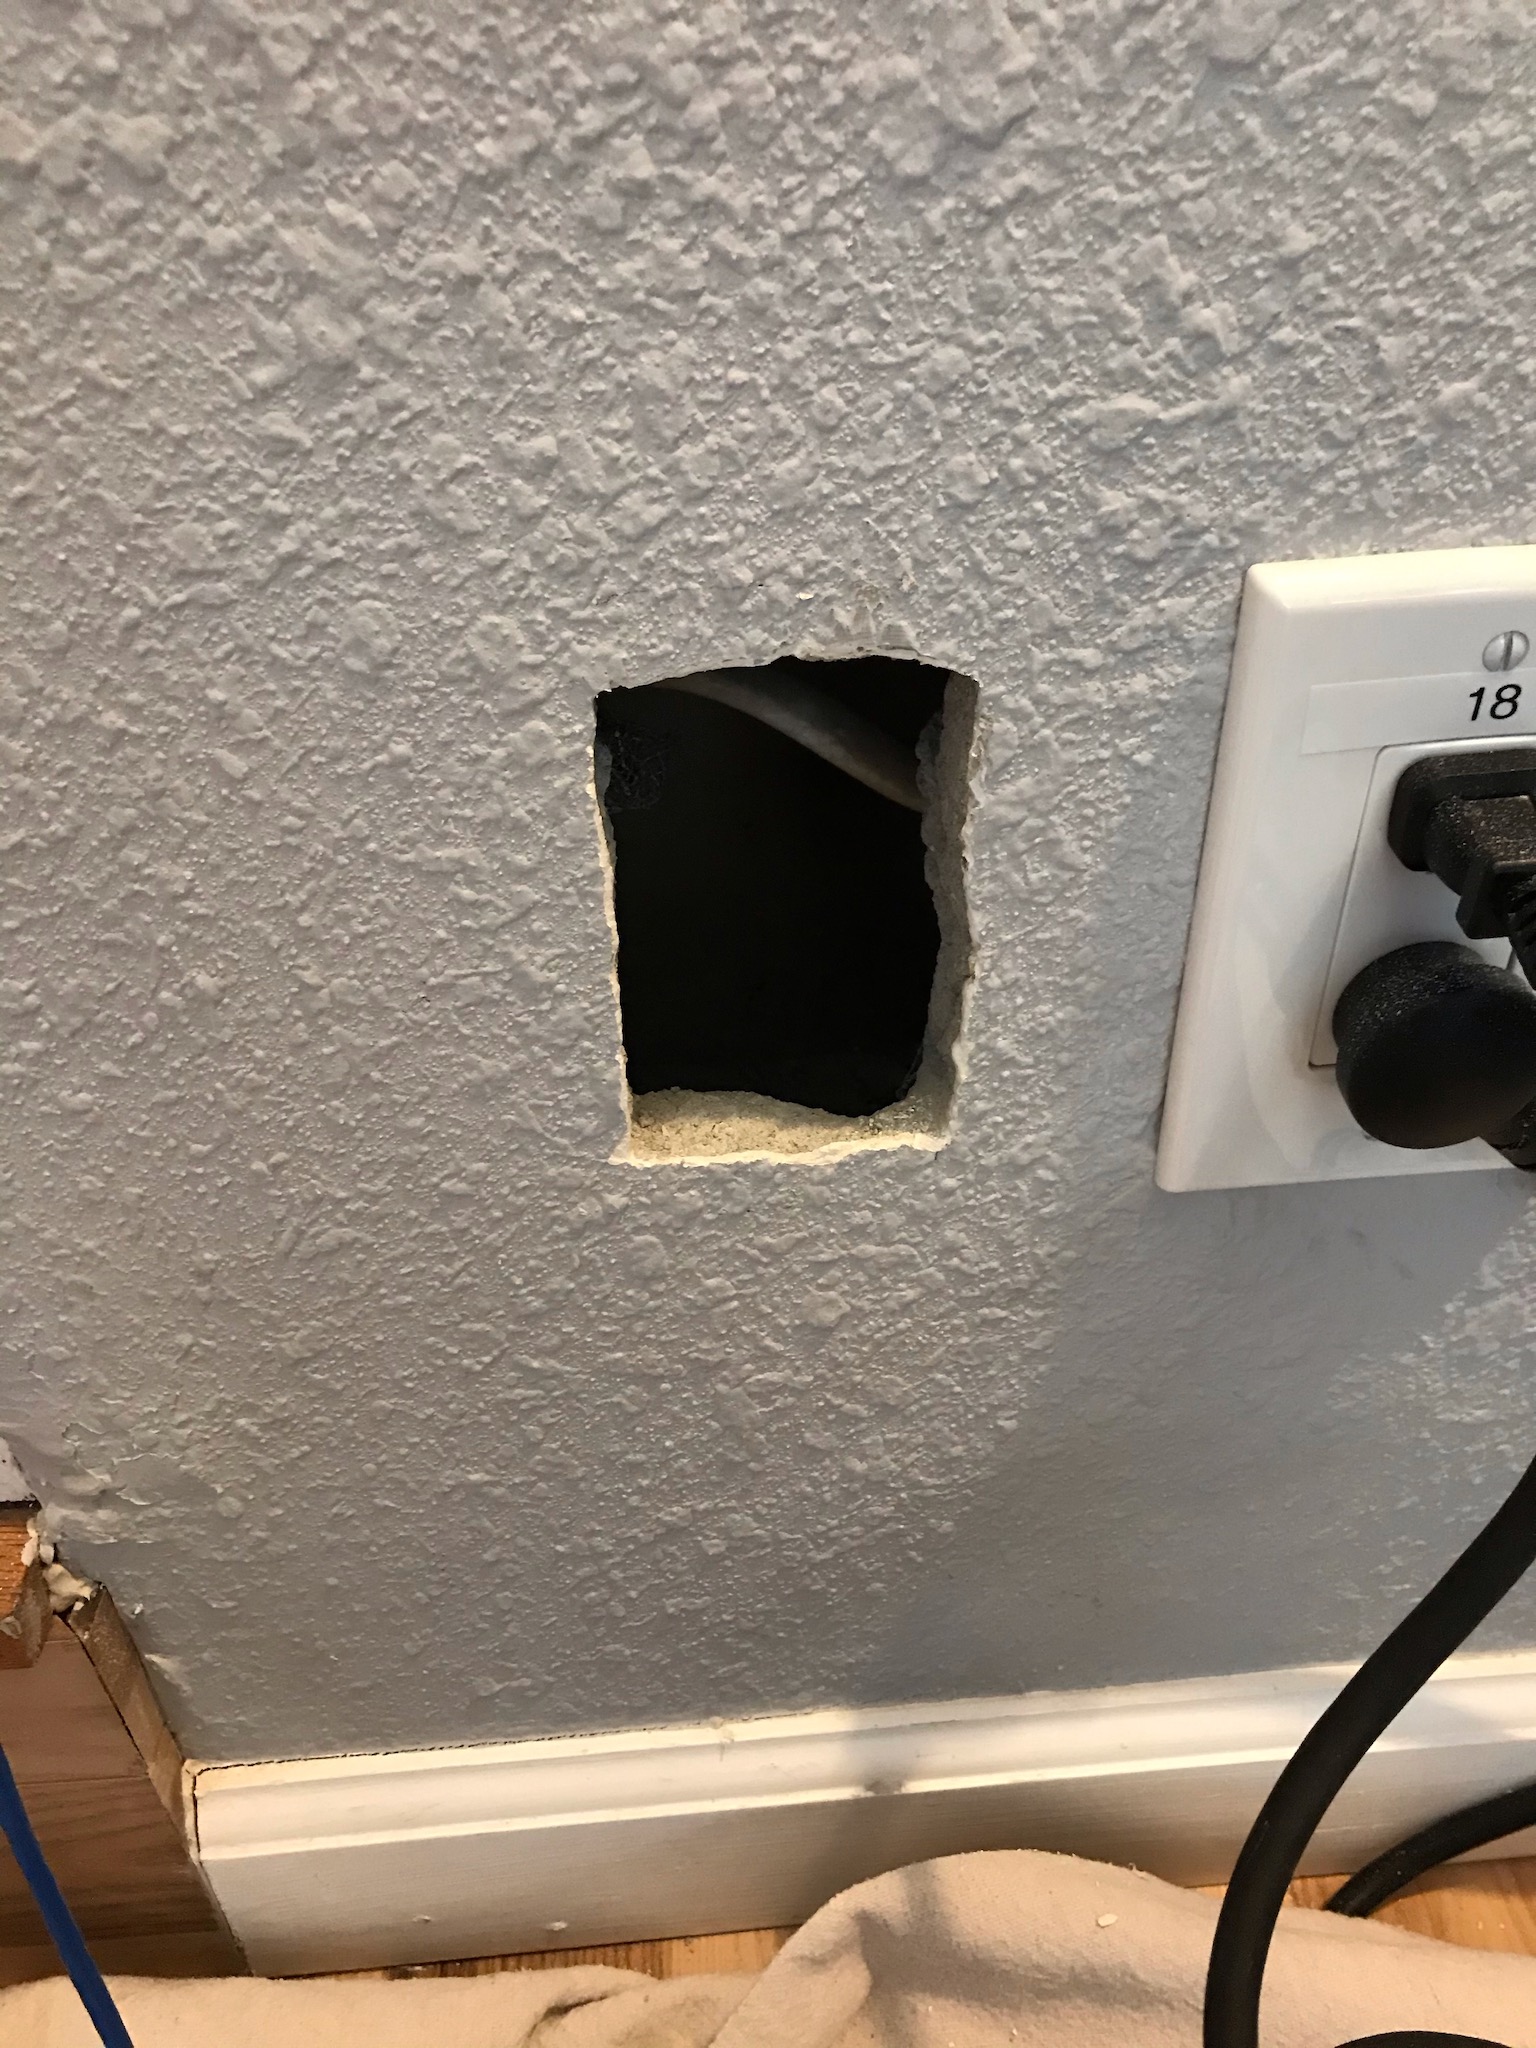
Now, despite the fact that this wall looks an awful lot like an interior wall, it is in fact an exterior wall. Or at least it was up until the addition was built. For whatever reason the builders decided to not take down the exterior stucco and instead just skim-coated and textured over top of it. That meant I had to somehow cut a square hole through over an inch of stucco.

Boschammer to the rescue.


I was able to use my rotary hammer to basically perforate an outline of the hole I needed for the low voltage drywall ring, and the remaining plug of stucco in the middle luckily just popped right out without any fuss, leaving a remarkably clean hole. Perhaps not as clean and accurate as I would have gotten using a drywall saw in drywall, but the situation did not allow for that.

Now that I had a hole in the wall, I needed a hole in the stud bay. Curiously, one was already provided for me.

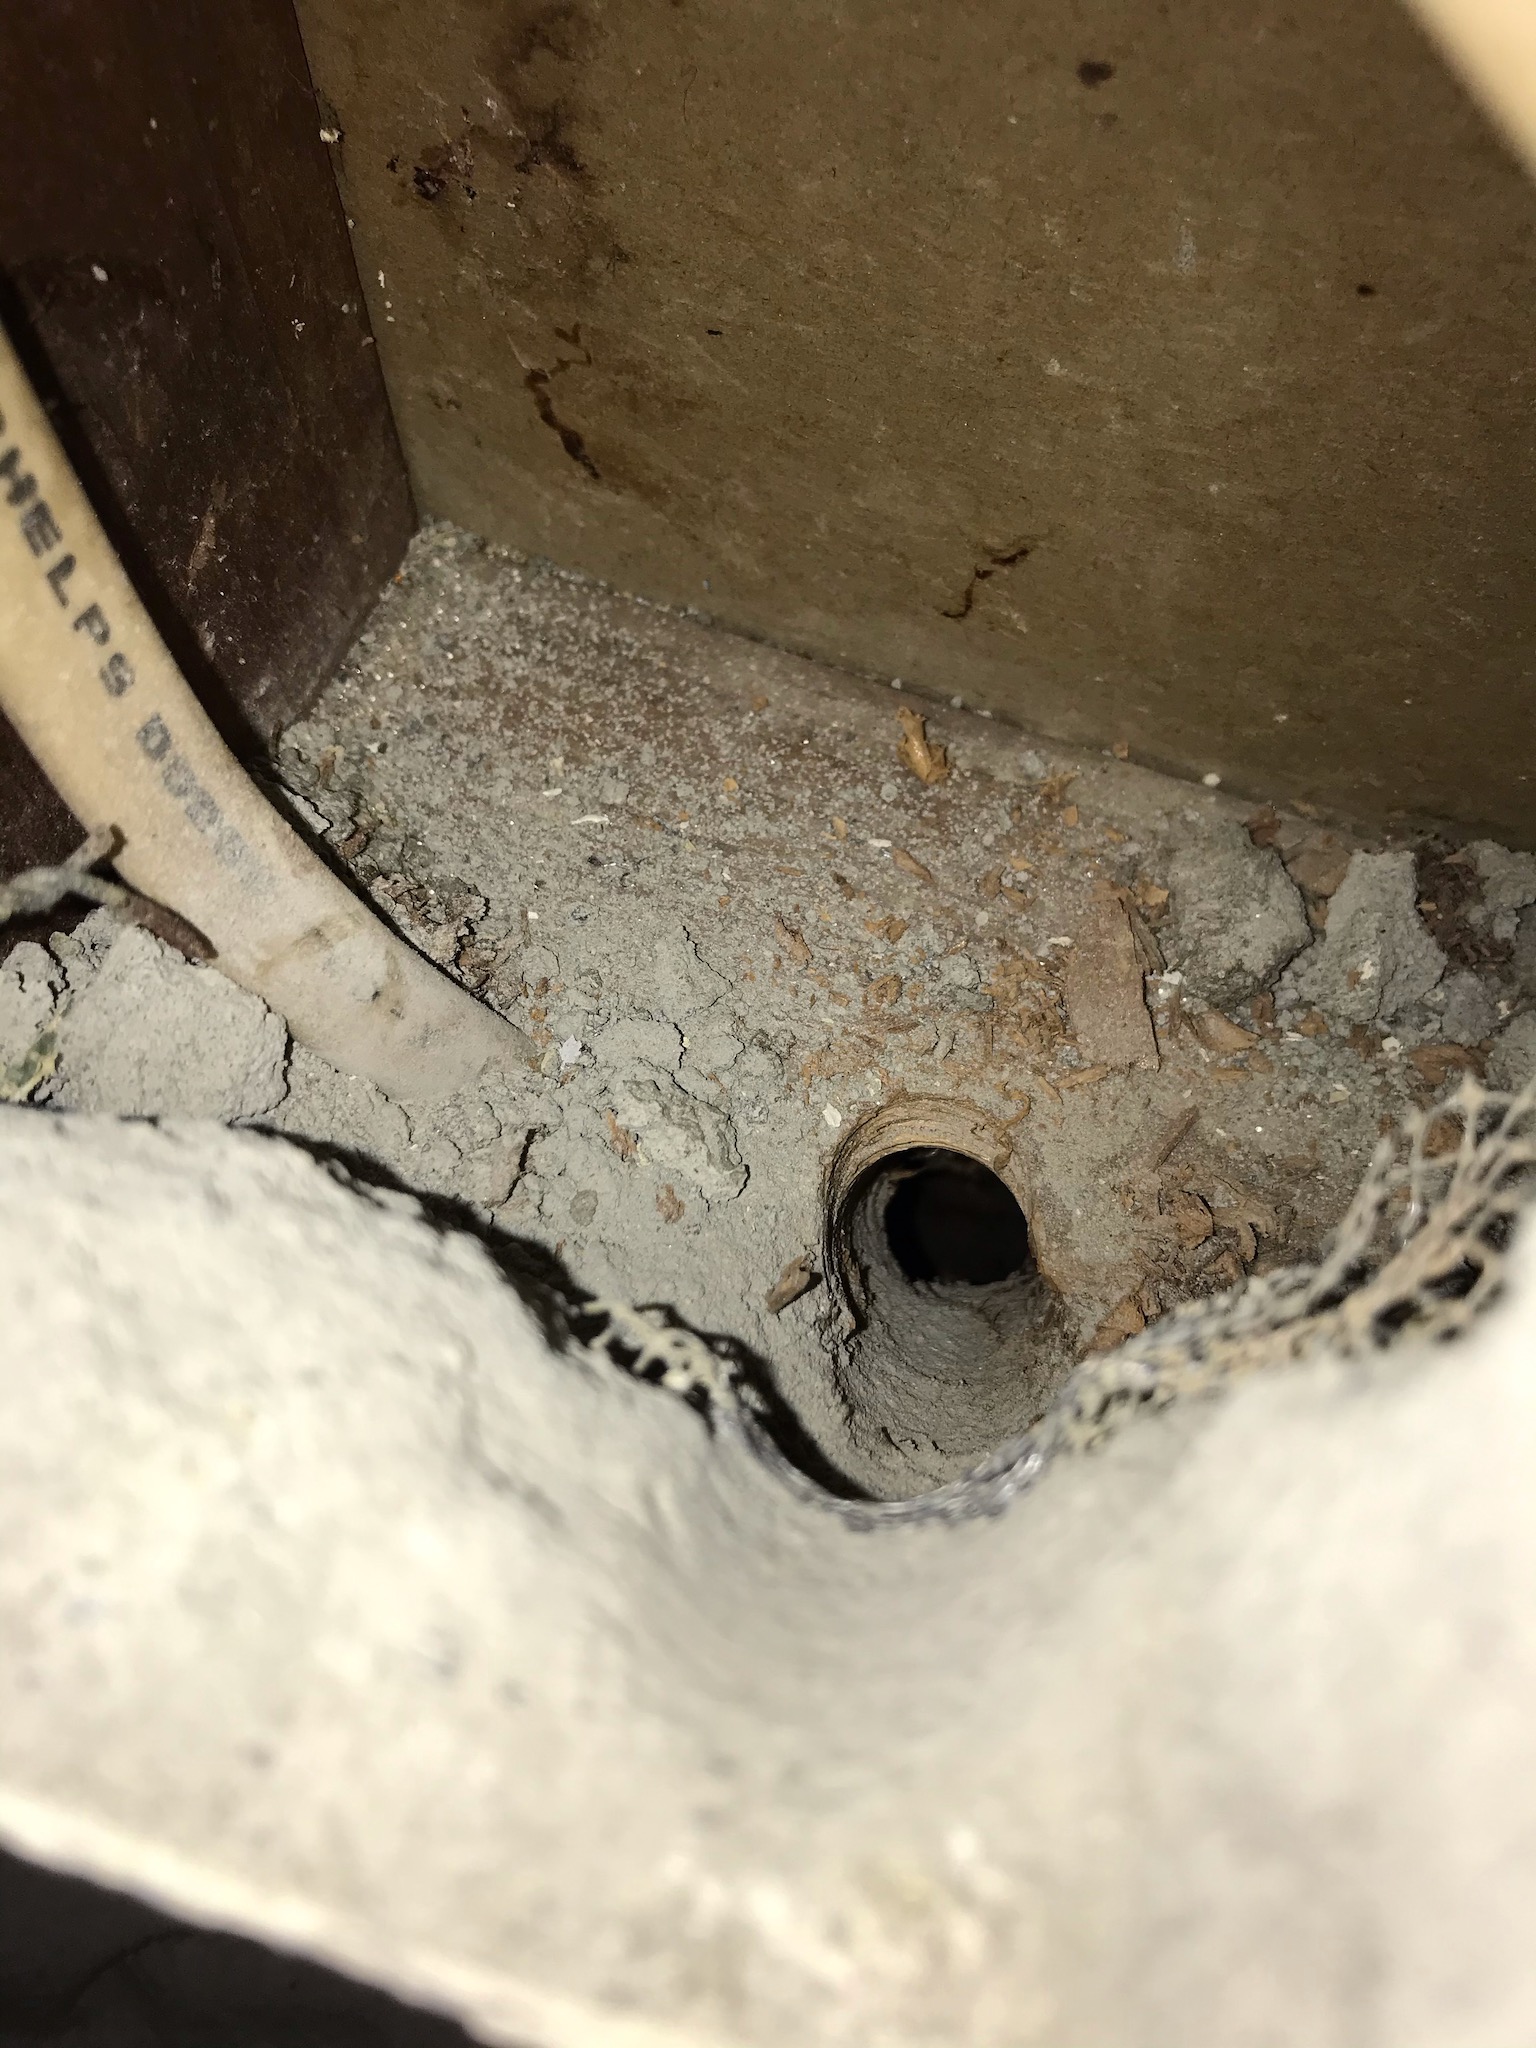
This hole is a bit of a mystery to me. It seemed to be positioned and angled almost exactly to supply a box right where I had cut into the wall. But, oddly, the cavity it opened out into didn't seem to lead into the crawlspace, and instead appeared to terminate between two rim joists, at least as far as I could see with my borescope. So, that wasn't too useful. Luckily I was able to drill a second hole a bit further back, and that one did break through into the crawl space.

Poking this hole through the stucco ended up dislodging quite a bit of material, and for some reason there was also an odd metal bracket at the bottom of the stud bay. Curious.


So all that was left was to go crawl under the house and fish the wires up through the new hole I drilled. Easy task, piece of cake.

Except, not quite.

You see, when I bought the house it was noted that the crawlspace was not the code-specified 18 inches minimum height between the dirt and the floor beams. In fact it was more like 12 inches, or less, under the beams, and where the ductwork went across it was more like, well, zero.

I did my level best to try to find a way to crawl around and under it all, but in the end I had to simply give up and crawl back out without making it over to the far corner where I needed to run the wires. Very sad. I'll need to figure out an alternate plan for this later.

Of course, I couldn't just leave a hole in my wall, so I popped the drywall ring in place, adding some construction adhesive to stick it to the stucco since the stucco was too thick for the usual plastic tabs to grab onto.

Then I topped things off with the cover plate and keystone jacks.

So it at least looks nice and finished. But it ain't.

An interesting side-note: The outlet right beside where I put the new jacks actually lands directly overtop of a stud. Whoever put it in decided to chisel out a bit of the stud to fit the box in place, which is a curious way of doing things. But, I suppose it worked, so yay?

Anyway, I have a few different options on how to proceed from here. I could try digging out a trench in my crawlspace to allow me access past the heating ducts, which would be an awful lot of unpleasant work. I could also see if I could remove some trim from an adjoining wall, drill through the rim joist, and see if I could fish the wires in from that angle without having to go into the crawl space. I could maybe see about coming down into the stud bay from the attic, though with the low roof angle it's really, really tight along that wall.

I've got options, I just need to figure out which options suit me best.

Bamboozled No More

 So, I had been quite sure that the source of my furnace problems was the high limit switch. I checked the voltage downstream of the high limit switch when the failure was occurring, and I saw only a small trickle of electrons. I pulled the connector off the upstream side of the high limit switch and measured a full 24vac. So it's the high limit switch that's gone wrong, right?

Wrong. After putting in the new high limit switch, things appeared to be working, but later on I got the same symptoms showing up again, and this time I did a big more debugging. I found that when the furnace was in fault mode that, in fact, there was an unusually low voltage (on the order of 2 or 3vac) on the entire loop, and disconnecting any part of the loop resulted in full 24vac on one side and 0v on the other.

There's only three things that could cause this to happen.

  1. The furnace controller board is bad and has a high resistance in the supply for the high limit switch loop.
  2. Somewhere in the loop there's an intermittent short to ground, somewhere upstream of the furthest-upstream connector I could probe.
  3. The furnace controller board is bad and has a low resistance in the sense line for the high limit switch loop.
Given that 2/3 of the possibilities were a bad furnace controller board, I popped onto Amazon and found an exact replacement for about $100. Naturally I slid right into Jeff Bezos's DMs and had him send one over.

A few odd shipping delays in Texas later, and I had a shiny new controller board in hand.

Swapping it out was a pretty straightforward matter of unplugging the old one and plugging in the new one, and once that was taken care of I fired up the furnace and, so far, everything seems to be working. Let's hope it stays that way this time.

While I'm waiting to see if the furnace dies again, have some shots of the old furnace controller, showing some rather suspicious heat staining around some resistors.


A little suspicious looking if you ask me.