Well I suppose I got my furnace fixed up just in time, as I woke up this morning to a bit of a frigid scene outside!


But it's cozy and warm inside, and that's what matters.
Well I suppose I got my furnace fixed up just in time, as I woke up this morning to a bit of a frigid scene outside!
But it's cozy and warm inside, and that's what matters.
So Tyler dropped by today to borrow the Pedovan in order to bring home a new fake xmas tree and a shiny new OLED TV. In payment for this vital service he dropped off his old TV, which, at 65 inches, is a fair upgrade from my 42 inch set that I've been rocking since, I dunno, sometime in 2012 or 2013.

The perspective makes it look less dramatic, but it is in fact a decent size upgrade.
So today I finally decided to get around to putting in an ethernet jack next to where my computers are, rather than relying on wifi for connecting to the wild world of the internet. Not that wifi has let me down at all, it's been rock solid reliable and very fast, but nothing beats a hard line.
Step one, mark out the location for the jack.

I used the location of a light switch on the far side of the wall to make sure I wouldn't end up cutting a hole right into the middle of a stud, and that plan ended up turning out quite well.
Now, despite the fact that this wall looks an awful lot like an interior wall, it is in fact an exterior wall. Or at least it was up until the addition was built. For whatever reason the builders decided to not take down the exterior stucco and instead just skim-coated and textured over top of it. That meant I had to somehow cut a square hole through over an inch of stucco.
Boschammer to the rescue.
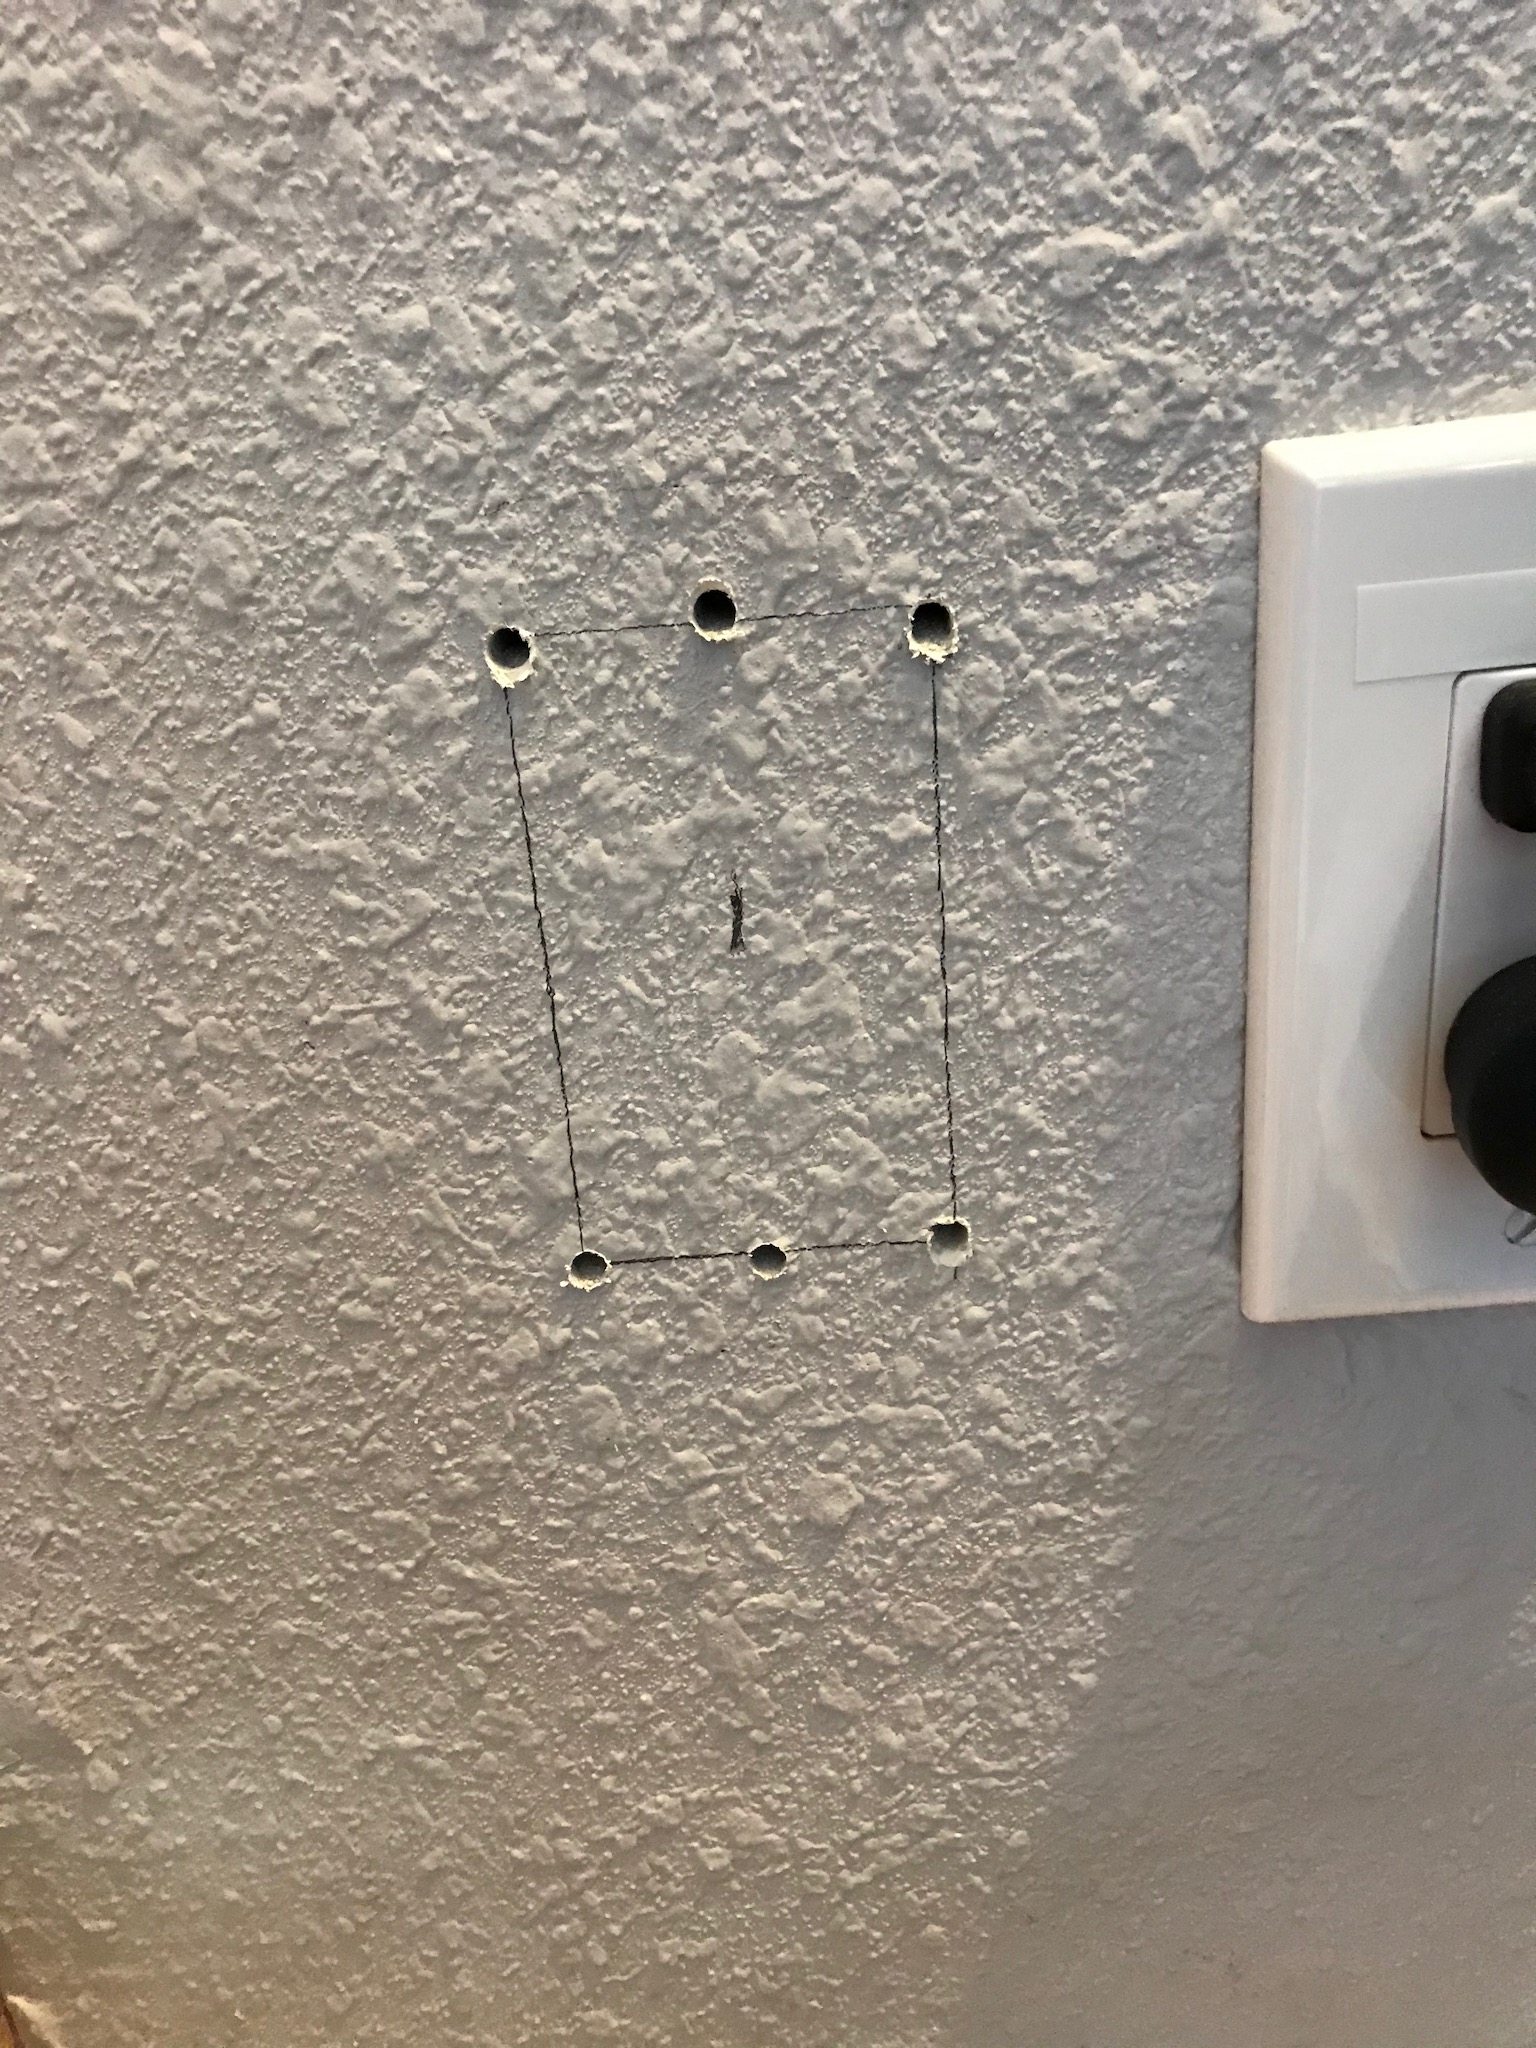
I was able to use my rotary hammer to basically perforate an outline of the hole I needed for the low voltage drywall ring, and the remaining plug of stucco in the middle luckily just popped right out without any fuss, leaving a remarkably clean hole. Perhaps not as clean and accurate as I would have gotten using a drywall saw in drywall, but the situation did not allow for that.
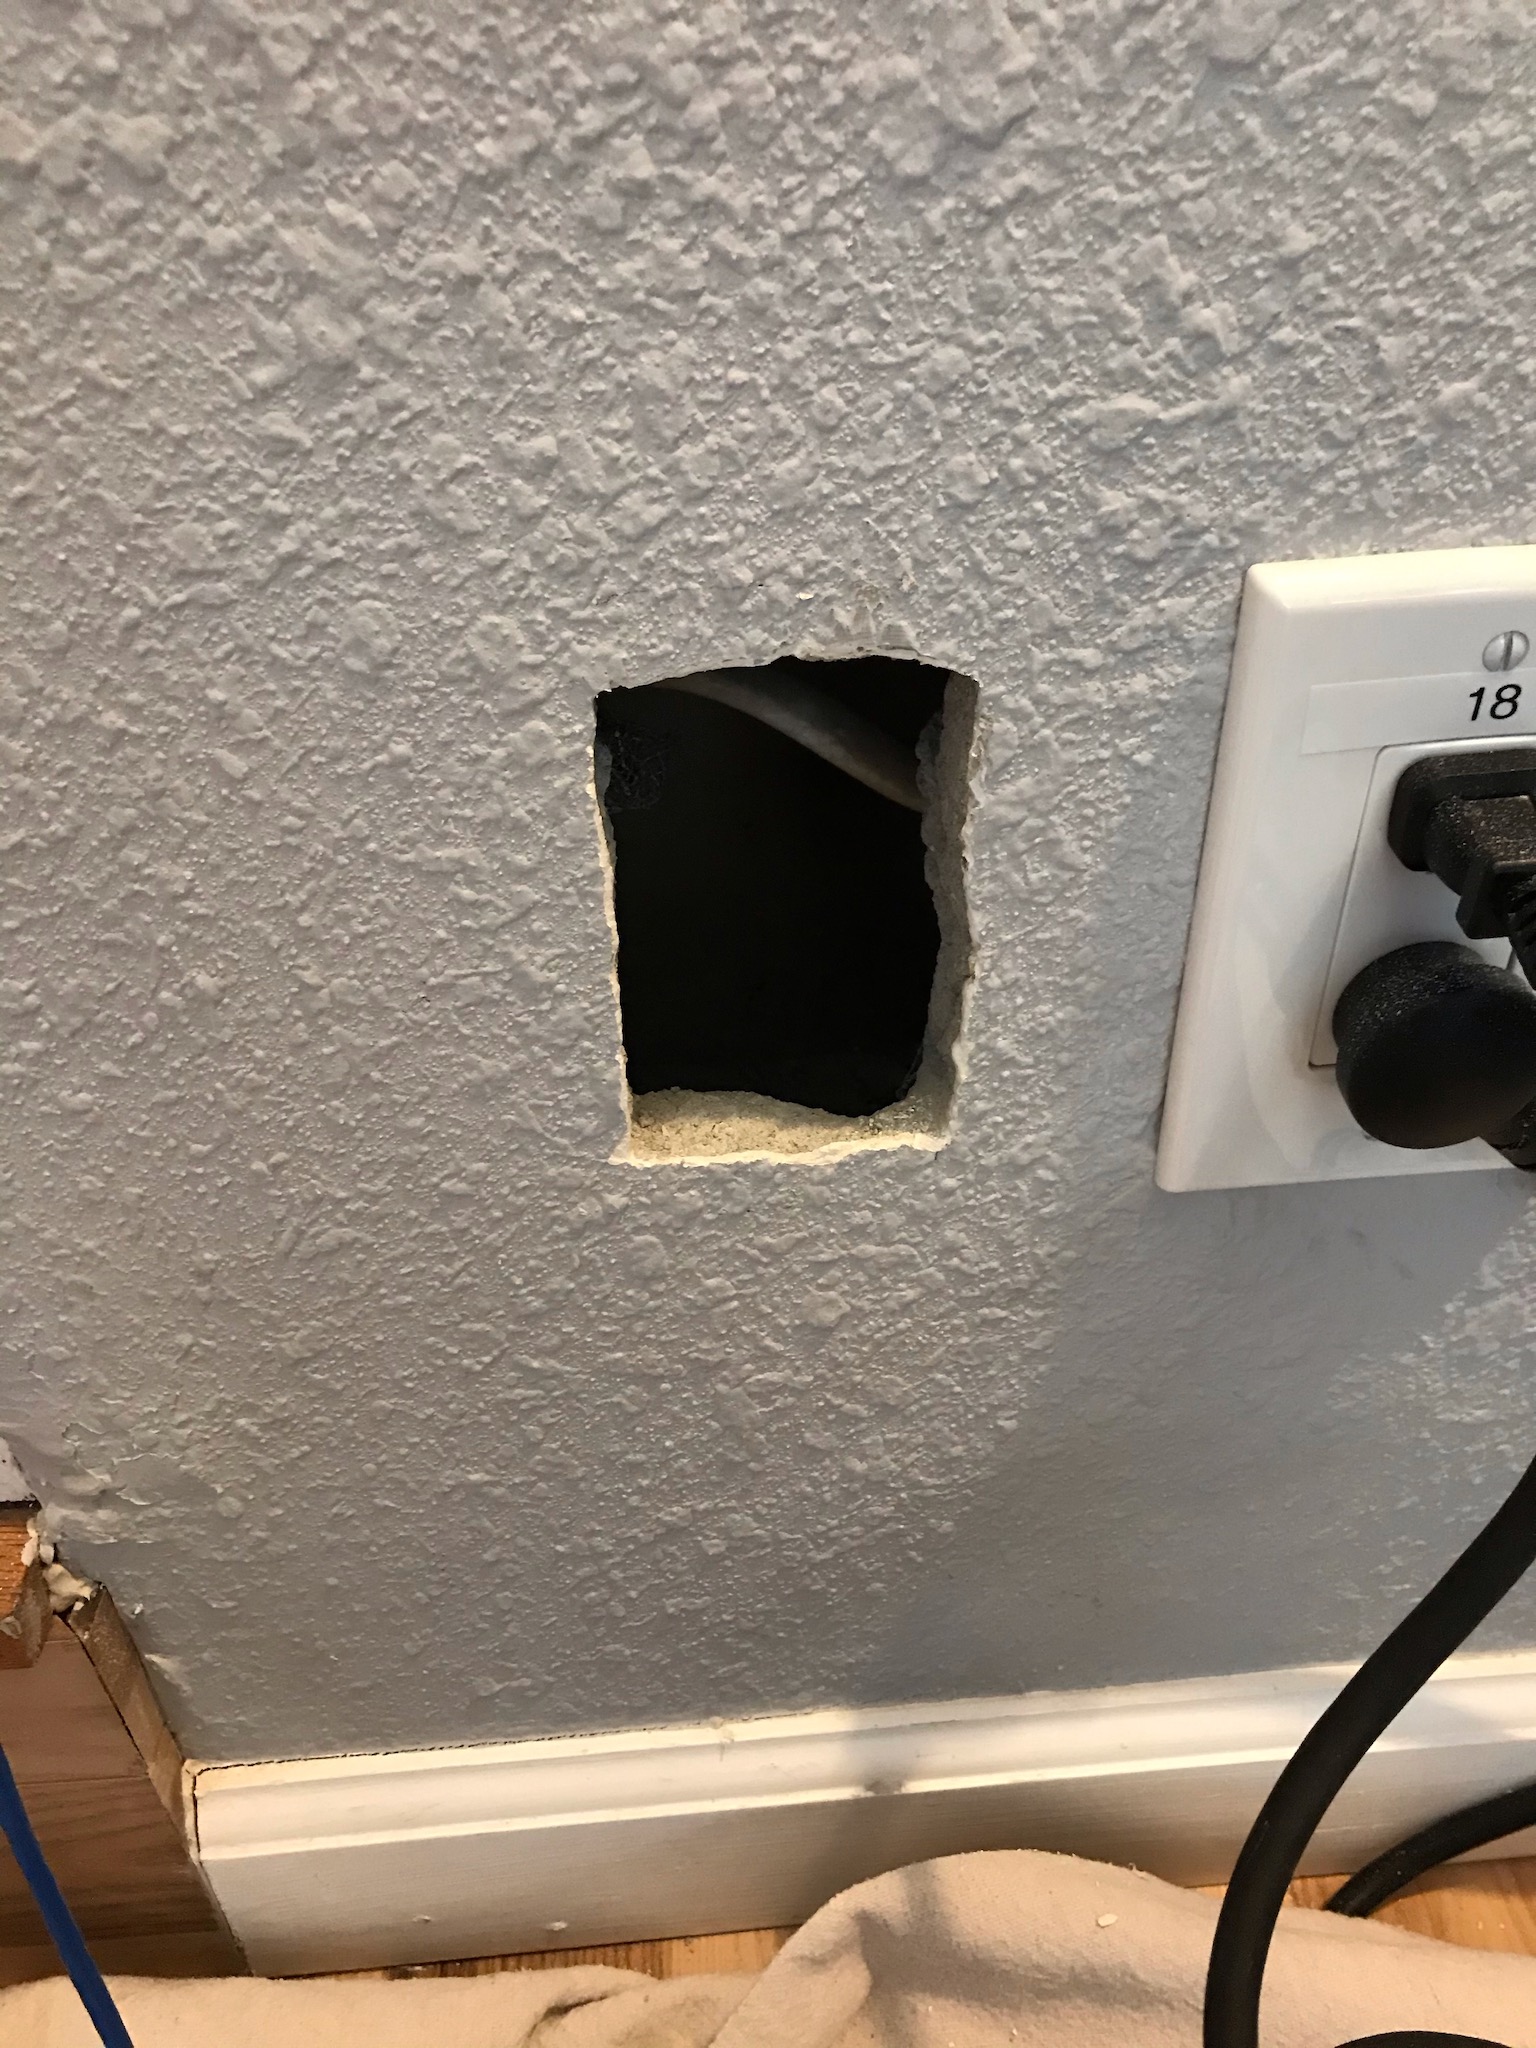
Now that I had a hole in the wall, I needed a hole in the stud bay. Curiously, one was already provided for me.
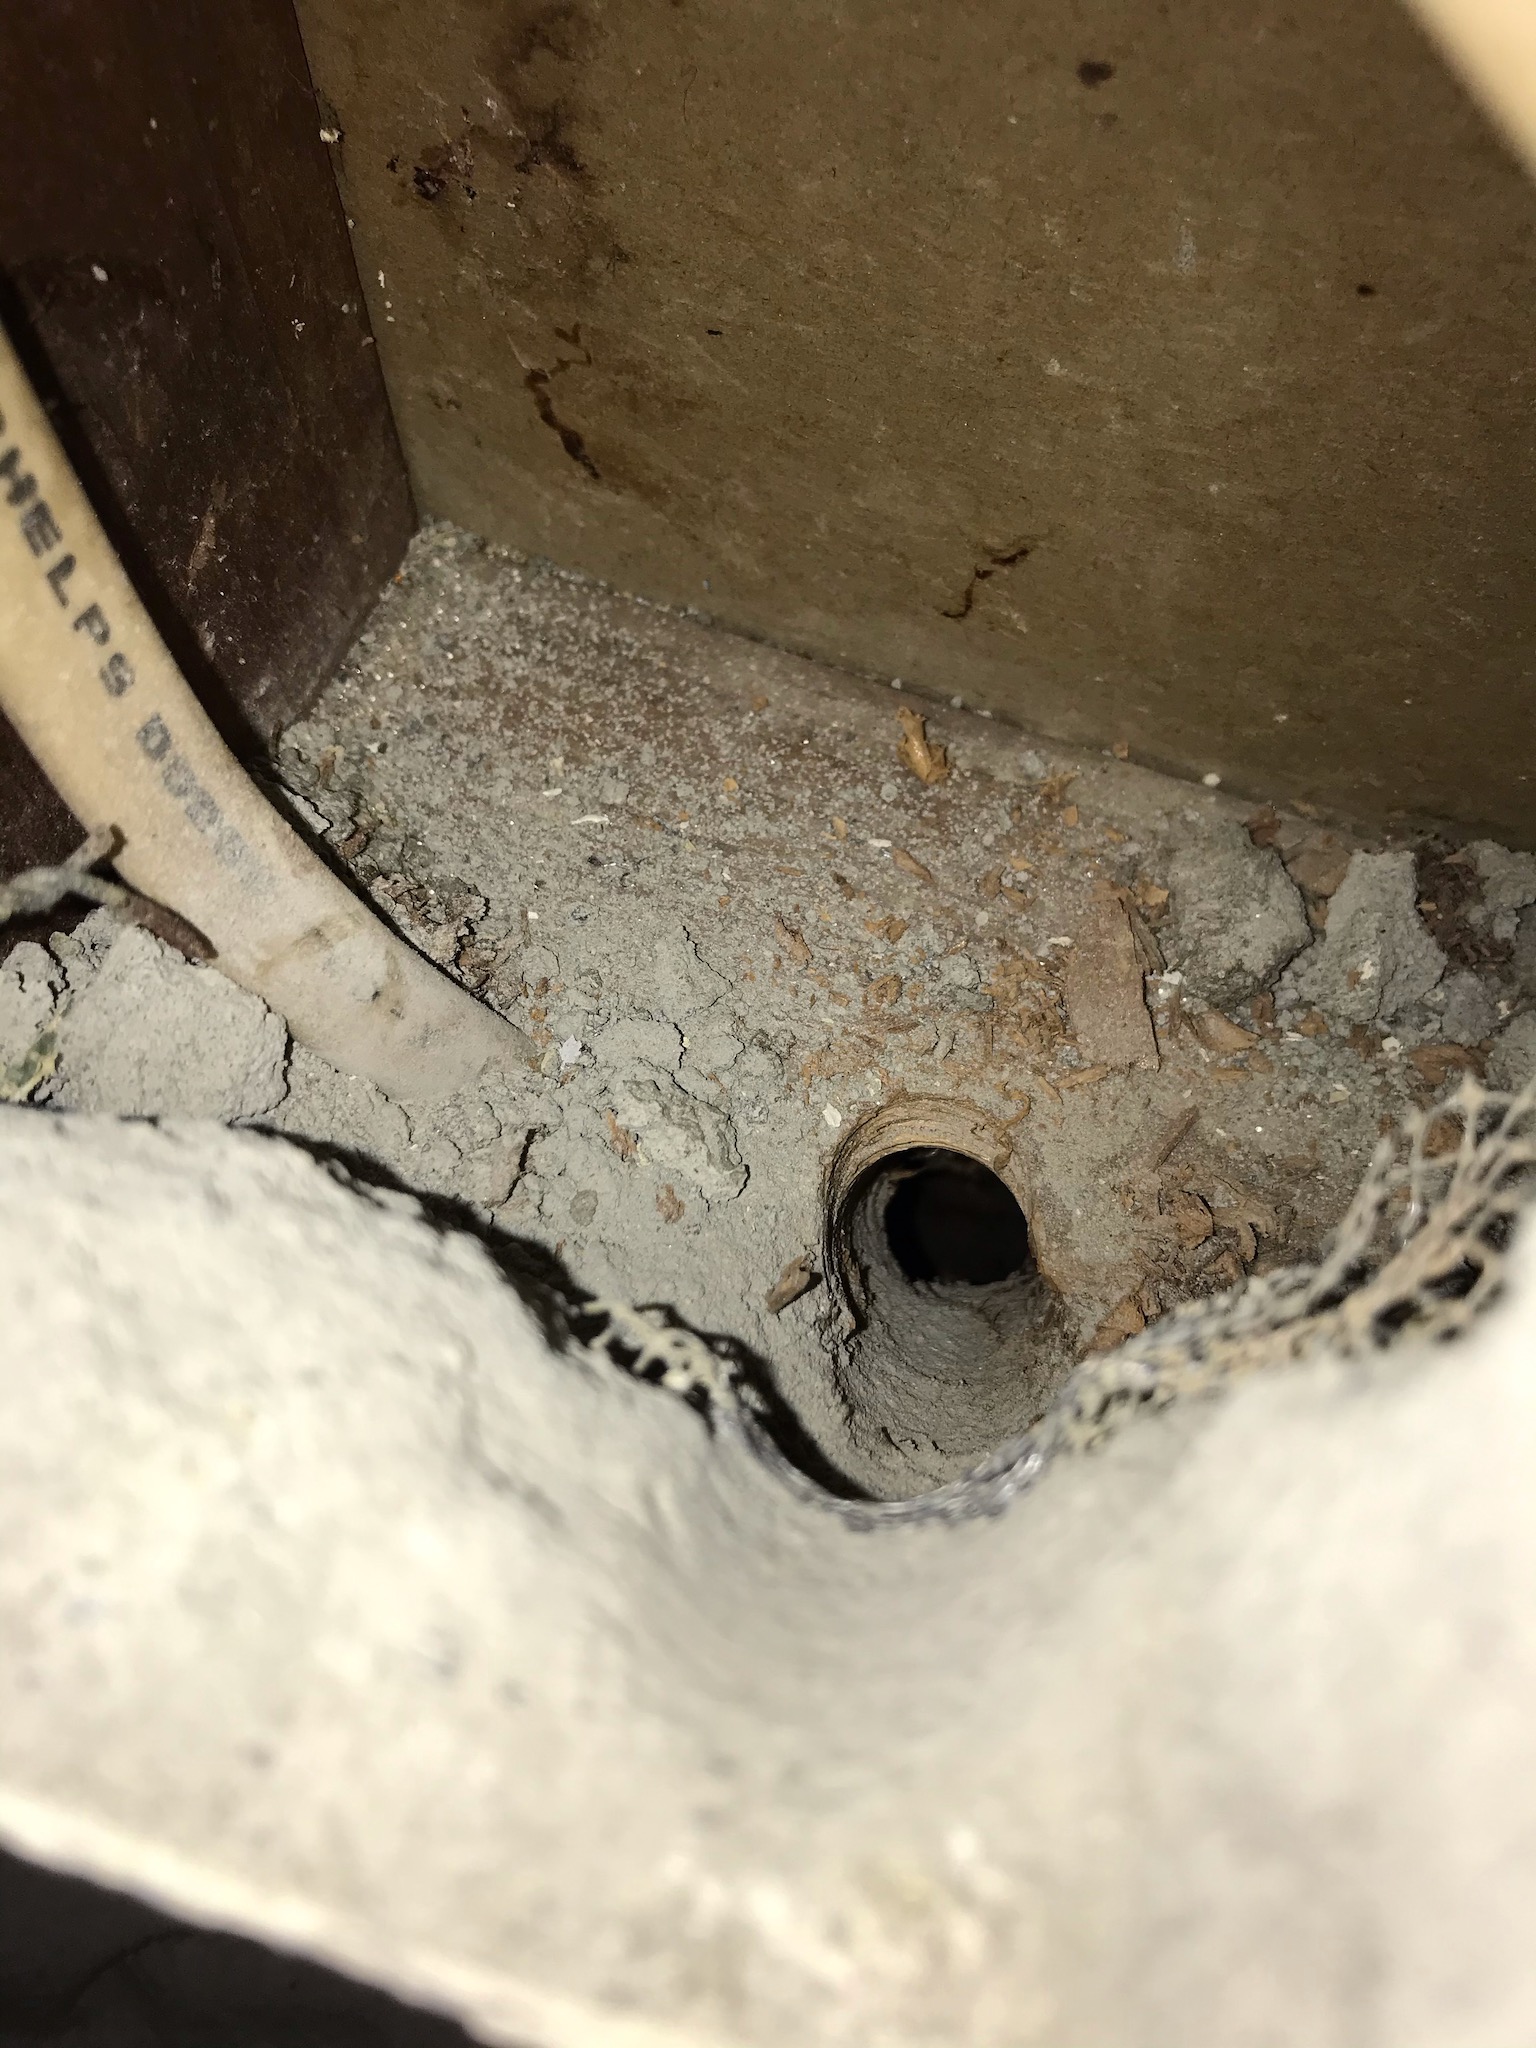
This hole is a bit of a mystery to me. It seemed to be positioned and angled almost exactly to supply a box right where I had cut into the wall. But, oddly, the cavity it opened out into didn't seem to lead into the crawlspace, and instead appeared to terminate between two rim joists, at least as far as I could see with my borescope. So, that wasn't too useful. Luckily I was able to drill a second hole a bit further back, and that one did break through into the crawl space.
Poking this hole through the stucco ended up dislodging quite a bit of material, and for some reason there was also an odd metal bracket at the bottom of the stud bay. Curious.


So all that was left was to go crawl under the house and fish the wires up through the new hole I drilled. Easy task, piece of cake.
Except, not quite.
You see, when I bought the house it was noted that the crawlspace was not the code-specified 18 inches minimum height between the dirt and the floor beams. In fact it was more like 12 inches, or less, under the beams, and where the ductwork went across it was more like, well, zero.
I did my level best to try to find a way to crawl around and under it all, but in the end I had to simply give up and crawl back out without making it over to the far corner where I needed to run the wires. Very sad. I'll need to figure out an alternate plan for this later.
Of course, I couldn't just leave a hole in my wall, so I popped the drywall ring in place, adding some construction adhesive to stick it to the stucco since the stucco was too thick for the usual plastic tabs to grab onto.

Then I topped things off with the cover plate and keystone jacks.

So it at least looks nice and finished. But it ain't.
An interesting side-note: The outlet right beside where I put the new jacks actually lands directly overtop of a stud. Whoever put it in decided to chisel out a bit of the stud to fit the box in place, which is a curious way of doing things. But, I suppose it worked, so yay?
Anyway, I have a few different options on how to proceed from here. I could try digging out a trench in my crawlspace to allow me access past the heating ducts, which would be an awful lot of unpleasant work. I could also see if I could remove some trim from an adjoining wall, drill through the rim joist, and see if I could fish the wires in from that angle without having to go into the crawl space. I could maybe see about coming down into the stud bay from the attic, though with the low roof angle it's really, really tight along that wall.
I've got options, I just need to figure out which options suit me best.
So, I had been quite sure that the source of my furnace problems was the high limit switch. I checked the voltage downstream of the high limit switch when the failure was occurring, and I saw only a small trickle of electrons. I pulled the connector off the upstream side of the high limit switch and measured a full 24vac. So it's the high limit switch that's gone wrong, right?
Wrong. After putting in the new high limit switch, things appeared to be working, but later on I got the same symptoms showing up again, and this time I did a big more debugging. I found that when the furnace was in fault mode that, in fact, there was an unusually low voltage (on the order of 2 or 3vac) on the entire loop, and disconnecting any part of the loop resulted in full 24vac on one side and 0v on the other.
There's only three things that could cause this to happen.
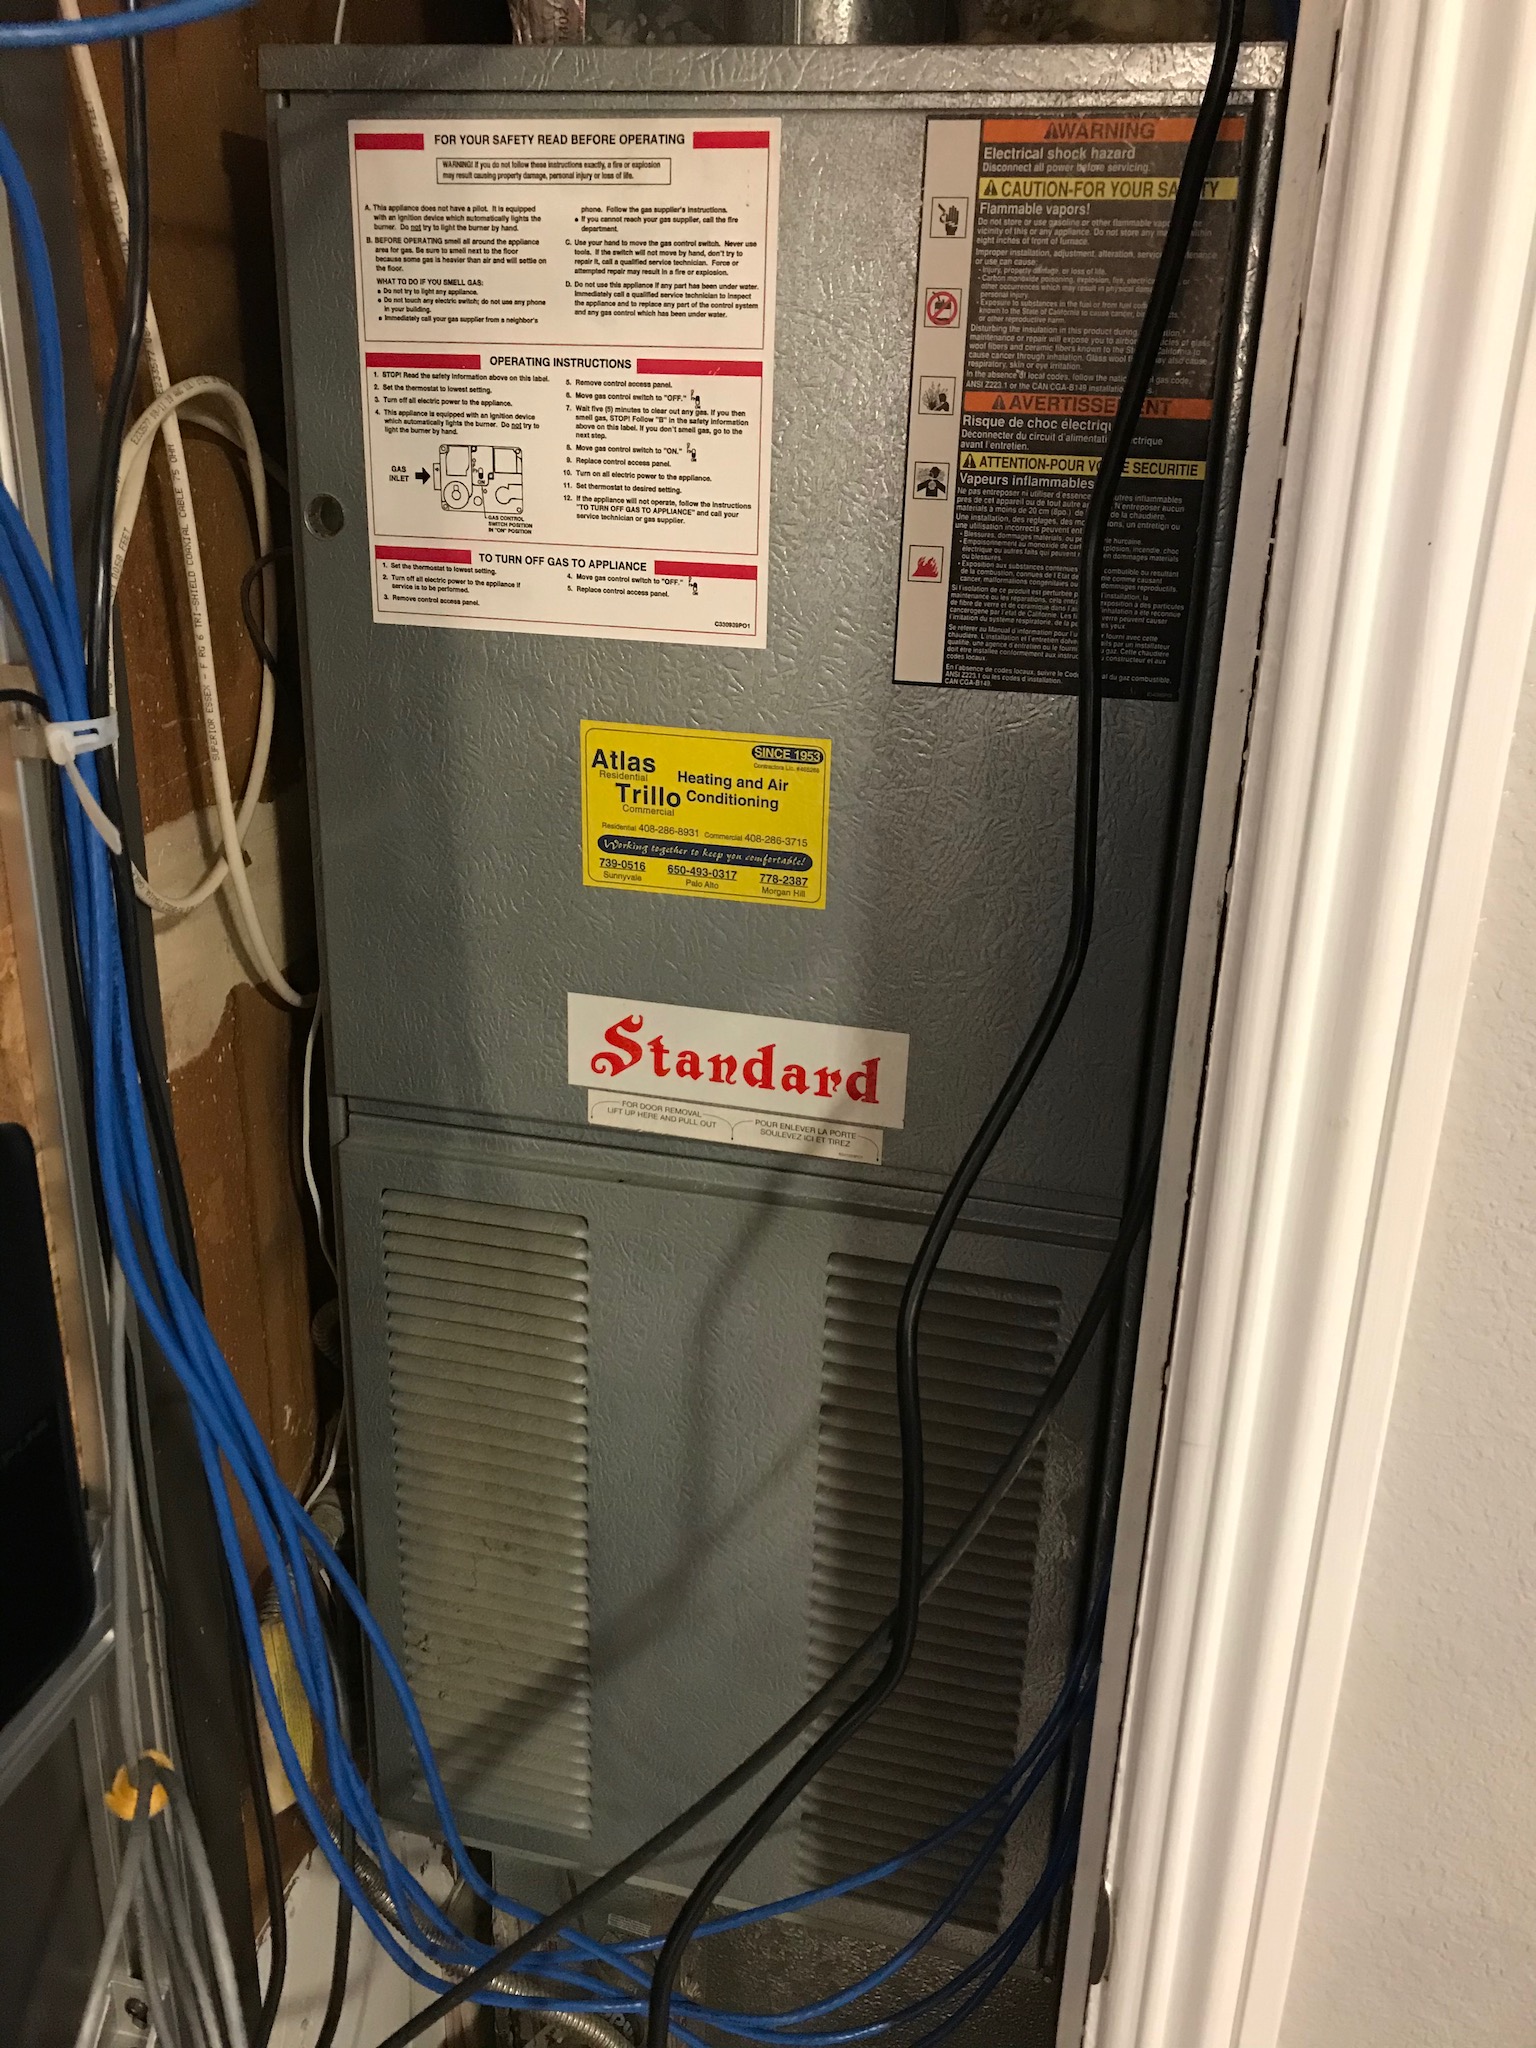
A few odd shipping delays in Texas later, and I had a shiny new controller board in hand.
Swapping it out was a pretty straightforward matter of unplugging the old one and plugging in the new one, and once that was taken care of I fired up the furnace and, so far, everything seems to be working. Let's hope it stays that way this time.
While I'm waiting to see if the furnace dies again, have some shots of the old furnace controller, showing some rather suspicious heat staining around some resistors.


A little suspicious looking if you ask me.
Heating season has begun here in sunny California, which means I am once more faced with my loud, obnoxiously unreliable furnace being loud and obnoxiously unreliable.
The loud part has a number of causes, one of which is the direct-return installation where the furnace uses a single central return vent plumbed directly into the blower plenum, which means that there's exactly zero ductwork on that side of things to absorb the noise. But it's also partly caused by the flue gas blower fan being bent and rubbing against its enclosure. Keep this in mind, we'll come back to it later.
The unreliable part came in the form of the furnace lodging itself in an error mode, blinking a code indicating a high limit error. What this means in theory is that the yellow loop that goes through the high-temp limit switches and the thermal fuses was going open-circuit, which you can see in the diagrams below. What this means in practice is that the furnace would randomly refuse to put out heat.

Now a noisy furnace will still keep me warm, but a furnace that won't put out heat is failing in a fairly fundamental task. So, time to diagnose!

I whipped out the multimeter and traced around the yellow high-limit sense loop. 24v goes in, 24v goes out, 24v goes in, 0v goes out. Well there's your problem. The issue was the burner-area high temp limit switch. It was supposed to be normally-closed, but was, in fact, only normally-mostly-closed, which doesn't really cut it.

So a replacement is ordered, personally delivered overnight by Jeff Bezos himself, and out comes the old switch.


And in goes the new switch.


The switch didn't come with the fiber gasket, so I reused that from the old one. Easy-squeezy.
So after everything is popped back into place, I set the thermostat to char-broil and...

I have created fire! Stolen from the gods themselves, tamed and domesticated by mankind.
As a bonus the furnace is a fair bit quieter now, since I also took the opportunity to pull out the flue gas fan and bend the squirrelcage back into shape, as well as giving the bearings a little squirt of oil. It still makes a lot of blower noise through the cold air return but at least the metallic schff-schff-schff-schff of the flue gas fan is gone.
A job well done, if I may be so bold as to pat myself on the back.
Update: those back-pats may have been premature, the problems continue...
So I got home after a long morning riding my bike up and down the hills of Santa Cruz, pull off my salt-stained gear, hop in the shower, and wouldn't you know it but the drain is plugged.
Thankfully my Trump-disapproved low-flow shower head wasn't filling the shower pan too quickly so I had plenty of time to soap up and rinse clean, but that wasn't exactly going to be a viable long term solution.
Now the drain had been somewhat slow flowing for a while now. Usually when I'd start a shower, the drain would back up for a moment, threaten to overflow the drain grate, but then catch up with itself and not cause any fuss for the remainder of my bathing. I had previously attempted to snake the drain, but the snake had always come out perfectly clean, leaving me rather puzzled to say the least.
But, as the situation had clearly deteriorated, I brought out the snake again to give it a second shot.
At first the results seemed to mirror previous attempts. I never seemed to hit a blockage, never got anything wrapped up in the snake, never got the water to flow. My plumbing line does have a cleanout outside, so I tried running the snake down there and as I expected, given that no other drain on that line had any issues, I didn't find a blockage there either.
I felt a little defeated and took a break to eat lunch, pondering just calling a plumber to go shimmy into the crawlspace and rip out and redo the pipe for the shower, but I went back and gave it another shot once I'd gotten some food in my belly.
I poured a few kettles full of boiling water down the drain and ran the snake again, and finally this time it latched onto something. It took quite a bit of force to yank it out, but when it came loose it pulled up a rather disgusting looking wad of matted hair, fabric fibers, and bits of carpet? Lord only knows what the previous owners were washing in that shower.
Still, the water wasn't draining, so I went at it again. It seemed to be pretty hit or miss whether I'd latch onto something or not, but after a few more lucky hooks I seemed to get the bulk of the clog cleared out.
When I poked my head into the crawlspace to have a look at the pipes the problem became quite apparent. The shower pan itself was plumbed with nice, smooth ABS pipe, but just past the trap it transitioned to galvanized steel pipe, which threaded into a cast iron tee fitting at the far end that served as the vent going up and the drain going down. Judging by the length of snake I had to feed in, and the fact that I was clearly hitting the far wall of the tee fitting before latching onto the clog, it was apparent that the threaded end of the pipe had been rusting internally and this flaky rust had been what was catching all the fibers as the water flowed over the corner of the tee, forming a clog just below it in the vertical pipe.
At some point I might have to go down there and replace the galvanized pipe with a length of ABS, but for now the drain is working so I'm just going to leave well enough alone, and be glad that I'm back up to 2 working showers again.
With the time change comes the off season for my cycling, and the switch back over to doing my weights as my primary form of exercise. I decided to take advantage of my peak cycling physique this weekend and hit up Demo forest for a second time on The Crimson Ghost.

I had previously only done a single lap down Flow trail, and I wanted to try Braille which is the other top rated trail in the park. There's also Sawpit and Corral but they're a bit less popular for a variety of reasons (Corral is rather short, and Sawpit is way down at the bottom of the forest which makes for a longer climb out).
So I saddled up and rode to the top and took my first run down Braille. It was, as the name might suggest, rather bumpy. Manageable though, I made it down in one piece, though I did mistake a roll for a drop and confirmed that my bike's suspension does have exactly as much travel as advertised. It's a decent mix of technical trail features, but at the end of the day it mostly just reinforced that technical trail features are not really my jam.
Since I still had my legs under me, I rode up Sulphur Spring and made my way across to Flow to see if my riding had improved any since my first attempt (which was, not coincidentally, the first time ever riding The Crimson Ghost).
Flow did not disappoint. I was able to take the bermed corners with more confidence than my previous attempt, but I was still going pretty slow through them and in general riding pretty heavy on the brakes. Cornering on a mountain bike at speed is not something that tends to come naturally, and I'll need to work on my skills a bit more before I feel like I've mastered it. As a bonus, I didn't eat shit this time, so I've got that going for me.
Once that was wrapped up it was high time to climb back up to the parking lot, pile in my van, and go home. 40 minutes of grinding up the hill later and that's exactly what I did, to close out a lovely morning of riding my bike.