Saturday, January 27, 2024

Wheezing Asthmatic

Not me, I mean my furnace.

For as long as I've lived here the furnace has been annoyingly noisy when it runs. Lots of whooshing from the air getting sucked through it, particularly through the paltry little 20x12 return grille.

There are many things wrong with this return grille, and while I'm no size queen it is rather on the small side for the amount of air it's being asked to move. But it's also a floor-level grille, mounted up near the ceiling. You can tell it's a floor-level one because all the louvers are pointing down instead of up, which means that I get to stare at my ugly furnace filter every time I look at it.

Then there's the fact that the original screw knobs were missing, which I replaced with some 3d printed parts. The prints work well enough, but they're not ideal.

And there's also the part where the return grille was rammed into a space slightly too small to actually fit it, which means that instead of the 20x12 filters sliding effortlessly into place, they instead basically need to be installed with a hammer.

You think I'm kidding about the hammer part but I'm not.

Anyway, step one is out with the old.

Apparently this wall was once painted pink. Probably to match the original stucco colour outside. Good gracious that would be a bit too much pink. It also apparently had wallpaper on it at one point, and I'm guessing under the texture coat it probably still does. Interesting.

Anyway, next we gather our supplies.

Pun partially intended.

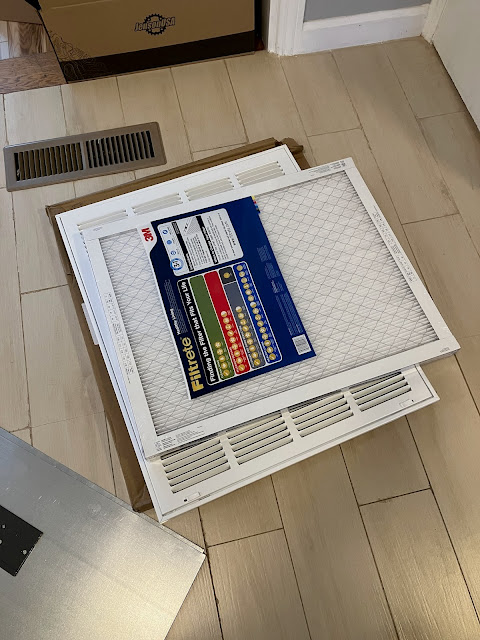
I'll admit I made an error here, falling for the third worst blunder of all time, right behind getting involved in a land war in Asia and going up against a Sicilian when death is on the line. Never buy hardwood or sheet metal at Home Despot. Just don't. Unless you're too lazy to go to the metal supply store, like me. These 24x36 inch sheets are $50 each.

Eugh.

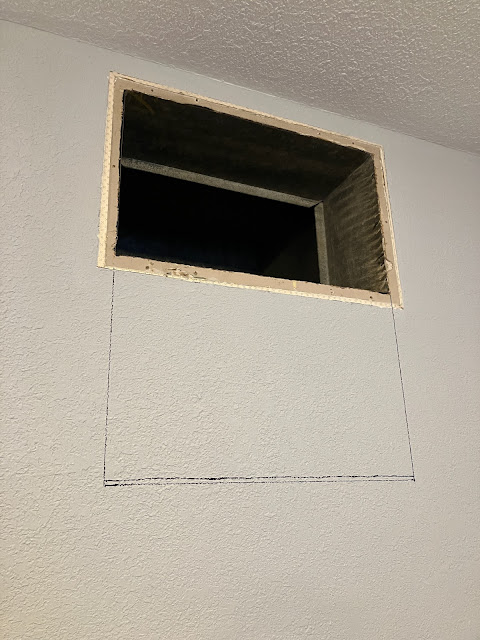
Anyway, the new return air grille is much larger than the old one, being 20x25, and that means there's some wall in the way.

The double line on the bottom was me being a bit sloppy with measuring and ending up with a bit of parallax while eyeballing the tape and making the first line a quarter inch too low, although in hindsight I should have gone with that measurement since things ended up being a bit snug.

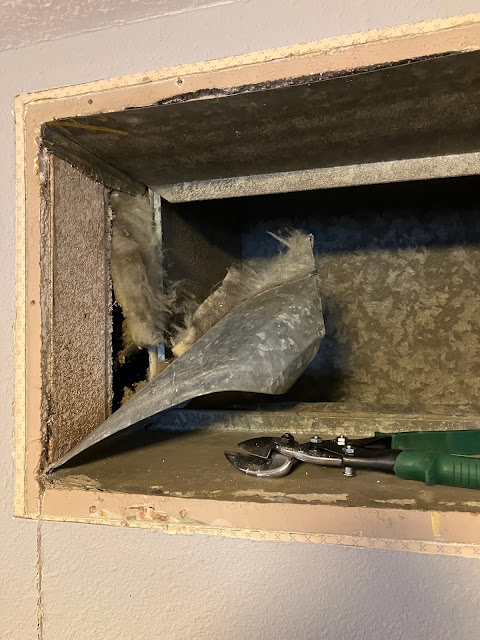
Before we poke a hole in that wall, though, we need to get rid of the old return boot. Which is kind of easier said than done, since it's kind of all folded up and jammed in there pretty good.

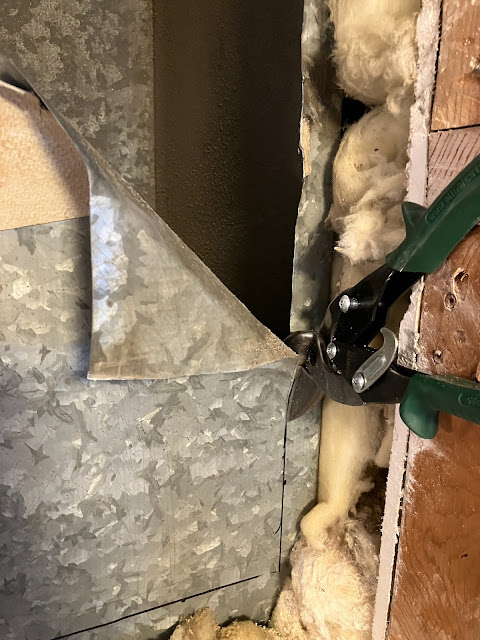
It was a bit of a struggle getting in there with the snips, but once I did the old sheet metal came out without too much of a fuss.

Now, back to poking a hole in the wall.

It's a good thing this is drywall and not plaster.

Now you might well ask: what happens if I run into a joist in the middle of this space I intend to expand the return into?

Well I'm glad you asked. For this sort of situation, the best tool for the job is an oscillating multi-tool. Like this one, for example.

It oscillates, and cuts through a multi-tude of things. Like pesky 2x4s, such as these ones that got in my way.

And which are now no longer in my way.

Of course now I need something to fill in around the edges of this hole, to keep the drywall from caving in the next time someone so much as sneezes in its general direction. It'd also help to have something there to keep me from dropping anything important down into the wall cavity where I might never see it again. Things like the 2x4 scraps I'm using to fill that gap.

It's a good thing I think ahead for this type of stuff. Attaching a temporary piece of blocking to keep the 2x4 from falling down the wall while I screw it in made things very easy and straightforward.

Of course, we still want to secure the drywall to this framing, which you might think would be a difficult task given that we have a finished surface on one side and a giant furnace plenum in the way on the other side. But technology has an answer for this problem too.

That ought to hold it.

Anyway, the bottom went into place pretty easily.

As did the sides.

And then we can get rid of the drywall in the back.

Now we still have one more layer to go through: the furnace plenum itself. It wouldn't do much good to just install the return grille like this and only suck air through the top half, so let's get some of that metal out of the way.

I actually should have been using the red ones for this cut. I'll never keep them straight, as long as I live.

And there we have it, just toss the grille up there and it's job done!

Ok, I'm kidding, this is just a test fit, and so far it's looking good. But we definitely need to rebuild the boot to seal the plenum to the return grille.

For this I cut out some panels from the new sheet metal and formed them into a similar shape to the old ones, though taking a little more care to not make them hilariously undersized for the opening.

I formed a little hook on the back side of these panels, which will get wrapped up into a double-fold in the adjoining panels.

This is really the kind of job where I'd love to have a sheet metal brake, but unfortunately they're both large and not especially inexpensive, particularly for a decent quality one.

But I managed to make do.

You can see here how the corners roll up around each other to hold everything in place.

And after a little hammering they're secure enough for ductwork.

I ended up reusing part of the old boot to make one panel for the new one, because I realized that I wouldn't have to carve into the second sheet if I scavenged one side from the old metal.

And it's in my wall, who's ever going to stick their nose in there and realize that it's mismatched?

Anyway, the new boot took a little bit of percussive massaging to coax into place, and a little bit of trimming here and there to make sure it ended up flush with the wall, but I eventually managed to get it and the return frame buttoned up.

I crimped the back edges around the plenum, sprinkled a few zip screws here and there, and buttoned it all up.

And I managed to do it all with only a few crumbs of the sheet left over.

Which meant I could return the other sheet and get my $50 back.

So did the sound level improve?

I have no idea. I think it's a little better but the recording has all sorts of audio processing and AGC automatically applied to it so it's pretty much impossible to tell from the two clips, even when playing them back-to-back. I think the second clip even sounds a bit louder on playback but I'm pretty sure that's just the mic level adjusting between the two shots.

I'm also kind of hoping that this will help with the overtemp problem it's been having, but it'll take a few days at least before I know if there's any effect there.

What's at least clear is that the return wasn't the only/primary source of noise here, so if I want it to properly quiet down I'll have to keep trying other things. Ah well, at least it's way, way easier to replace the filter now. And the louvers are pointed in the right direction. 

Tuesday, January 23, 2024

Holding On By A Thread

When I got my LS-321 sewing machine, one of the things missing was the needle bar thread guide.

It's a semi-circle of metal that wraps around the needle bar right at the height of the needle set screw, and guides the thread so that it follows the needle in a more vertical path. This gives the thread a more uniform geometry as the needle pushes through the fabric, which leads to better quality stitches.

Luckily, this part is still available, if only just barely.

I actually ordered this part back in October, but thanks to a combination of shipping errors and scant supply, it took until now to actually show up.

Installing it is quite simple. You just remove the needle set screw, and the needle while you're at it so it doesn't just fall out onto the floor, then slide it up onto the needle bar and reinstall the needle and set screw.

Then when you're threading the machine, you simply need to hook the thread around the left side of the guide and pull it into place, easy-peasy.

And the usual proof that the machine still sews.

This is the last item on the fix-it list for the LS-321, so from here on out it should be ready to just make projects.

Sunday, January 21, 2024

Put A Lid On It

A few months back, a terrible tragedy befell my poor PedoVan.

That's right, the tiny little plastic tether that holds the fuel cap when you're refuelling broke, rendering the whole van literally undriveable. I've been suffering ever since.

Anyway, as is usually the case with this sort of thing, this tiny 3¢ part is only available as a complete subassembly with the fuel cap, and can't be purchased separately.

Honestly this isn't the worst thing as the gasket will eventually dry out and cause an evap error in the OBD computer.

Except that diesels don't have an evap system so actually it wouldn't have done anything at all.

But I think it was still worth getting a new one.

Anyway, before we get the new one installed, we must remove the peg holding the remains of the old tether in place. Luckily, there's a tool for that.

Then we just tether the new fuel cap in place.

And it's out with the old and in with the new.

I'll just have to be careful that the tether doesn't get caught in the hinge again. I'd rather not do this again for another 15 to 20 years.

Saturday, January 20, 2024

I'm Screwed

For a while now I've been on the lookout for a very specific style of screwdriver. Basically what I want is an offset flat-blade screwdriver set, where the two ends are at 90 degrees to each other. With this sort of tool, you can reach into tight spaces and screw in, or unscrew, a slotted screw 90 degrees at a time.

Now it's not hard to find offset flat-blade screwdrivers, but if you look closely at most of them, they're only flat blade on one side and the other side is almost always a philips head, which is not a very useful tip for driving a slotted screw.

However, one company does manufacture the right style.

Unfortunately, it's Snap-On (AKA Blue-Point).

Now there's nothing wrong with this from a quality or design perspective, but the trouble is that these tools come with a Snap-On price tag. This set of 5 screwdrivers would normally cost about $75 retail, but luckily I was able to find a completely nonsuspicious listing on eBay for about $33 all-in.

So with that out of the way, it's worth discussing why I need a flat blade screwdriver to fit into tight places in the first place? The answer is simple.

Sewing machine needle plates are almost universally held in by slotted screws, and they always have the entire rest of the sewing machine right above them that really gets in the way of accessing them with a regular screwdriver. Even getting them with a stubby screwdriver tends to be quite difficult due to the proximity of the needle bar and presser foot shank.

But an offset screwdriver is the perfect tool for the job.

Unless, of course, the screwdriver's blade is just a fraction too thick to fit into the head of the screw.

Well, lucky for me I have more than one sewing machine.

See? It works perfectly.

Friday, January 19, 2024

Feet Pics

So a while back I bought this chair from Ikea. This was not a great decision, for multiple reasons.

One of those reasons is that the casters keep falling out of the legs.

Which is really not helpful for the whole "staying upright" thing that chairs are supposed to do. They're supposed to be held in place by these rather stubby plastic inserts that are "press fit" (more like loosely held) into the ends of the legs, but now they're going to get a little chemical assistance.

The putty is supposed to mix up black, but I guess dark grey is close enough.

It was a little frustrating to work with as it was a touch crumbly rather than being smooth and easily malleable like I hoped it would be.

But thankfully I did manage to squish a reasonable amount in there between the plastic inserts and the inside of the legs.

I was a little bit worried that the epoxy wouldn't have much holding power, given how dry it felt, but I think my worries might have been misplaced.

It definitely stuck just fine to the cardboard it was resting against overnight.

Anyway, the chair is back together and everything's good, right?

Wrong. These casters are awful, as in pure 100% garbage. Ikea decided to be a little too clever for their own good and designed them with a spring-loaded mechanism where they won't roll unless you apply a fairly significant amount of downward pressure. So any time you try to move the chair around, it just scrapes across the ground instead of rolling. And then when you're sitting down, the chair is all rolly and unstable under you. Literally the worst of both worlds.

And added on top of that, the global standard for every single office chair caster ever made is to have an 11mm shank. Guess what Ikea's are? Yeah, that's right, 10mm. They just had to be different for the sake of being different.

Thankfully, you can find Ikea-specific replacements, and I found these bell glides listed for sale on the House of Bezos.

Basically they're a solid foot that replaces the wheeled casters. they slide relatively easily when you're not sitting on them, and then stay solidly in place when you do sit down. You know, the right way around.

They generally come in two heights: a low-profile height, which is basically just no taller then they need to be; and then these high-profile versions which are designed to match the height of wheeled casters. I chose the latter because the lift cylinder in the middle of the leg assembly hangs down pretty far, and I didn't want it to end up scraping the floor.

They install very easily: just yank out the casters and shove in the bell glides.

That's much better.

Of course, there is still one teensy tiny little design flaw with this chair.

Somehow Ikea thought it would be an amazing idea to design the seat to tilt forward at a noticeable angle. I can't even begin to imagine why they thought this would be a good idea, but it makes the chair remarkably uncomfortable to sit in.

But this is a problem to fix another day. For now,  I'm done with dealing with this awful, awful chair.