Not me, I mean my furnace.
For as long as I've lived here the furnace has been annoyingly noisy when it runs. Lots of whooshing from the air getting sucked through it, particularly through the paltry little 20x12 return grille.
There are many things wrong with this return grille, and while I'm no size queen it is rather on the small side for the amount of air it's being asked to move. But it's also a floor-level grille, mounted up near the ceiling. You can tell it's a floor-level one because all the louvers are pointing down instead of up, which means that I get to stare at my ugly furnace filter every time I look at it.
Then there's the fact that the original screw knobs were missing, which I replaced with some 3d printed parts. The prints work well enough, but they're not ideal.
And there's also the part where the return grille was rammed into a space slightly too small to actually fit it, which means that instead of the 20x12 filters sliding effortlessly into place, they instead basically need to be installed with a hammer.
You think I'm kidding about the hammer part but I'm not.
Anyway, step one is out with the old.
Apparently this wall was once painted pink. Probably to match the original stucco colour outside. Good gracious that would be a bit too much pink. It also apparently had wallpaper on it at one point, and I'm guessing under the texture coat it probably still does. Interesting.
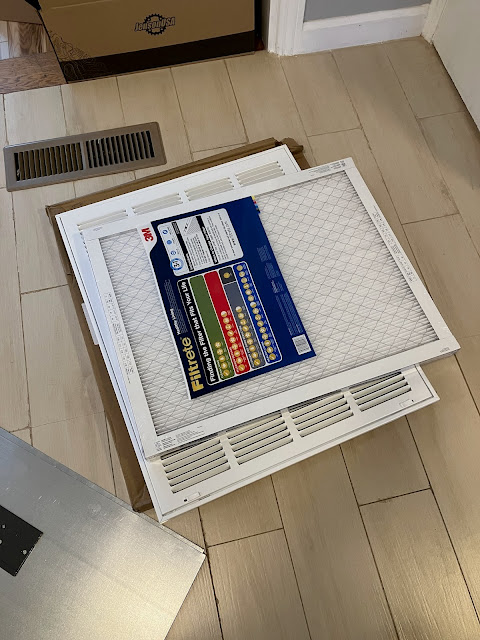
Anyway, next we gather our supplies.
Pun partially intended.
I'll admit I made an error here, falling for the third worst blunder of all time, right behind getting involved in a land war in Asia and going up against a Sicilian when death is on the line. Never buy hardwood or sheet metal at Home Despot. Just don't. Unless you're too lazy to go to the metal supply store, like me. These 24x36 inch sheets are $50 each.
Eugh.
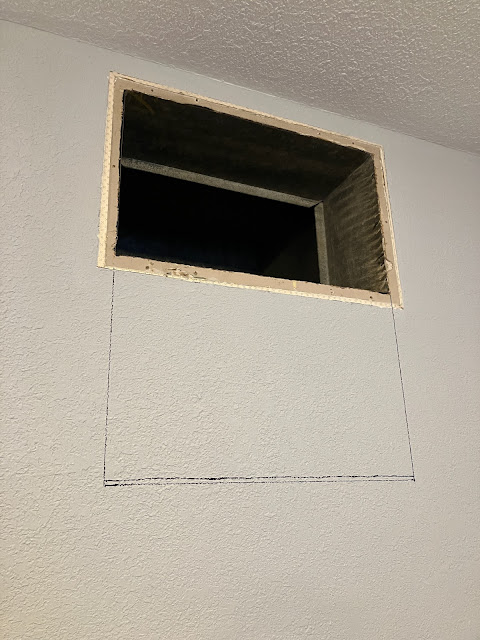
Anyway, the new return air grille is much larger than the old one, being 20x25, and that means there's some wall in the way.
The double line on the bottom was me being a bit sloppy with measuring and ending up with a bit of parallax while eyeballing the tape and making the first line a quarter inch too low, although in hindsight I should have gone with that measurement since things ended up being a bit snug.
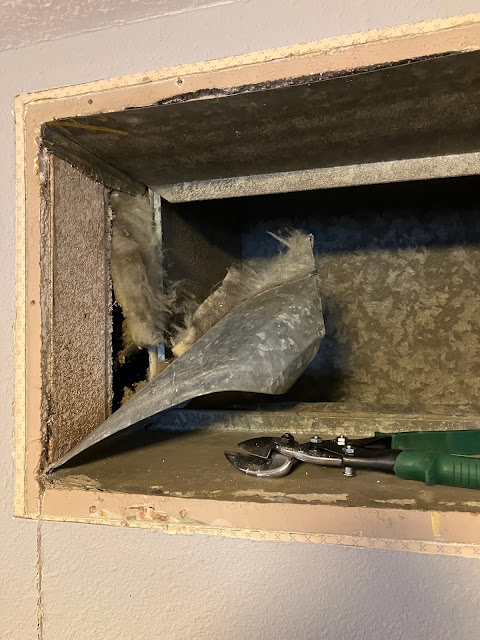
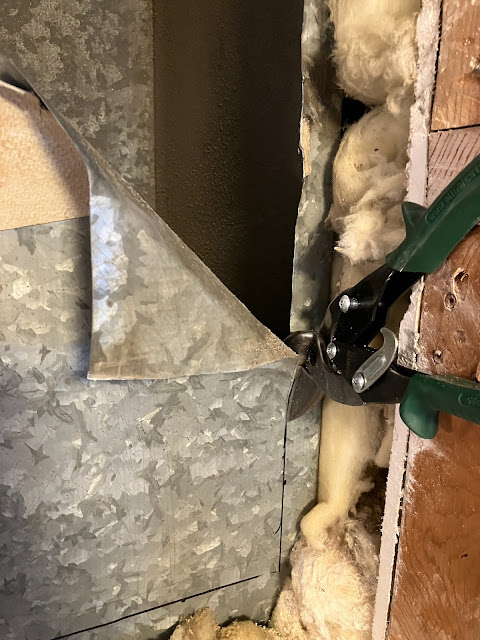
Before we poke a hole in that wall, though, we need to get rid of the old return boot. Which is kind of easier said than done, since it's kind of all folded up and jammed in there pretty good.
It was a bit of a struggle getting in there with the snips, but once I did the old sheet metal came out without too much of a fuss.
Now, back to poking a hole in the wall.
It's a good thing this is drywall and not plaster.
Now you might well ask: what happens if I run into a joist in the middle of this space I intend to expand the return into?
Well I'm glad you asked. For this sort of situation, the best tool for the job is an oscillating multi-tool. Like this one, for example.
It oscillates, and cuts through a multi-tude of things. Like pesky 2x4s, such as these ones that got in my way.
And which are now no longer in my way.
Of course now I need something to fill in around the edges of this hole, to keep the drywall from caving in the next time someone so much as sneezes in its general direction. It'd also help to have something there to keep me from dropping anything important down into the wall cavity where I might never see it again. Things like the 2x4 scraps I'm using to fill that gap.
It's a good thing I think ahead for this type of stuff. Attaching a temporary piece of blocking to keep the 2x4 from falling down the wall while I screw it in made things very easy and straightforward.
Of course, we still want to secure the drywall to this framing, which you might think would be a difficult task given that we have a finished surface on one side and a giant furnace plenum in the way on the other side. But technology has an answer for this problem too.
That ought to hold it.
Anyway, the bottom went into place pretty easily.
As did the sides.
And then we can get rid of the drywall in the back.
Now we still have one more layer to go through: the furnace plenum itself. It wouldn't do much good to just install the return grille like this and only suck air through the top half, so let's get some of that metal out of the way.
I actually should have been using the red ones for this cut. I'll never keep them straight, as long as I live.
And there we have it, just toss the grille up there and it's job done!
Ok, I'm kidding, this is just a test fit, and so far it's looking good. But we definitely need to rebuild the boot to seal the plenum to the return grille.
For this I cut out some panels from the new sheet metal and formed them into a similar shape to the old ones, though taking a little more care to not make them hilariously undersized for the opening.
I formed a little hook on the back side of these panels, which will get wrapped up into a double-fold in the adjoining panels.
This is really the kind of job where I'd love to have a sheet metal brake, but unfortunately they're both large and not especially inexpensive, particularly for a decent quality one.
But I managed to make do.
You can see here how the corners roll up around each other to hold everything in place.
And after a little hammering they're secure enough for ductwork.
I ended up reusing part of the old boot to make one panel for the new one, because I realized that I wouldn't have to carve into the second sheet if I scavenged one side from the old metal.
And it's in my wall, who's ever going to stick their nose in there and realize that it's mismatched?
Anyway, the new boot took a little bit of percussive massaging to coax into place, and a little bit of trimming here and there to make sure it ended up flush with the wall, but I eventually managed to get it and the return frame buttoned up.
I crimped the back edges around the plenum, sprinkled a few zip screws here and there, and buttoned it all up.
And I managed to do it all with only a few crumbs of the sheet left over.
Which meant I could return the other sheet and get my $50 back.
So did the sound level improve?
I have no idea. I think it's a little better but the recording has all sorts of audio processing and AGC automatically applied to it so it's pretty much impossible to tell from the two clips, even when playing them back-to-back. I think the second clip even sounds a bit louder on playback but I'm pretty sure that's just the mic level adjusting between the two shots.
I'm also kind of hoping that this will help with the overtemp problem it's been having, but it'll take a few days at least before I know if there's any effect there.
What's at least clear is that the return wasn't the only/primary source of noise here, so if I want it to properly quiet down I'll have to keep trying other things. Ah well, at least it's way, way easier to replace the filter now. And the louvers are pointed in the right direction.


No comments:
Post a Comment