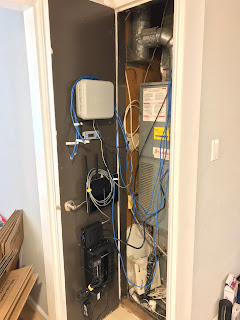
Not that kind of closet, the nerdy kind.
I've been using the furnace closet as a network/tech hub, and while I did manage to organize things a little by mounting them to the back of the door, the paper-thin door skin didn't really offer the best support. (The sprinkler controller, at the top, was existing when I moved in)
I also wanted to add some 19" rack rails to be able to mount my PoE ethernet switch for my security cam system, and the space above the sprinkler controller was just a bit too small to squeeze one in.
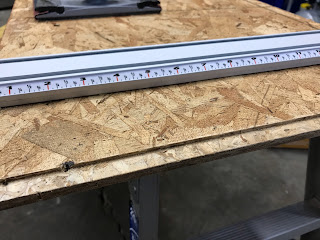
It took a bit of pondering to figure out exactly how I wanted to tackle this project before finally settling on using 3030 aluminum extrusion for making the rack rails, as well as for creating a frame that would screw into the solid wood at the edges of the door to support both the rack as well as the rest of the installed equipment.
I initially planned out the project with the intention of buying some plywood to make the equipment panels, but it just so happened that I had some 3/8 OSB laying about from the demolition of a very old and rotting shed in my back yard (the roof had been replaced more recently and the sheathing was thus still in good shape). I was hesitant initially but soon found that OSB is actually much nicer to work with than I had imagined.
I was able to cut some pieces down to size, route a profile into the edge, and lop the bottom corners to clear the brackets without any trouble at all. I expected it to fall apart into a messy pile of splinters and tear-out, but even just using the basic construction blades in my circ saw and chop saw the cuts came out impressively good.
Speaking of cutting things, I did most of the cuts on the 3030 using my portaband, and so long as I took the time to draw a straight line both across two faces to line up the cuts I could basically get a serviceably straight cut. I got a bit overconfident at one point though and skipped drawing one of the lines, and ended up cutting a bit off course, at which point I took a bit of a risk and tried using the chop saw to clean it up. It did a remarkably good job of cutting despite, again, only using the basic construction blade; I had been avoiding using it for cutting the aluminum as I had planned to get an aluminum/laminate blade to use before settling on using the portaband instead, but apparently I was being overly cautious. (I'm still going to get an aluminum/laminate blade later for future non-ferrous projects, and the portaband will be reserved for ferrous cutting tasks)
Other power tool takeaways: Making cuts with a circ saw is once again less exciting than I remember it being. The chop saw is a delightful tool but it can be tricky not to nudge the work piece when the motor spins up. The router wins the prize for the most uniform and annoying plume of sawdust ejected. And, finally, it doesn't matter what tool I use: aluminum chips get e v e r y w h e r e.
Back to the project, day one ended with half of the panels/equipment/rails installed because I didn't actually plan ahead to figure out how many corner brackets I'd need. Thank goodness for prime shipping!
Once the remaining bits arrived the project wrapped up without a ton of fuss on day 2.
I really like how this project turned out. It's very tidy and clean (though I didn't go overboard on the cable porn), and there's still a little room left for expansion (about 2u of rack space, and I could put some small item above the wifi router if I move the antennas aside), and I actually kind of like the look of the OSB framed by the 3030 extrusion.


No comments:
Post a Comment