Friday, April 21, 2023

The Beast Stirs

As we all know from years of experience, decades even in some cases, the best way to deal with a problem is to ignore it and hope it goes away on its own.

Well, the problem of the bike parts accreting in my house, though seemingly halted for a while, has resumed agglomerating once more.

Oh, it's just a dropper post and lever. Yes, that might be what it appears to be on the surface, but to the trained eye this is the first crack in the dam breaking once more.

And wouldn't you know it: brake parts! Two rotors and a caliper spacer. This is starting to look very dire indeed. However, it's possible we might still have a chance of holding back the tide, just so long as...

Oh no. No. It can't be!

There's no denying it. That's a cassette, and look at the size of it! At least 50 teeth on the big ring. There's no hope of fending off a mature specimen like this. This is the thin end of the wedge, soon all hell will break loose, and before you know it...
Oh, this is it; this is the end times. These are juvenile parts, not even fully fledged. These poor little wheels don't even have their spokes yet, and it'll be weeks before they grow a rim!

I think my only hope is to return these two to their nest and hope that their mother doesn't reject them. Once they're fully grown, well, we'll just have to cross that bridge when the time comes.

Better Living Through Chemistry

So my challah experiment has run into a minor speedbump.

Yes, the ugly spectre of food spoilage has descended upon my kitchen. The bread lasted a good solid week on my counter before these microscopic interlopers showed up, so it didn't do too bad, but the bread was clearly lacking the extra natural preservative qualities of the cakes I had previously been baking. All that extra sugar really does do wonders to suck the life out of microbes.

So, I plucked this little blue speck of fouling from the loaf and ensconced the remainder in the refrigerator. This is a risky move; not necessarily from a food safety perspective, but rather from a freshness and palatability one.

You see, as soon as bread is done baking, the starches within begin a process of retrogradation. They try to revert from their soft, fluffy cooked form into a hard, chewy crystalline form. This process happens rather slowly at counter temperature, but gets absolutely turbocharged at refrigeration temperature. This is the same process that turns leftover rice into buckshot and day-old mashed potatoes into half-set drywall compound.

Luckily there is one sure fire way to reverse this process: cook the starch again.

The good news here is that challah toast is really quite tasty, even if it wasn't exactly what I had initially signed up for. Tasty or not, though, it does leave me with a puzzle for what to do with the next batch of bread to avoid this tragedy recurring.

Thankfully, science has an answer in the form of calcium propionate, which is mixed into the dough at a ratio of approximately 0.1% of the flour weight, or about a quarter teaspoon for the 2-loaf recipe I'm making.

I may have obtained a lifetime supply of it. Also it does amuse me that a concentrated food preservative has a best-by date. Something tells me that's more of a liability thing than an actual risk of spoilage.

Will it work, though? Only time will tell.

Saturday, April 15, 2023

The Short End of the Wrench

One of the troublesome things about having a gas generator is that the fuel in the carb tends to go bad pretty quickly. This means that, after weeks to months in storage, it will be almost impossible to start without a great deal of difficulty and adult language.

The cure to this problem is simple: one must always make sure to drain the carb bowl before putting the generator back in storage. Simple enough in theory, but it's easy to make excuses when the tools aren't conveniently at hand.

So, I decided to keep the tools at hand. A quick trip to The House of Bezos and a day or two later, this arrives.

A wrench to use on the drain plug, and a silicone measuring cup to catch the fuel.

Of course, there's something about these that may not be apparent in this photo, so here's a second shot.

Working around a generator can be very tight quarters, and having small tools really pays dividends.

And I can assure you that you've never seen a cuter 10mm wrench in your life.

But what do these look like in action?

Well there's plenty of room to swing a wrench this size, to start with.

And not a drop of fuel will poison the soil with how well this measuring cup fits in the space below.

But draining the fuel out of the carb is only one part of keeping a generator running in tip-top shape. The most important thing one must always do is, well, fill it with oil when you buy it. They ship them dry. But the second most important thing is to change the oil frequently because there's no oil filter and less than a quart of the dino-honey in the oil pan. But the THIRD most important thing... wait, the third is draining the carb bowl, we already covered that.

Ok, so the fourth most important thing is periodically checking and adjusting the valve lash, done while the engine is cold. The valves need a little bit of clearance between the rocker arm and the valve stem in order to allow for the valve to expand when the engine warms up to operating temperature. On an engine like this, it's about 0.008 inches on the exhaust valve, since it gets quite hot, and 0.006 inches on the intake valve. As the engine ages, this gap tends to shrink as the valve stems stretch and the valve seats wear, and eventually you get to a point where, when the engine is hot, the valves no longer fully close. This results in combustion gasses bypassing the valves, which then burns the valves and seats, and suddenly you're looking at a full rebuild (or tossing the entire engine).

So, let's dive right in. The valve cover comes off, and there's the rockers right there.

The valves are up top, with the adjustment screws and the jam nuts, and the pushrods are below.

It's a good thing I've got a nice short wrench for loosening off the jam nuts.

Then all we need to do is go in with the feeler gauges to set the gap.

Making sure to do this while the engine is cold, of course. I've skipped detailing some steps here, so look up some tutorials online if you're about to embark on this task yourself, and check the manufacturer's specs for the valve lash for your particular engine model.

Anyway, I buttoned everything back up, started it up, and it purred like a kitten. Another successful job done.

Wednesday, April 12, 2023

An Enriching Experience

While bread may seem, at first glance, to be a commodity product, it takes on an almost unlimited variety of different forms. However, these forms can be divided into main families: those made with a lean dough, which generally contains only water, flour, salt and yeast; and those made with an enriched dough which contain additions such as sugar, oil/butter, eggs, milk and so on.

Though I fully acknowledge that lean dough breads have their place, I am not, personally, overly fond of them. The enriched dough breads bring so much more to the party that they can stand on their own without being constructed into a sandwich, smothered in jams and nut butters, battered and fried into french toast, and so on. I delight in a bread that has a soft, moist crumb that you can enjoy with nothing more than a kiss of butter, if even that.

Possibly the most recognizable enriched bread these days would be brioche. Truly, brioche is a delight. To eat. To prepare, it is tedium and toil. Unlike most breads, even most enriched breads, where all the dough ingredients are assembled up-front, the high butter content of brioche requires that the dough, minus the butter, be mixed and kneaded first, after which the butter is kneaded in a little at a time.

Rubbish to that.

Instead, consider challah. Religious tradition aside, it is a much more manageable bread to prepare. The use of oil rather than butter means we're back to just dumping everything into a bowl and then mixing and kneading like any other bread dough. The resulting loaf is hardly a compromise, still having a delightfully moist and chewy texture with a rich sweetness that avoids descending into the territory of cakes while solidly establishing itself as a pastry-style bread.

And so it is that I chose that style of bread to bake.

Now some would argue that a proper challah would be braided rather than rolled into a plain rectangular loaf. To those people, I invite you to spend your time however you see fit, as I do as I please with mine.

The resulting bread is every bit as delicious as I had hoped, and the preparation was no more difficult than any other style I've ever made.

Spring is Sprung

The superbloom has arrived in my yard. Rather than trying to babble on about these flowers, I'll just share the photos and let them speak for themselves.

The irises aren't blooming yet, nor is the rose, but they're getting quite close and should be showing their colours in a week or two.

Saturday, April 1, 2023

Some Like It Hot

I'm not a huge fan of freezing to death, and so I figured it was high time to make sure I could run my furnace during our inconveniently frequent power outages.

Normally, a furnace is hard wired to a circuit by way of a cut-off switch, like this.

Convenient for safely servicing the unit, but not so hot (quite literally) if you want to power it another way. Luckily, there is a solution.

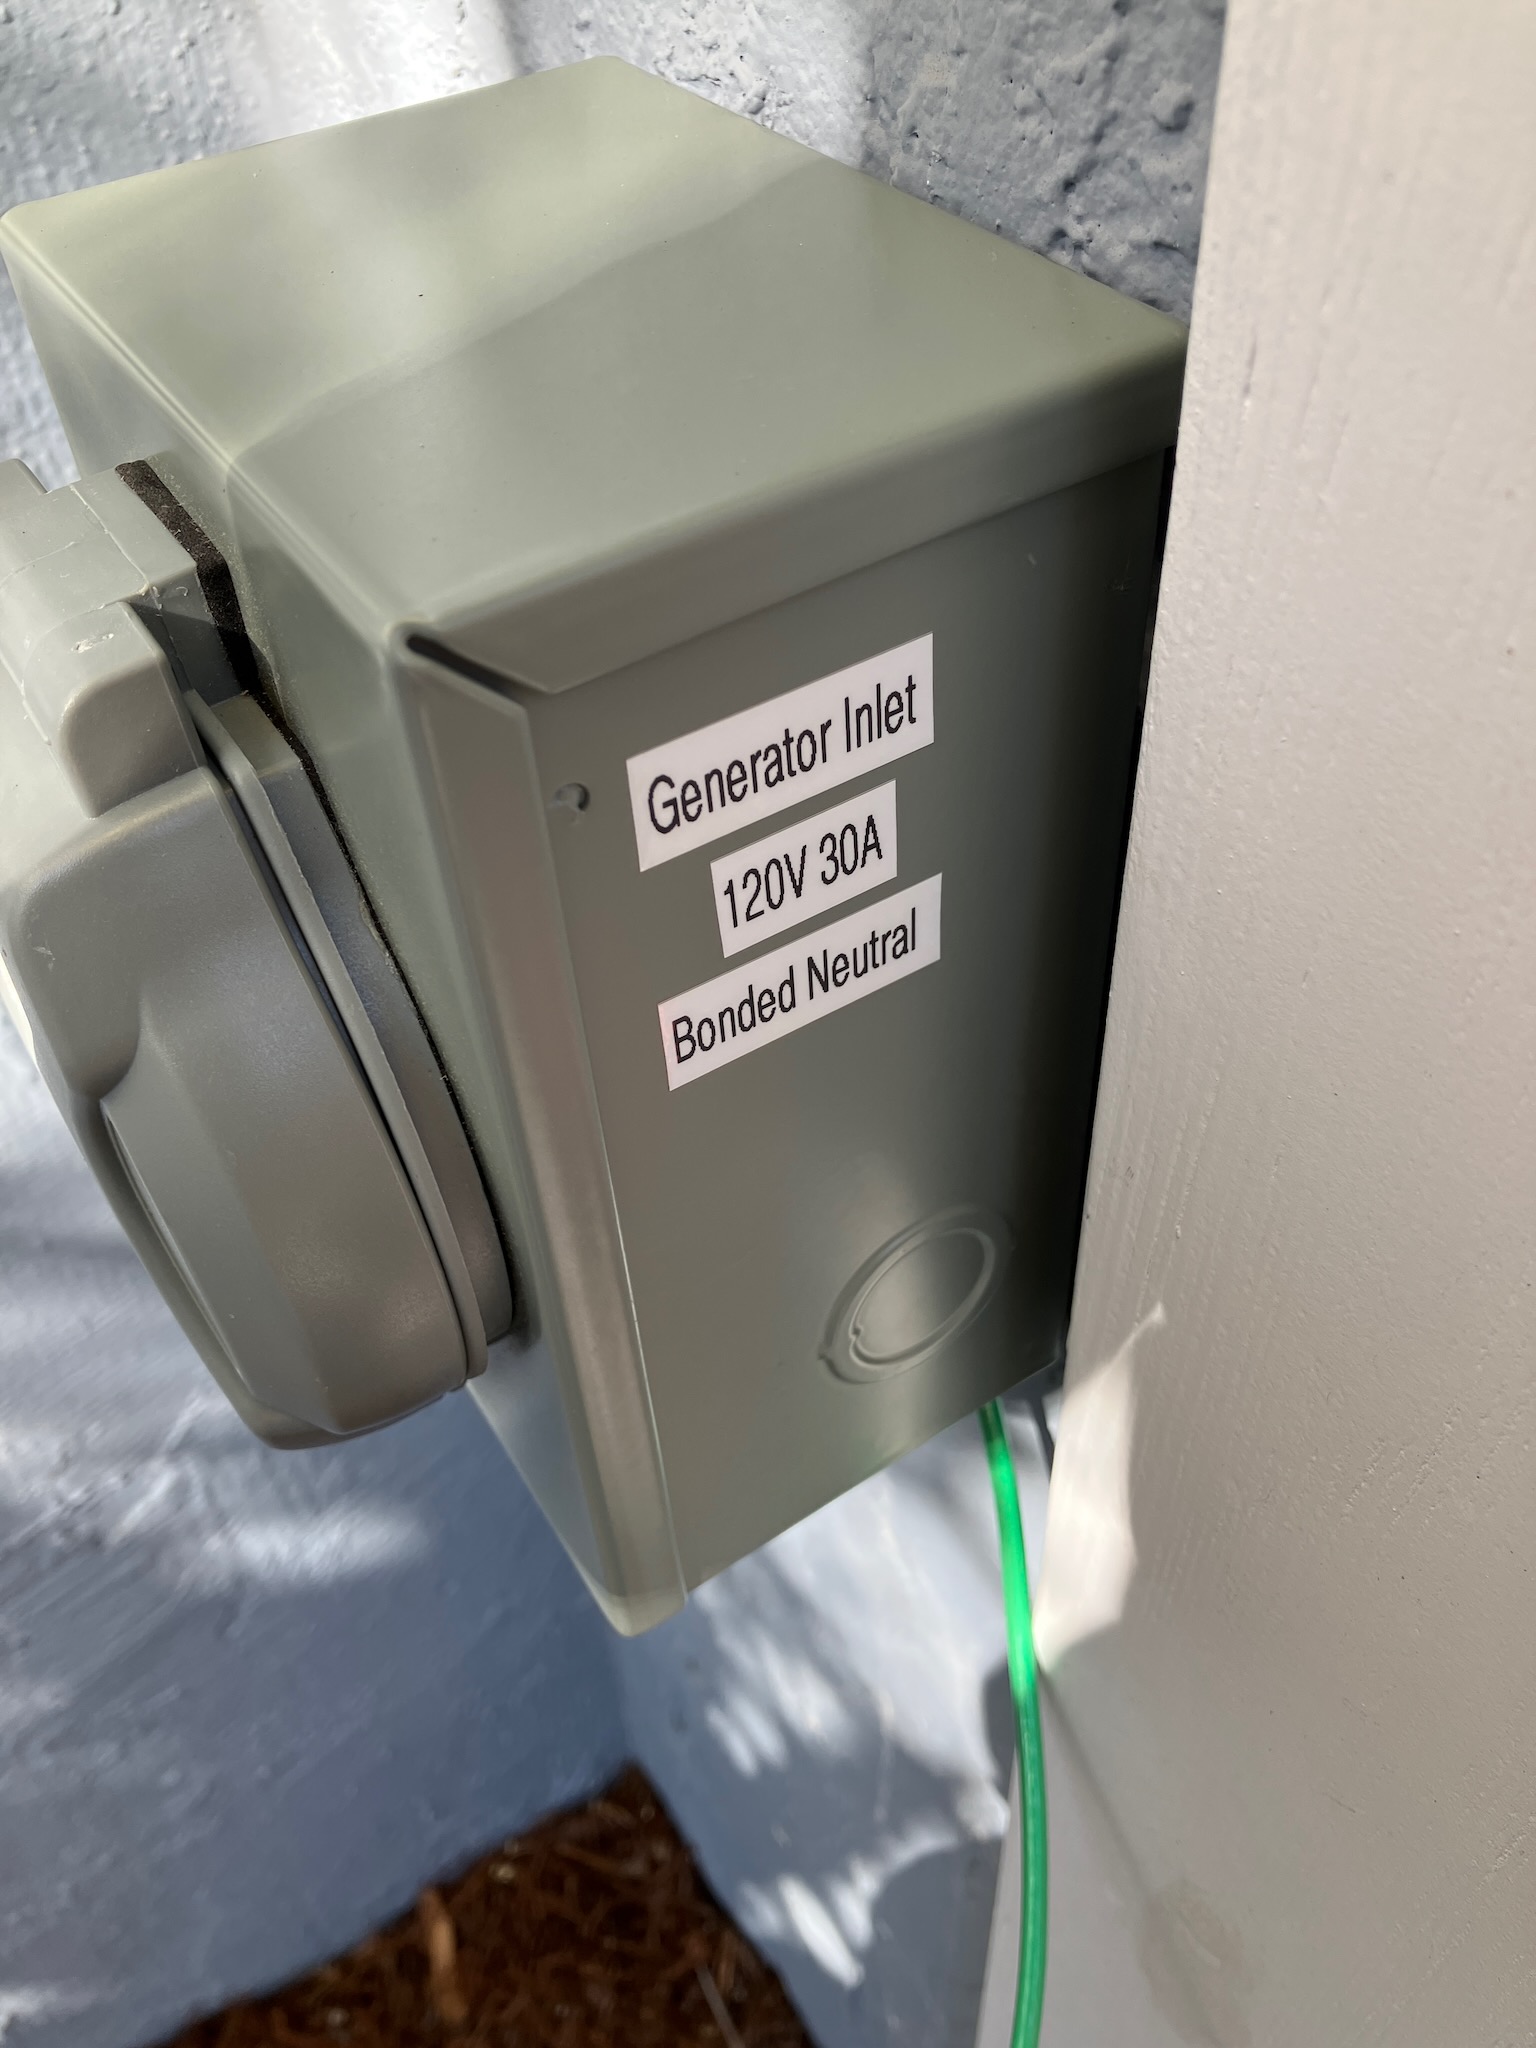
These generator inlet kits are not especially cheap, considering the parts list, but they at least come with fancy looking printing and a nice paint job.

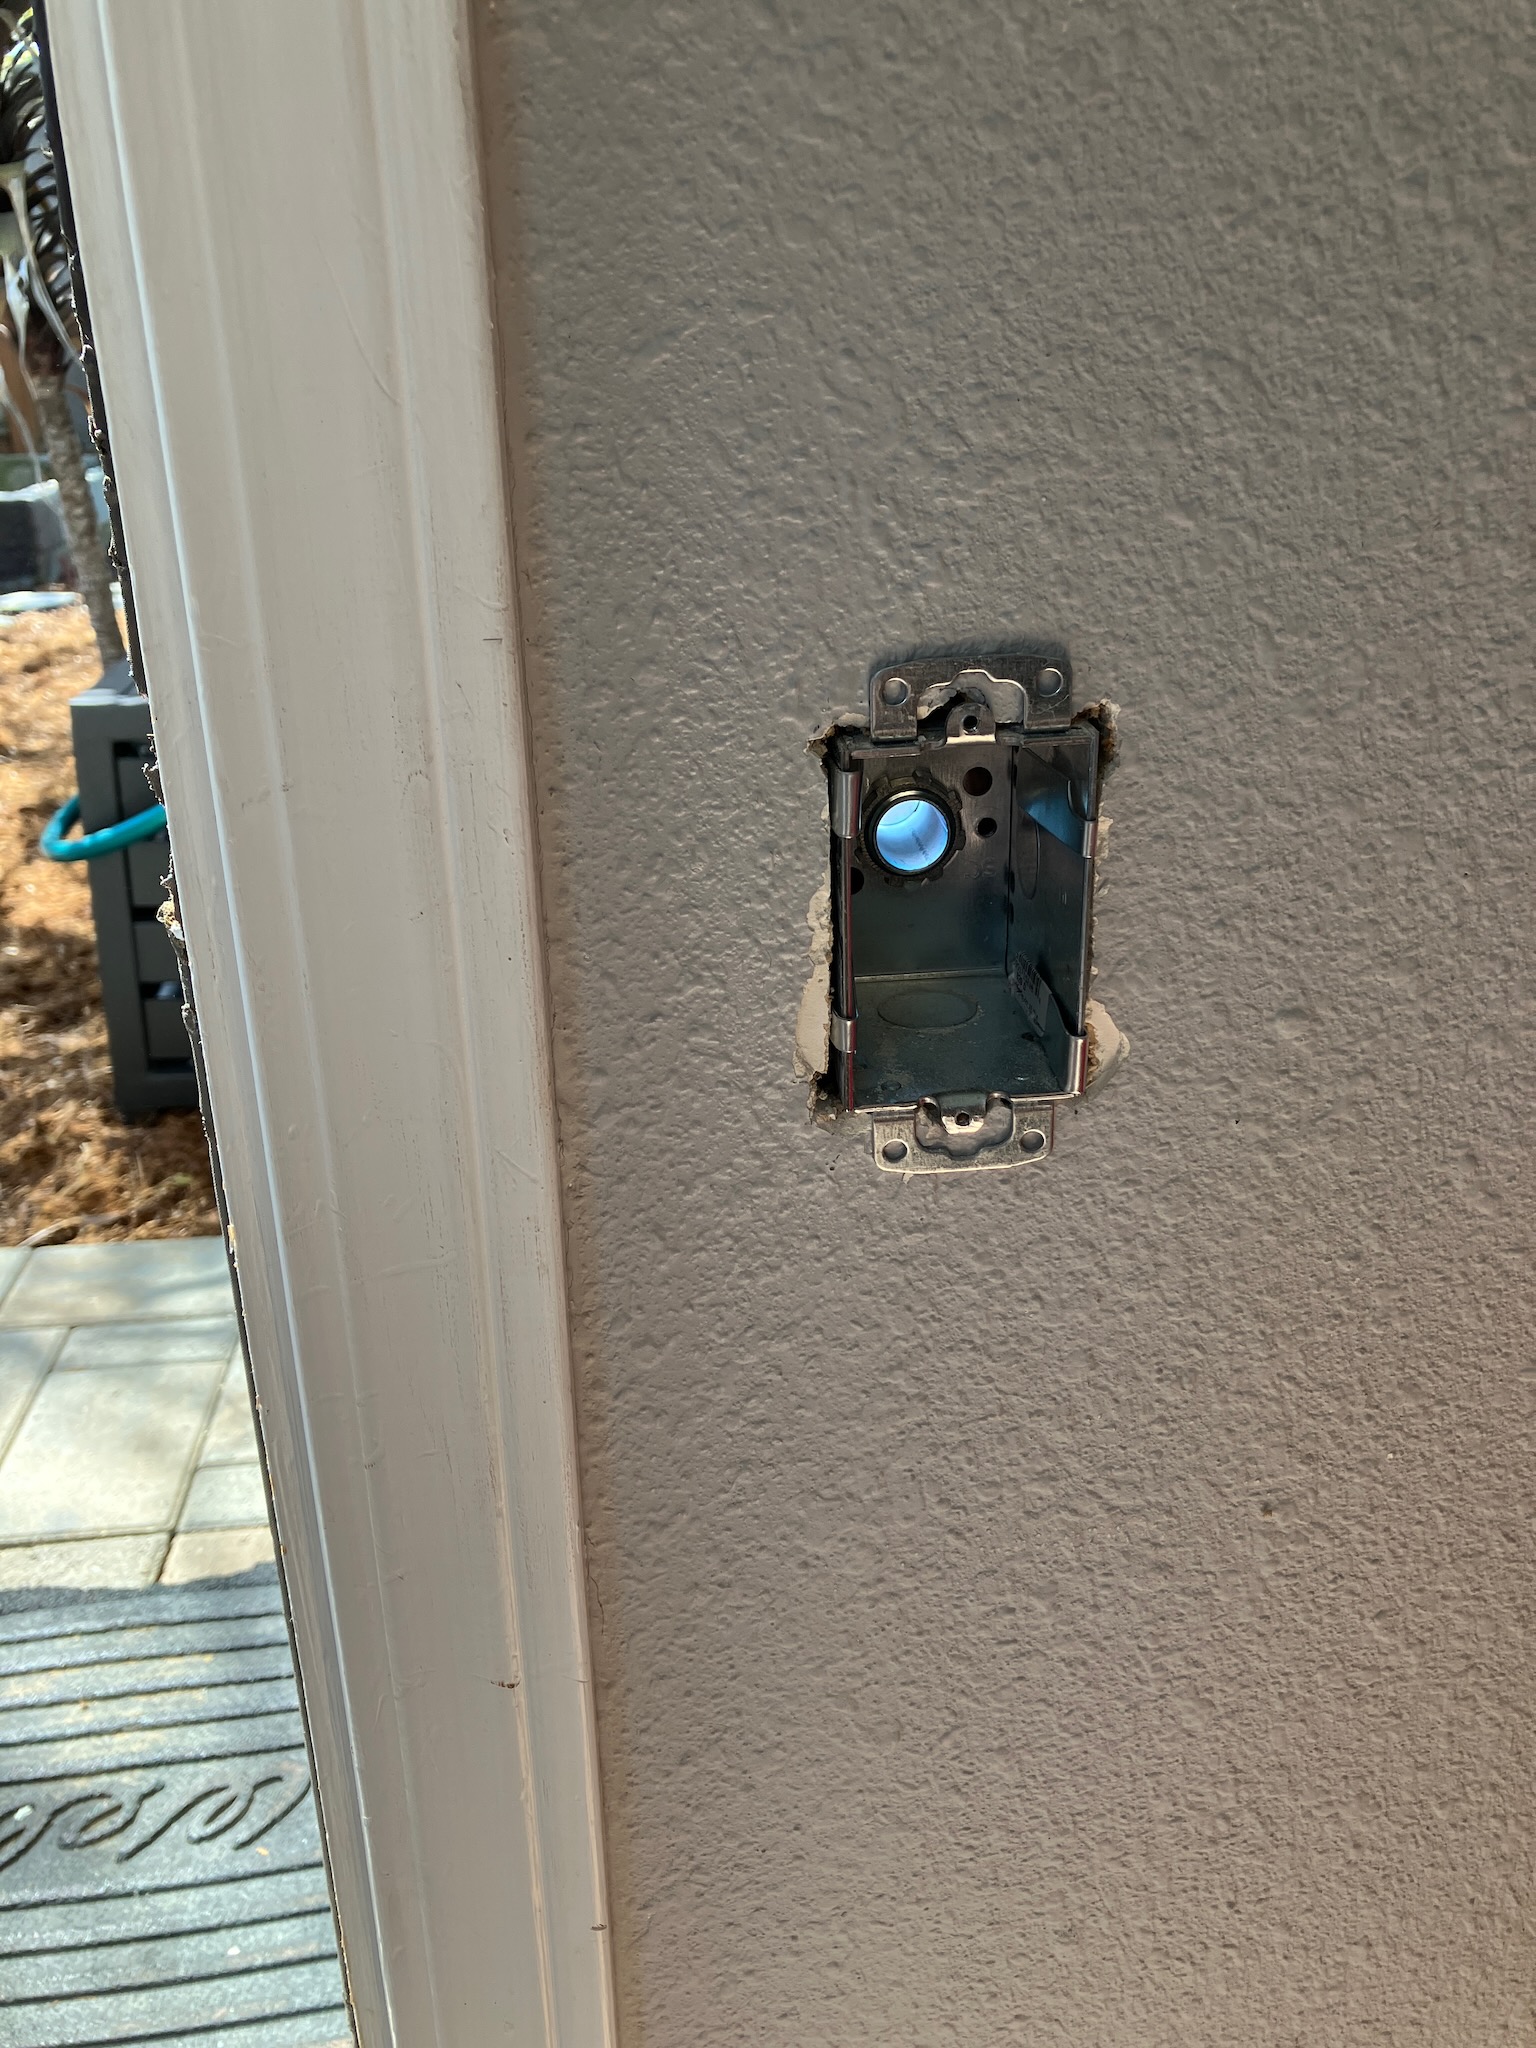
So, the first step of installation is ridding ourselves of that switch and handy-box screwed to the wall.

Oh, ok. Turns out it wasn't a handy-box, but actually a box extension. Interesting. So, slight change in plans: I'll need to modify the new box a little to act as a box extension, which mostly involves measuring and drilling two new holes.

Thankfully, drilling holes is not particularly difficult. It does look a little weird with unjacketed wires coming in through the grommet but oh well, nobody will ever see this once I'm done.

Let's get the MC from the furnace stuck in here.

If you've ever struggled with a conduit locknut before, you really owe it to yourself to get one of these tools. It will save you a lot of frustration.

Speaking of frustration, nothing will ever make packing wires back into an electrical box easy or fun. It's always a struggle, no matter what you do. Thankfully persistence pays off, eventually.

And the all important question: does it work?

Yes, it absolutely does.

Sunday, March 26, 2023

Generating Interest

I've had a few power outages since I moved into this house. Quite a few. In fact, I've racked up almost 70 hours of runtime on my generator, and that's not counting the time I borrowed Tyler's generator before I got this one, nor the time I spent sitting in the dark hoping that the outage wouldn't be long enough to justify hauling out the generator. Needless to say, PG&E is not doing an impressive job of keeping the lights on.

Now, running on generator power is somewhat inconvenient for a number of obvious reasons, but one of the less obvious reasons is that getting the power from the generator, which is outside, to the appliances, which are inside, usually means having a window or door propped open a bit. This tends to let in a little bit of exhaust fumes (not ideal), cold/hot air (also not ideal), noise (ideal, it is not), and various bugs and woodland creatures (definitely not ideal).

So given that the power grid is unlikely to get any more reliable in the foreseeable future, I decided it was time for an upgrade. Specifically, it was time to install a generator inlet.

Now I could have installed a transfer switch instead, so that I could feed the actual house wiring, but I decided to hold off on that. Those transfer switches are usually designed for 240v generators and mine is a 120v, plus my main panel is kind of a little bit over-stuffed and I didn't fancy the idea of adding a whole bunch more wires to it. Also they generally cost over $300.

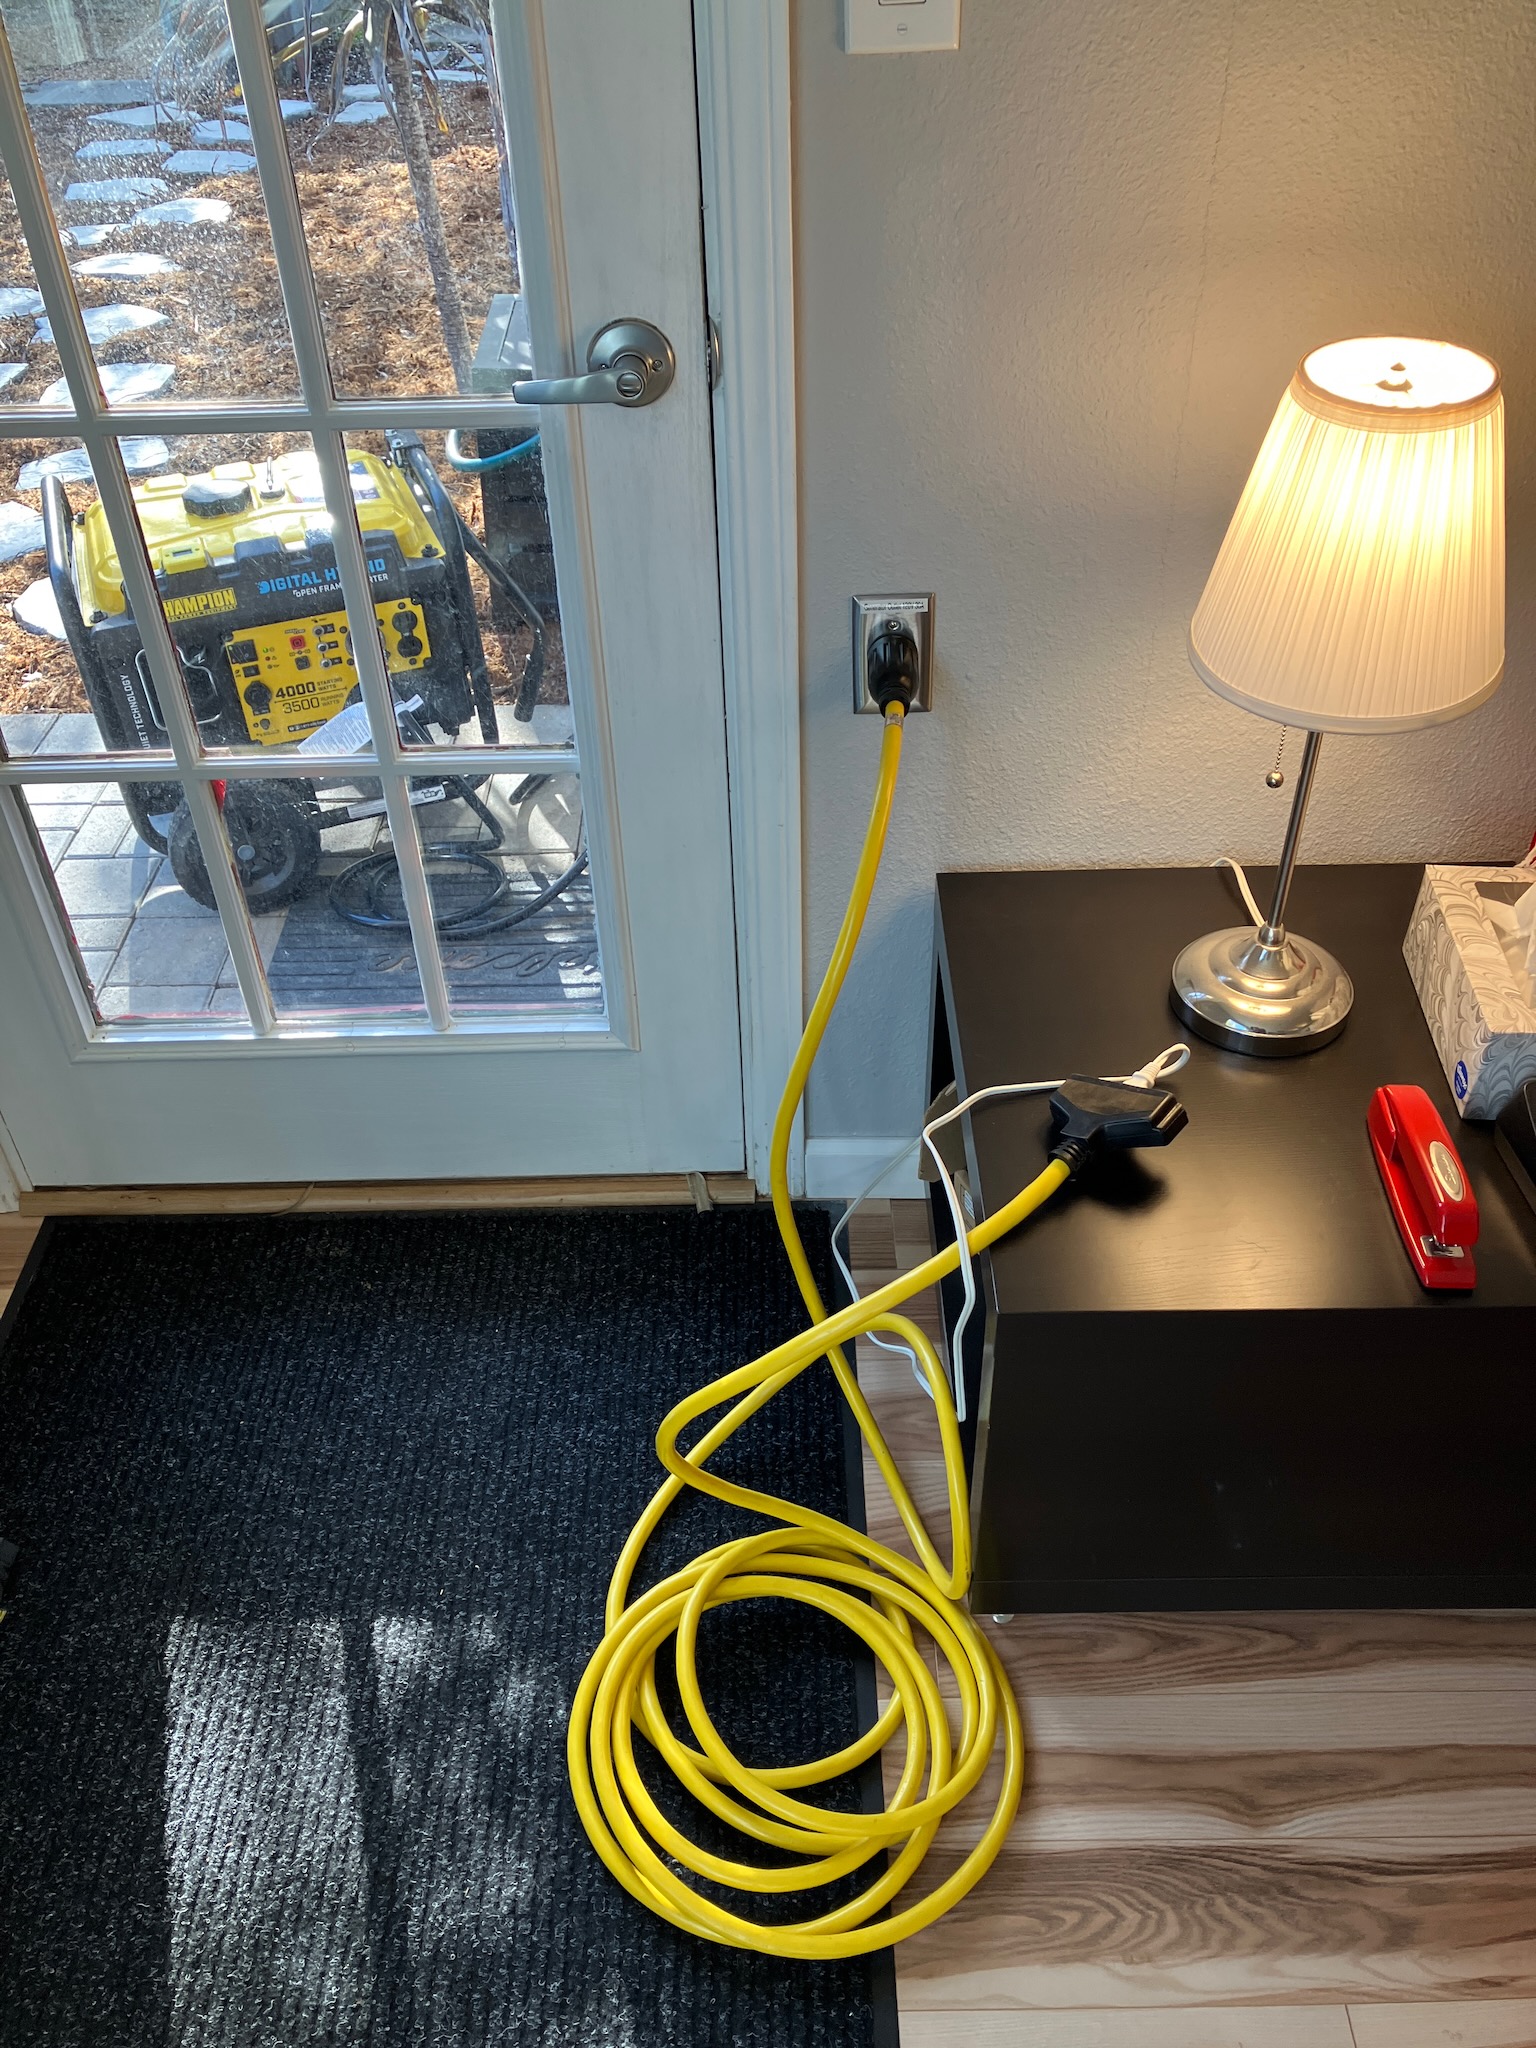
So, downside is that I'll still be dragging extension cords through the house to keep things powered up, but upside is that I won't have to deal with running a cord through an open door or window.

Anyway, to get started, I needed to pick a spot for the inlet. I decided that right beside the back door would be an ideal location, since it was under an awning (to keep the generator dry), near where I store the generator, away from my bedroom (so I don't have to deal with as much noise when I'm sleeping), and conveniently located for running the extension cords through the house.

Yes, this spot will do just nicely. As a bonus, the hose bib piping here makes for a convenient ground bounding point.

Inside, things look just as convenient; nothing in the way I need to deal with.

So let's get this party started. A little poke with the jab saw, and some quality time with a cheap diamond drill makes room for the box and conduit stub to poke through.

I initially tried to drill the holes in the stucco for the wall anchors using my milwaukee drill's "hammer drill" mode and the masonry bit included with the anchors. That lasted about 30 seconds and an 1/8th of an inch into the stucco before I said "fuck it" and got out my rotary hammer. The next 30 seconds was all the time it took to drill the three mounting holes.

Of course that's gonna need a bit of caulking to keep the water out, so let's take care of that before I forget.

Beauty.

Next comes the inlet box. From the factory it doesn't come with the ground/neutral bonding bar; I added that myself. It's important that a power system has a ground-neutral bond in exactly one place, and my generator does not have one, so I figured it made the most sense to install one in this box.

I'm reusing some 10ga stranded wire here that I recycled out of my drawer full of assorted lengths of wire, which you might remember me mentioning in a previous blog entry. I only had some black lengths, though, so I used a roll of white electrical tape to properly mark my neutral.

Speaking of proper markings, any time you're installing a bit of unconventional wiring like this, it's a good idea to label it.

And on the subject of good ideas, let's get that ground wire hooked up.

The rotary hammer (the Boschhammer barely visible in the bottom right, not the orange Black & Decker screwdriver-pretending-to-be-a-drill) is one of the best tool investments I've ever made. It just melts through stucco, masonry and concrete.

Also a good investment: the angle grinder with the wire wheel attachment I used to scuff off the paint from this copper pipe. I had actually thought "oh, I'll just use this regular, hand-held wire brush to clean off some of this paint and expose the bare copper underneath" but apparently paint is much, much more durable than I give it credit for.

Anyway, with the outlet installed on the inside, things are really starting to take shape.

And as a little unexpected bonus, the inlet includes a little indicator LED to tell you that the power is on. In case you somehow couldn't hear the generator rumbling away right beside you.

But in all honesty it is actually nice to be able to see that power is making it to the box, and that nothing weird is happening along the way.

This is admittedly a silly way to light one (1) lamp, but when the next power outage rolls along I'll be happy to have it.