One of the troublesome things about having a gas generator is that the fuel in the carb tends to go bad pretty quickly. This means that, after weeks to months in storage, it will be almost impossible to start without a great deal of difficulty and adult language.
The cure to this problem is simple: one must always make sure to drain the carb bowl before putting the generator back in storage. Simple enough in theory, but it's easy to make excuses when the tools aren't conveniently at hand.
So, I decided to keep the tools at hand. A quick trip to The House of Bezos and a day or two later, this arrives.
A wrench to use on the drain plug, and a silicone measuring cup to catch the fuel.
Of course, there's something about these that may not be apparent in this photo, so here's a second shot.
Working around a generator can be very tight quarters, and having small tools really pays dividends.
And I can assure you that you've never seen a cuter 10mm wrench in your life.
But what do these look like in action?
Well there's plenty of room to swing a wrench this size, to start with.
And not a drop of fuel will poison the soil with how well this measuring cup fits in the space below.
But draining the fuel out of the carb is only one part of keeping a generator running in tip-top shape. The most important thing one must always do is, well, fill it with oil when you buy it. They ship them dry. But the second most important thing is to change the oil frequently because there's no oil filter and less than a quart of the dino-honey in the oil pan. But the THIRD most important thing... wait, the third is draining the carb bowl, we already covered that.
Ok, so the fourth most important thing is periodically checking and adjusting the valve lash, done while the engine is cold. The valves need a little bit of clearance between the rocker arm and the valve stem in order to allow for the valve to expand when the engine warms up to operating temperature. On an engine like this, it's about 0.008 inches on the exhaust valve, since it gets quite hot, and 0.006 inches on the intake valve. As the engine ages, this gap tends to shrink as the valve stems stretch and the valve seats wear, and eventually you get to a point where, when the engine is hot, the valves no longer fully close. This results in combustion gasses bypassing the valves, which then burns the valves and seats, and suddenly you're looking at a full rebuild (or tossing the entire engine).
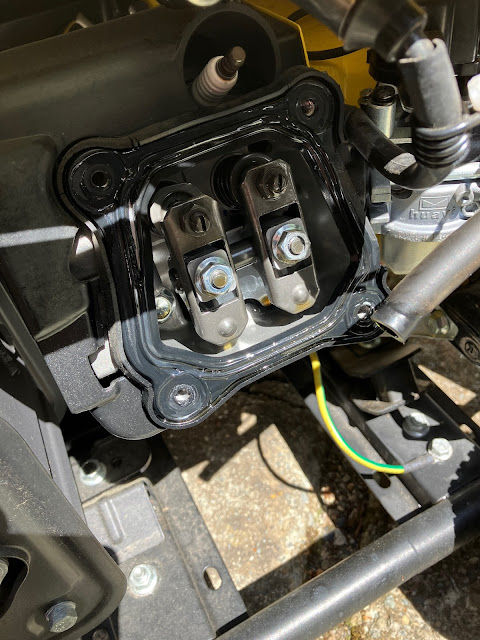
So, let's dive right in. The valve cover comes off, and there's the rockers right there.
The valves are up top, with the adjustment screws and the jam nuts, and the pushrods are below.
It's a good thing I've got a nice short wrench for loosening off the jam nuts.
Then all we need to do is go in with the feeler gauges to set the gap.
Making sure to do this while the engine is cold, of course. I've skipped detailing some steps here, so look up some tutorials online if you're about to embark on this task yourself, and check the manufacturer's specs for the valve lash for your particular engine model.
Anyway, I buttoned everything back up, started it up, and it purred like a kitten. Another successful job done.


No comments:
Post a Comment