I've had a few power outages since I moved into this house. Quite a few. In fact, I've racked up almost 70 hours of runtime on my generator, and that's not counting the time I borrowed Tyler's generator before I got this one, nor the time I spent sitting in the dark hoping that the outage wouldn't be long enough to justify hauling out the generator. Needless to say, PG&E is not doing an impressive job of keeping the lights on.
Now, running on generator power is somewhat inconvenient for a number of obvious reasons, but one of the less obvious reasons is that getting the power from the generator, which is outside, to the appliances, which are inside, usually means having a window or door propped open a bit. This tends to let in a little bit of exhaust fumes (not ideal), cold/hot air (also not ideal), noise (ideal, it is not), and various bugs and woodland creatures (definitely not ideal).
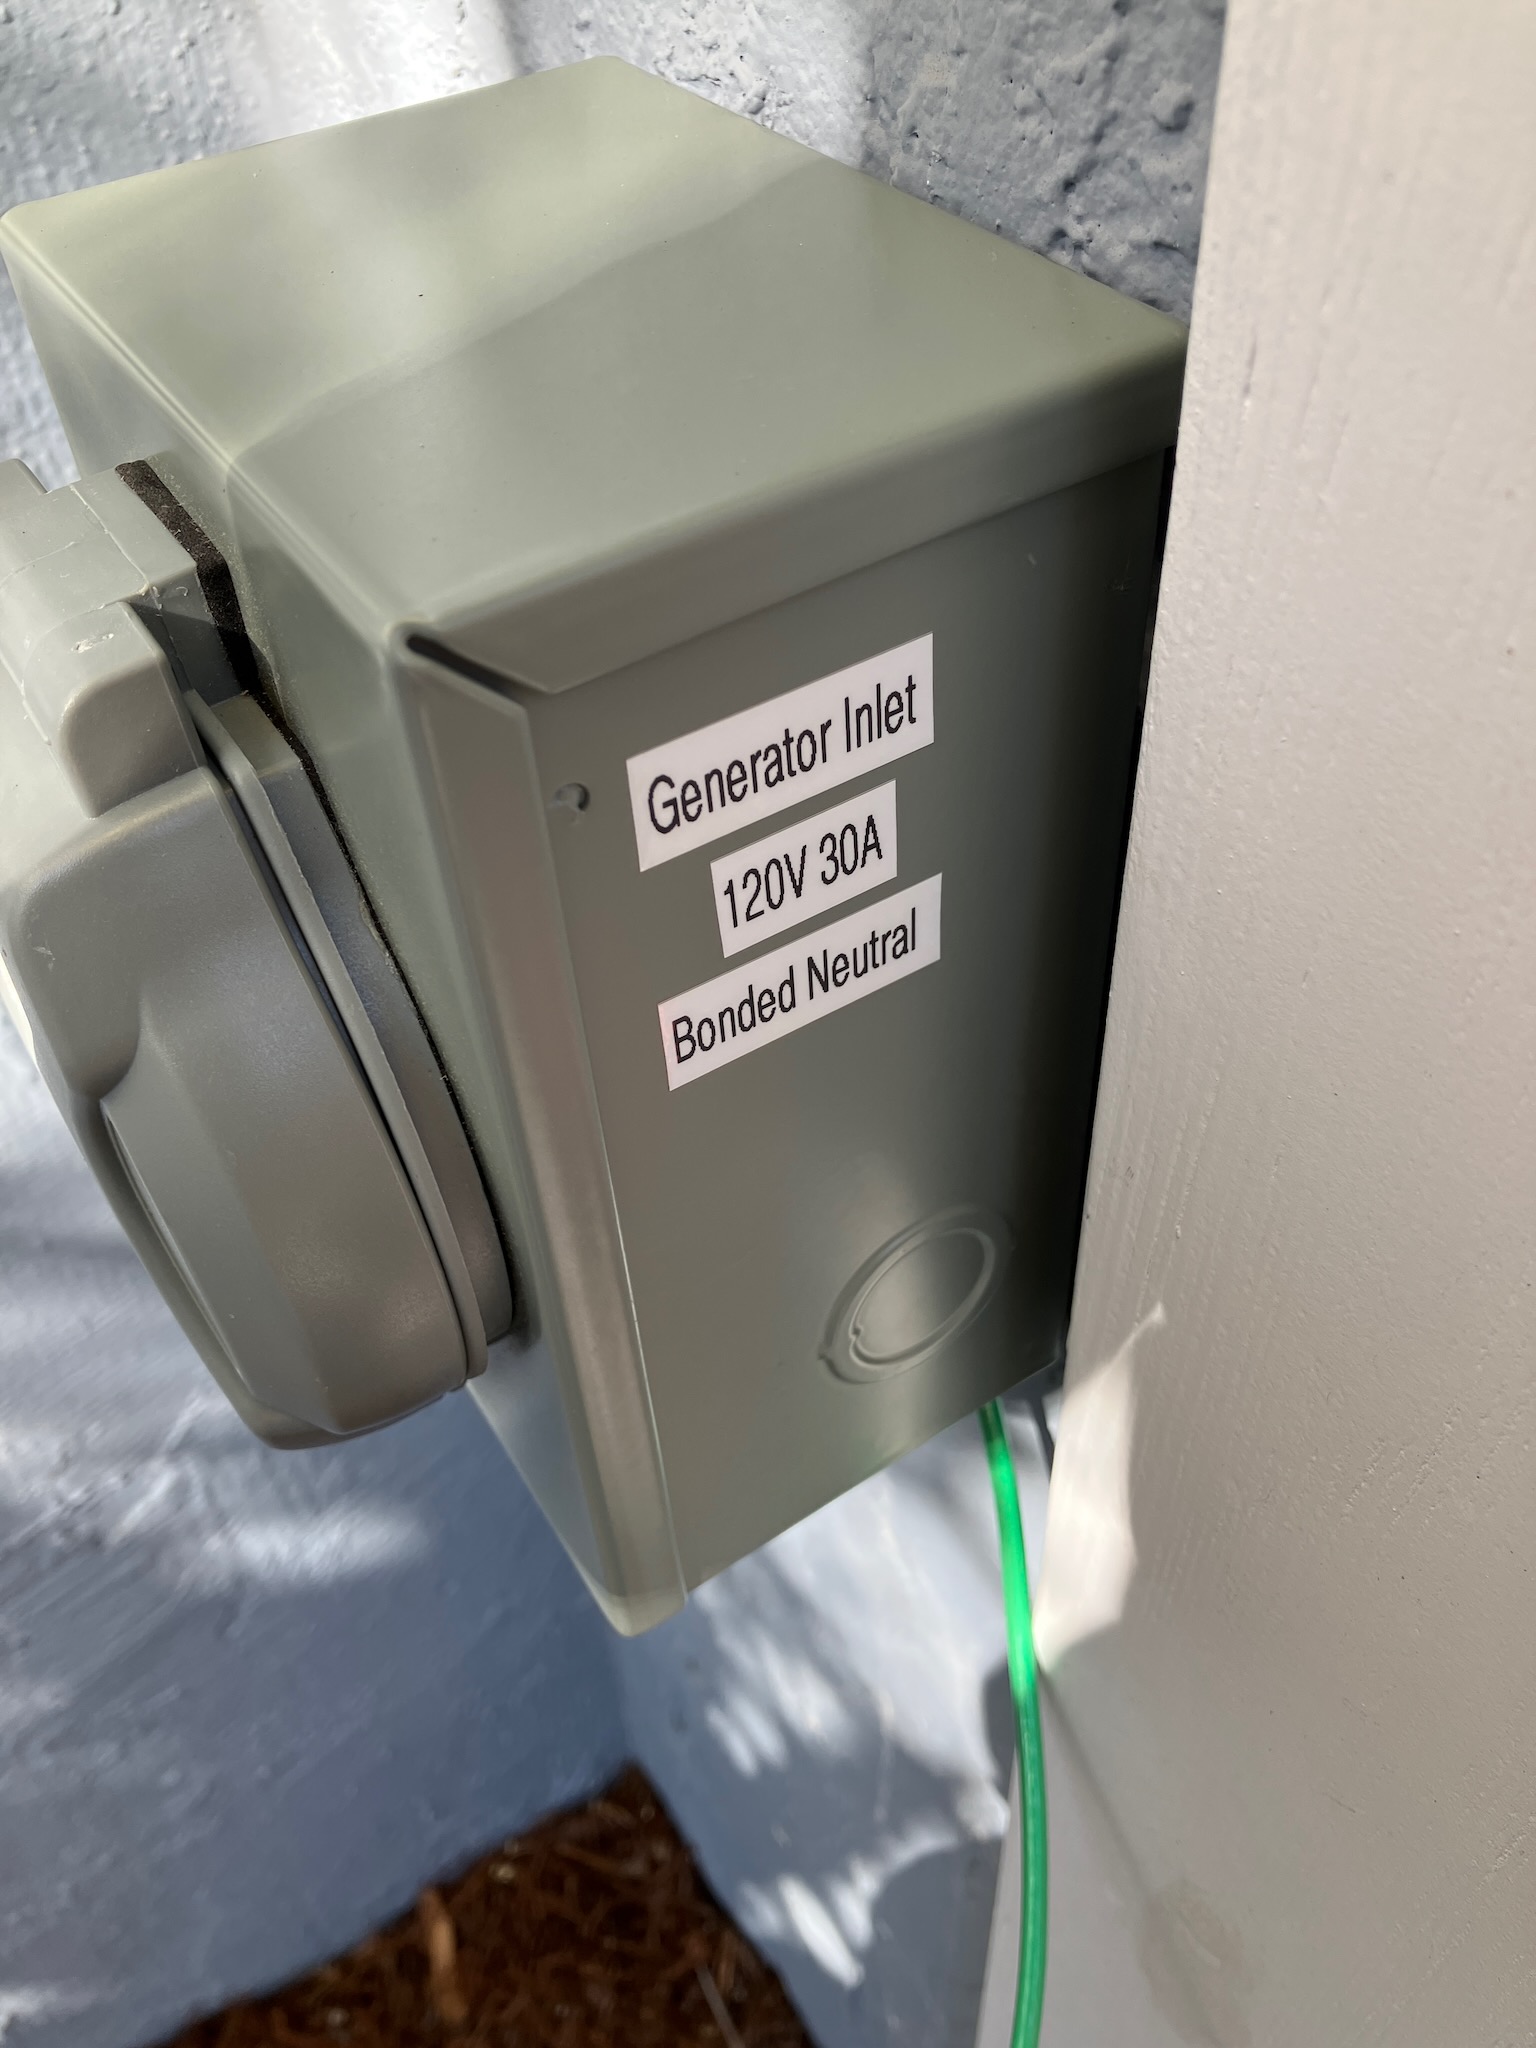
So given that the power grid is unlikely to get any more reliable in the foreseeable future, I decided it was time for an upgrade. Specifically, it was time to install a generator inlet.
Now I could have installed a transfer switch instead, so that I could feed the actual house wiring, but I decided to hold off on that. Those transfer switches are usually designed for 240v generators and mine is a 120v, plus my main panel is kind of a little bit over-stuffed and I didn't fancy the idea of adding a whole bunch more wires to it. Also they generally cost over $300.
So, downside is that I'll still be dragging extension cords through the house to keep things powered up, but upside is that I won't have to deal with running a cord through an open door or window.
Anyway, to get started, I needed to pick a spot for the inlet. I decided that right beside the back door would be an ideal location, since it was under an awning (to keep the generator dry), near where I store the generator, away from my bedroom (so I don't have to deal with as much noise when I'm sleeping), and conveniently located for running the extension cords through the house.

Yes, this spot will do just nicely. As a bonus, the hose bib piping here makes for a convenient ground bounding point.
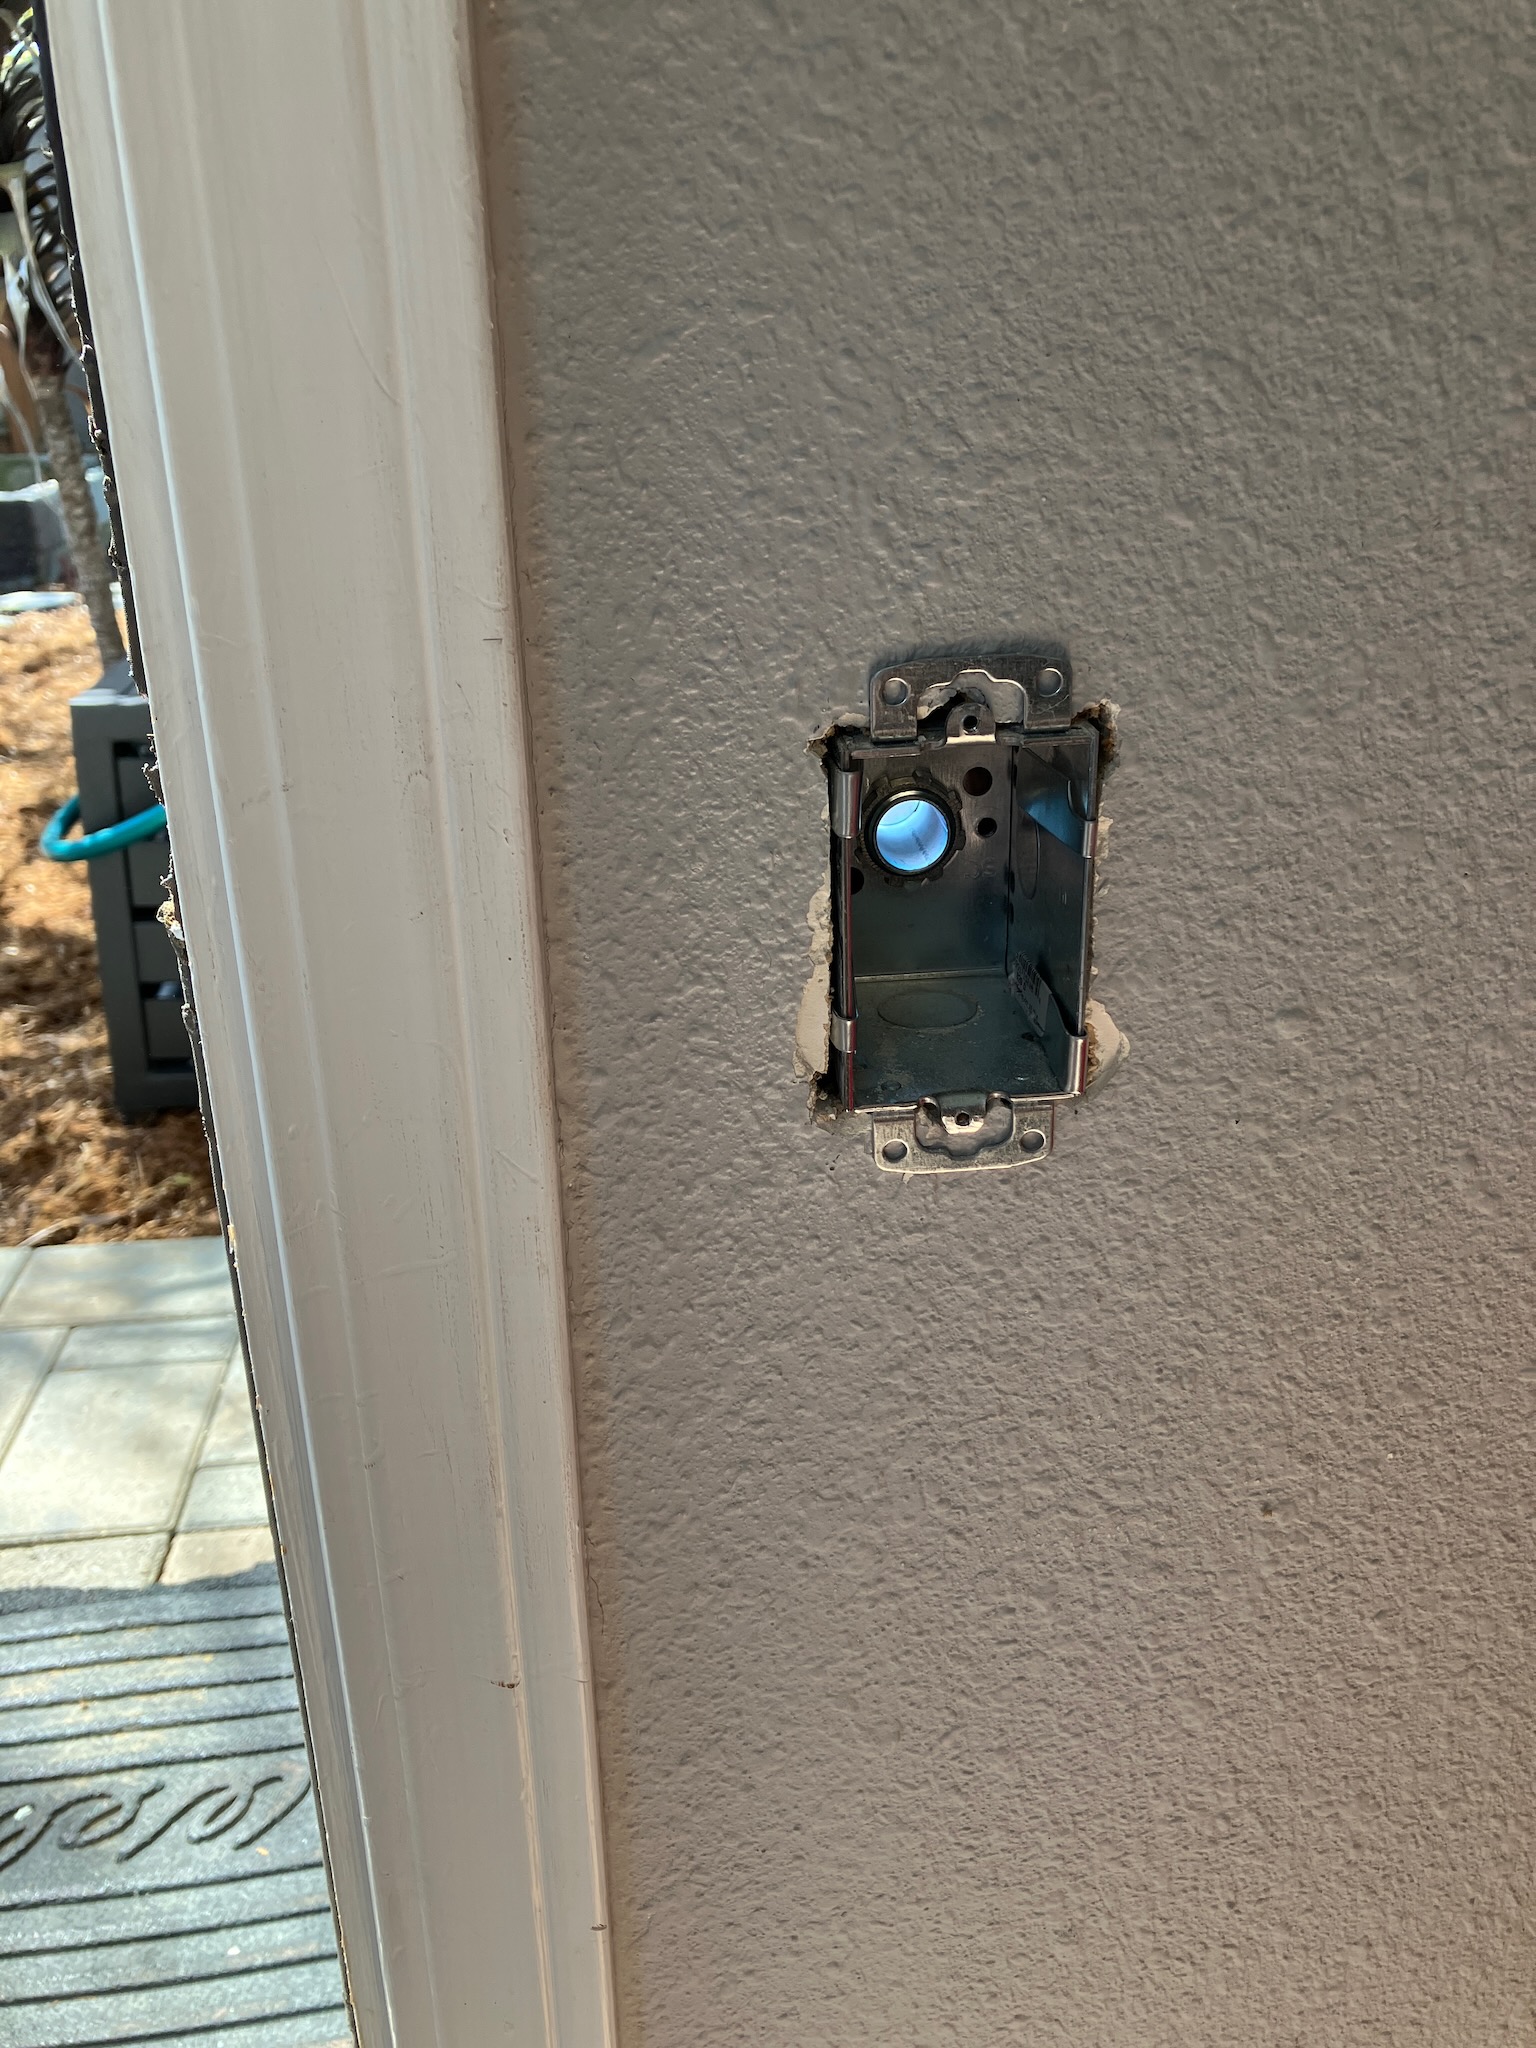
Inside, things look just as convenient; nothing in the way I need to deal with.

So let's get this party started. A little poke with the jab saw, and some quality time with a cheap diamond drill makes room for the box and conduit stub to poke through.
I initially tried to drill the holes in the stucco for the wall anchors using my milwaukee drill's "hammer drill" mode and the masonry bit included with the anchors. That lasted about 30 seconds and an 1/8th of an inch into the stucco before I said "fuck it" and got out my rotary hammer. The next 30 seconds was all the time it took to drill the three mounting holes.

Of course that's gonna need a bit of caulking to keep the water out, so let's take care of that before I forget.

Beauty.
Next comes the inlet box. From the factory it doesn't come with the ground/neutral bonding bar; I added that myself. It's important that a power system has a ground-neutral bond in exactly one place, and my generator does not have one, so I figured it made the most sense to install one in this box.

I'm reusing some 10ga stranded wire here that I recycled out of my drawer full of assorted lengths of wire, which you might remember me mentioning in a previous blog entry. I only had some black lengths, though, so I used a roll of white electrical tape to properly mark my neutral.
Speaking of proper markings, any time you're installing a bit of unconventional wiring like this, it's a good idea to label it.
And on the subject of good ideas, let's get that ground wire hooked up.

The rotary hammer (the Boschhammer barely visible in the bottom right, not the orange Black & Decker screwdriver-pretending-to-be-a-drill) is one of the best tool investments I've ever made. It just melts through stucco, masonry and concrete.
Also a good investment: the angle grinder with the wire wheel attachment I used to scuff off the paint from this copper pipe. I had actually thought "oh, I'll just use this regular, hand-held wire brush to clean off some of this paint and expose the bare copper underneath" but apparently paint is much, much more durable than I give it credit for.
Anyway, with the outlet installed on the inside, things are really starting to take shape.


And as a little unexpected bonus, the inlet includes a little indicator LED to tell you that the power is on. In case you somehow couldn't hear the generator rumbling away right beside you.

But in all honesty it is actually nice to be able to see that power is making it to the box, and that nothing weird is happening along the way.
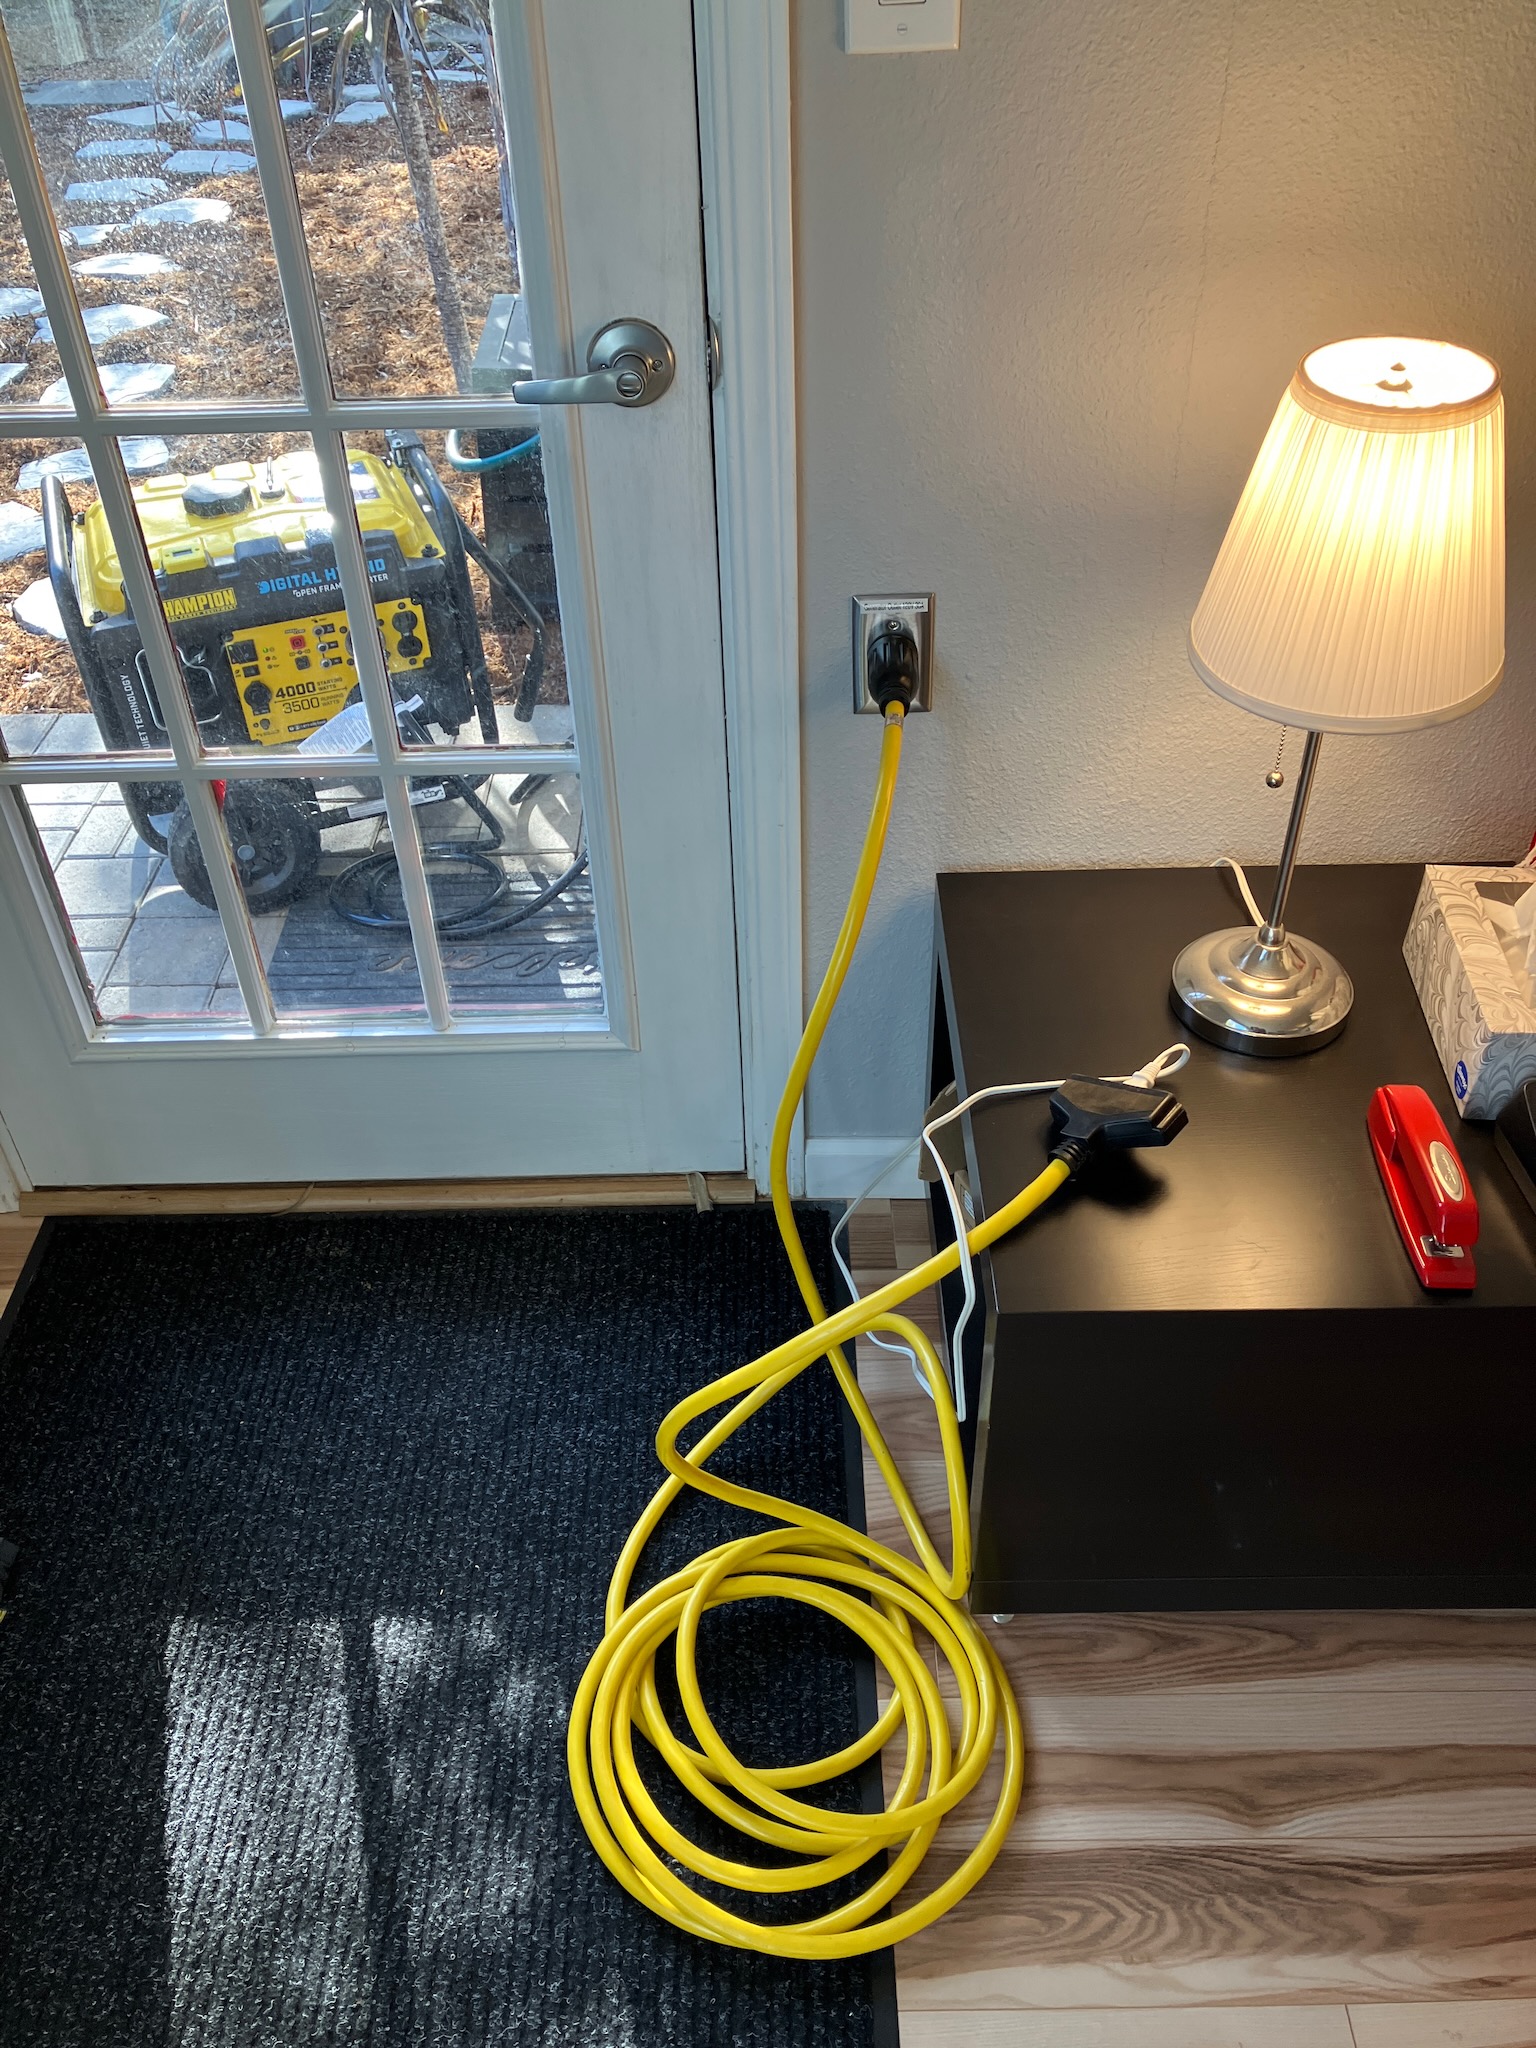
This is admittedly a silly way to light one (1) lamp, but when the next power outage rolls along I'll be happy to have it.
No comments:
Post a Comment