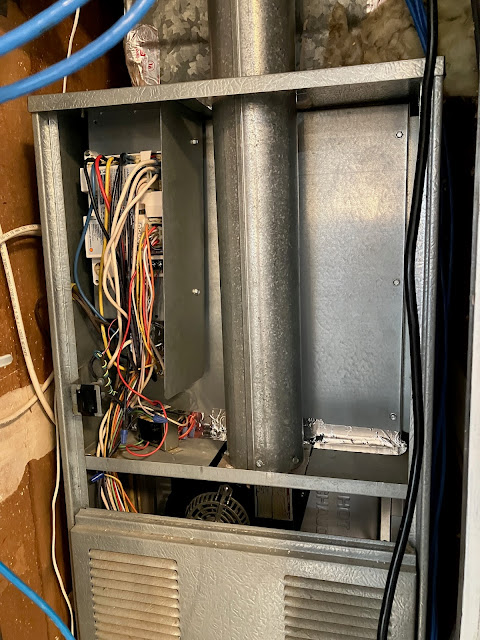
The furnace has been acting up again a little bit, hitting the high limit cutoff error. I ran into something similar before a while back and ended up replacing the main control board (which is surprisingly affordable). This time, however, it seemed to be cutting out in less peculiar ways (like, not immediately after starting) and so I decided to take a different path with troubleshooting.
I decided to clean the main blower fan.
I kind of knew it was going to be dirty. When I got this house the furnace filter was one of those bargain basement $2 fiberglass filters that are guaranteed to catch 99.5% of gravel and coarse sand. The previous owners also had both dogs and cats, so it wasn't hard to imagine the worst. I have since switched to using some MERV-13 filters that turn jet black every time there's a "spare the air" alert, but of course the damage had already been done.
So there's only one thing to do: get in there and clean it.
The good news is that this isn't one of those "the blower is the first thing that goes on the assembly line, and the rest of the furnace is built around it" things. That would be the heat exchanger. The blower is the second piece.
So that means I only have to remove the main board mounting bracket, the flue, and the access panel to get to the blower. Not too bad, really.
But first, we take a photo or two of how the blower is wired.
This is very important because this isn't something you can look up in a manual or online. There's no correct way to wire this, you have to reconfigure the wires between the terminals to get the fan blowing at the right speeds for different modes while measuring static pressure, CFMs, etc, and that's not something I'm at all interested in doing.
Anyway, with that done we can unscrew the main board mounting bracket and swing it out of the way.
Or "out of the way" as the case may be.
Then, a bit of wrestling with the flue and plenum access panel and we're in like sin.
These blowers are generally stuck in place with two bolts and some bent sheet metal tabs that a flange slides into, so removing it is just a matter of popping those bolts out and sliding the fan free. After unplugging the wires from the high temp limit switch and the power lines from the control board, of course.
I should probably mention here that the furnace should be switched off, both the electricity and the gas, by this point. There's full line voltage exposed in here, and it'll give you a tickle if you forget. I did not get tickled this day.
Anyway, the dusty 'ol beast is out.
If I were replacing the blower, this is when I'd be swapping the new unit in. However, this blower is still working fine, it just needs cleaning.
Speaking of "needs cleaning," now is also a good time to get the vacuum out and clean out the plenum.
It's not critical, but you might as well.
Anyway, outside we go with the fan so we can have a look at the dust buildup.
Yup, it's dusty. It's a caked on type of dust, too, so it needs some physical agitation to work it loose.
I used a bamboo skewer and a tooth brush, along with plenty of air from my compressor.
Anyway, with that all taken care of, it's time to get things put back together again. The plenum is nice and clean after a vacuuming.
And the fan slides back into its tabs and gets bolted down again.
Some aluminum tape seals the gaps around the wires, and along the bottom of the access panel where the soft gasket material has hardened into something resembling the texture and consistency of lucky charms marshmallows.
And with everything wired back up and bolted back into place, we're back in business.
Was the cleaning a success? Well, I certainly got gobs of dust out of the fan, and the furnace still works now that it's back together, so that's a positive sign. No hint of an overtemp yet, but it's an intermittent issue anyway so the jury is out on that. I did notice that the furnace sounded a little quieter when it was running, but it's one of those things where it could just be confirmation bias, so who knows.
In all, it took about 90 minutes from start to finish, not counting a nice hot shower afterwards to wash the dust off myself. Well worth the effort, I think, and it's probably not something I'll have to do again given that I'm using good filters now.


No comments:
Post a Comment