Friday, May 30, 2025

Step 2: Install The Rest Of The Fucking Door

When we last left off, the door into my car hole was looking a little bit like this.

Functionally installed, but lacking a bit in terms of aesthetics and weathertightness.

As you might expect, this blog instalment is once again a bit on the lengthy side, so click through to read on.

Sunday, May 25, 2025

Ekcs Dee

 So once again I found myself sifting through the underbelly of eBay looking for bargains that might pique my interest, and I came upon a Korg Minilogue XD synthesizer with my four favourite words "for parts or repair" attached. A few months ago I had actually found another one of them, also in inoperable condition, but ended up losing that auction. This one, though, had an issue that promised to be more easy to solve (some non-functional keys rather than the whole synth showing no signs of life) and was actually cheaper, so I went ahead and bought it.

The diagnosis of the issue was rather straightforward though it ended up requiring a slightly more involved fix than I had initially assumed. You can watch the adventure in this video here:

Anyway, the repair was a success, even with the unexpected twist that happened along the way, and the synth is now up and running and basically as good as new.

I decided to swap it in place of my Yamaha Reface CS. This isn't because the Minilogue XD is necessarily any better than the CS, but rather because the CS has built-in speakers and batteries, and thus it makes sense to use it as a portable couch-synth rather than just tying it down to one spot on my synth desk.

Wednesday, May 21, 2025

I Think I'm Turning Japanese

Or at least it would appear that way according to what I just ordered.

This is the Hakko FR-301, obviously, and there's really no reason I bought the Japanese version; they do make a basically identical American version with english packaging and documentation and a 3-prong plug. And it's also $100 more expensive for some reason.

I suppose I should explain what this is: it's a desoldering gun. To desolder a component, you generally need to heat up the solder past its melting point, then somehow physically remove the liquid solder from the joint. You can wick it away with solder wick, or suck it away with a separate solder sucker, but this tool combines both the solder sucking and the heating in one single tool.

It's also, somewhat inconveniently, designed to run on 100VAC, since it's the Japanese version. So we're going to need to do a little bit of tweaking.

The back cover and solder jar come off quite easily without tools, and then there's 4 screws on the case and 2 on the nozzle that need to come out.

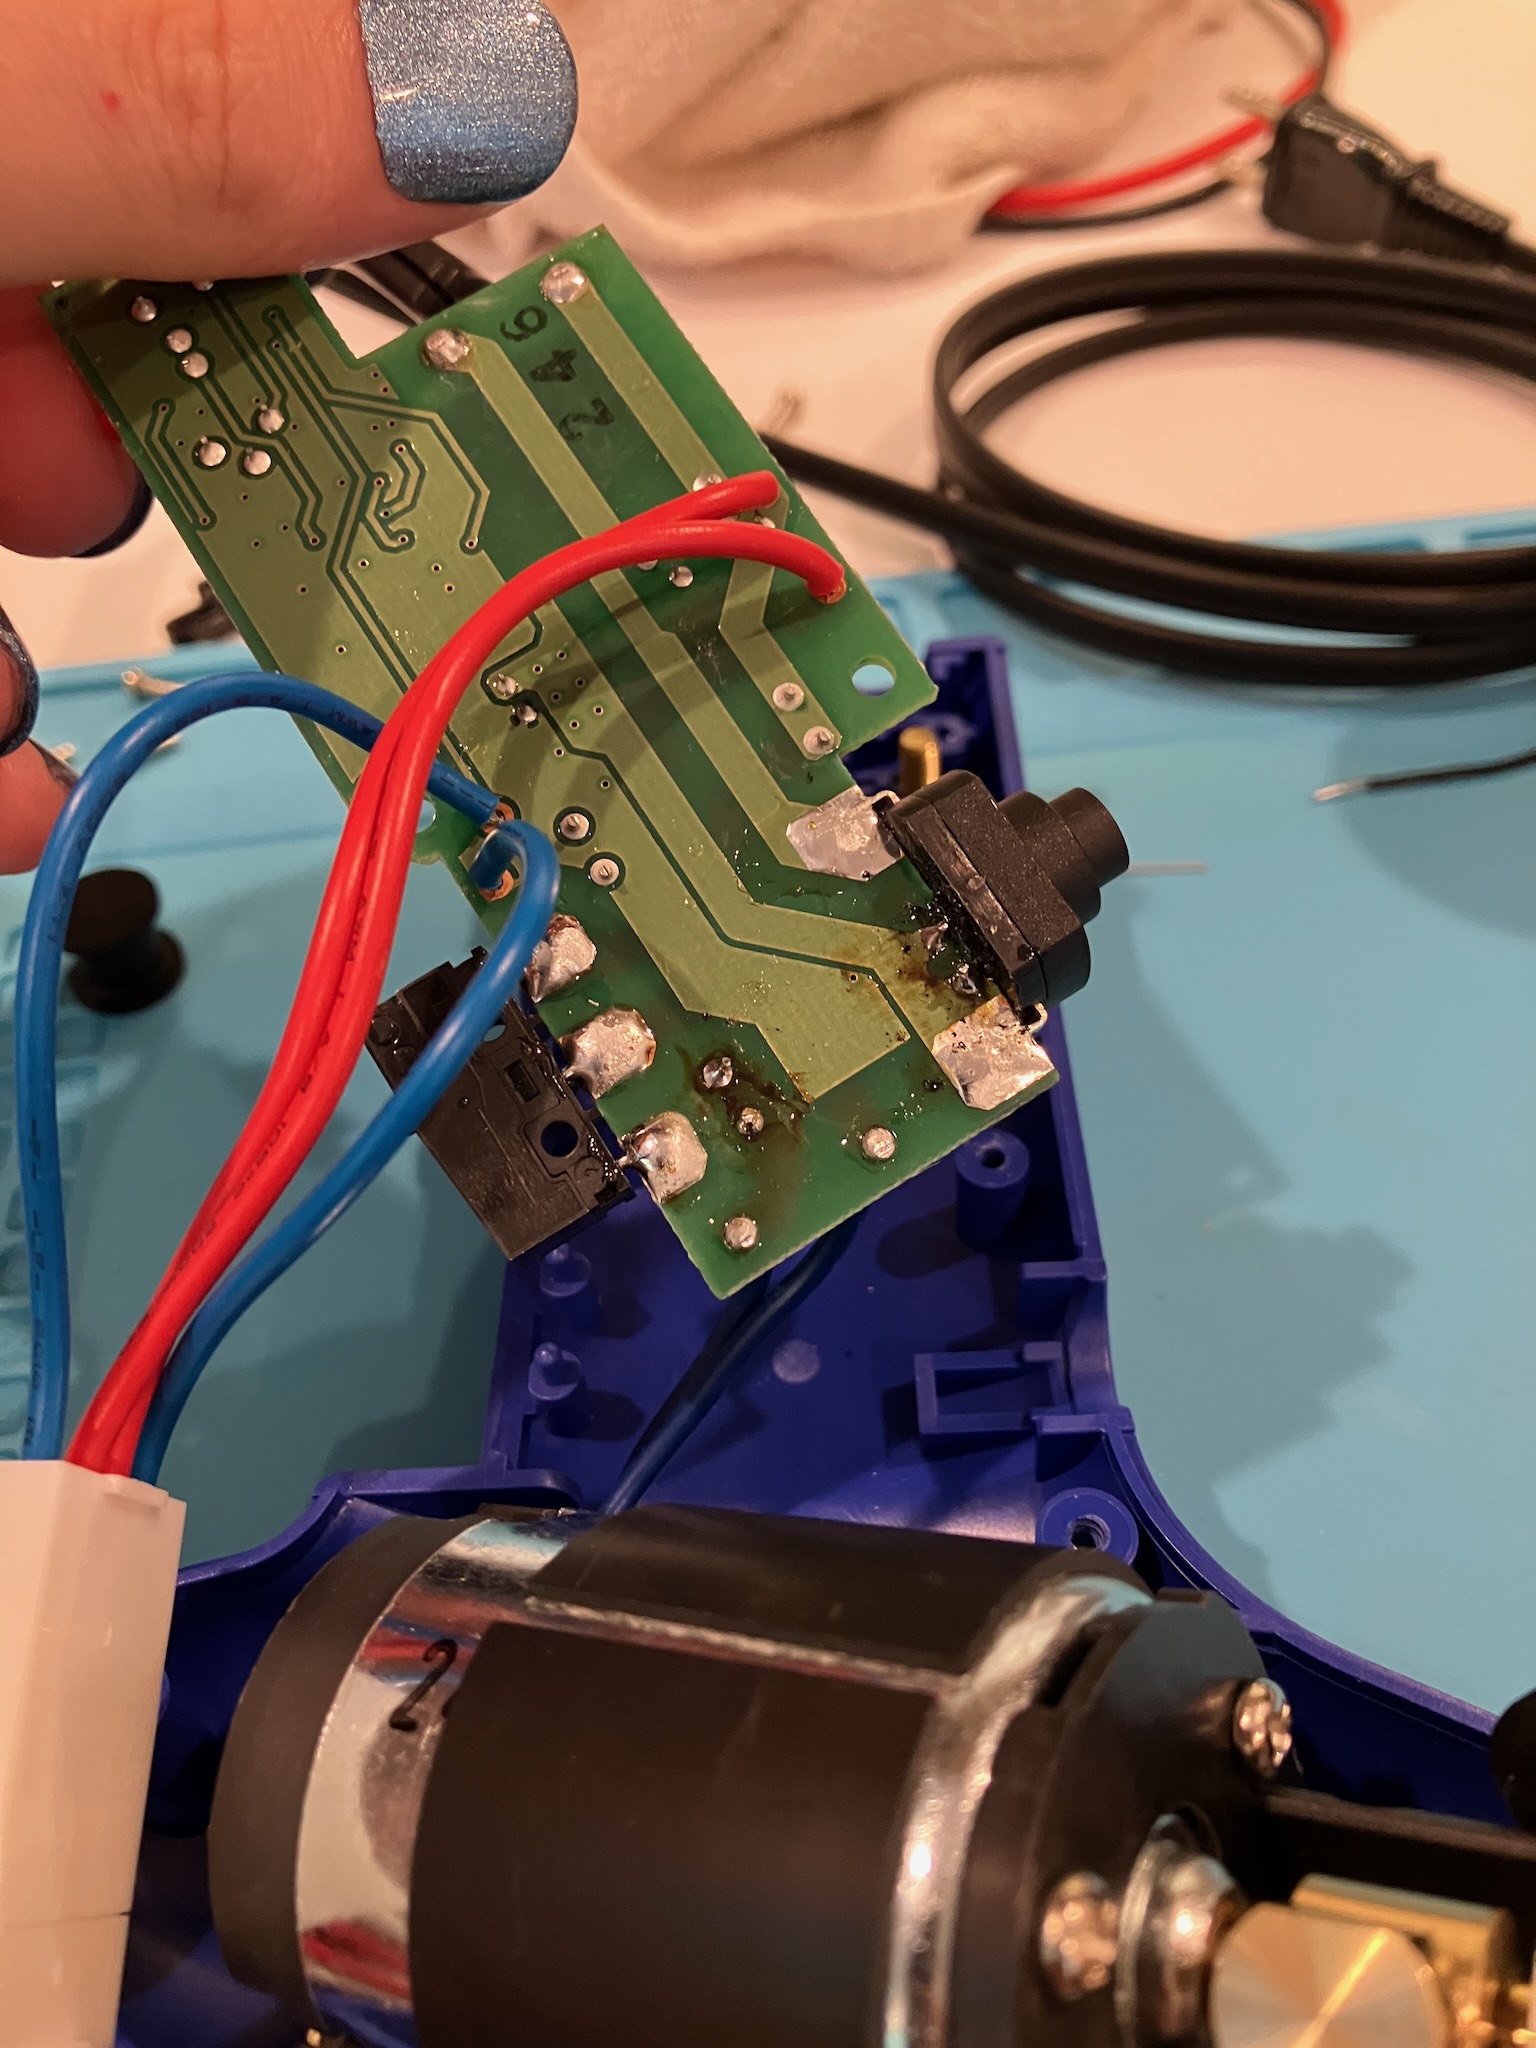
Is it scandalous to see it this naked? Anyway, 2 screws on the PCB and 2 more on the power cord strain relief need to be removed to free up the main PCB.

What we're looking for is the 10Ω resistor that runs in line with the vacuum pump motor, which needs to be swapped out with a pair of 300Ω resistors to get it running the correct speed at 120v.

And yes, I now have 48 spare 300Ω 1W resistors that I'm sure I will find a use for... eventually.

Anyway, to remove the 10Ω resistor we can just use the desoldering gun to... oh, wait.

Right, we gotta do this old school.

This is, quite frankly, a giant pain in the ass thanks to the use of lead-free solder. But I managed.

Thankfully soldering in the two new resistors is pretty easy. Remember to space them off the board so that they don't cook the PCB when they warm up.

And don't forget to clean off the flux when you're done.

Curiously the trimmed leads from these new resistors are magnetic, apparently having been made from tinned iron wire, rather than something like, I dunno, copper?

Given that these resistors are THAT cheap, it's probably not a bad idea to check to see if they're even in spec.

Ok, that's actually not too bad. And since I have a 4-wire meter, I can also check to see how much resistance is coming from the iron component leads themselves.

You really need a 4-wire setup for this as otherwise the resistance from the test leads and the contact resistance from where you connect to the component you're testing will overwhelm the low resistance you're trying to measure.

2mΩ ain't half bad, I guess the iron wire does the job if it's thick enough.

Anyway, assembly is the reverse of disassembly.

And we're ready to suck some solder!

Saturday, May 17, 2025

This Pillow Is Too Spicy

As discussed on a previous blog entry, the magical pixies that power my Garmin 1030 are starting to escape their enchanted prison.

Ok, maybe it's a little more than just starting to. Anyway, it's time to deal with it and conveniently the expanding battery has given us an easy entry point. As per usual, a careful application of heat and guitar picks is the musical spell to gain access into this electrical dungeon.

Once inside we can get a good look at the pixie containment unit, which is dangerously close to being breached.

And by peeling back a bit of tape, we can lift the flex cable connector and disconnect the screen unit to get it out of the way.

One of the screws we need to remove is hiding under the copper tape, and the one in the bottom-right has a washer on it, but they all come out with the assistance of a T-6 and T-5 torx driver.

And the connector at the bottom pops off with just a little gentle prying, the battery cable lifts off, and we can set this board aside.

The pixie prison is, per usual, restrained in place by an adhesive force the likes of which mankind can scarcely imagine. Still though, persistent prying from the underside will be able to overcome its tenacious grip.

As we can clearly see, the pixies in the new spectral chalice are still quite compliant and well secured, and show no signs of rioting or plots of escape.

And a little square of carpet tape binds their souls to the interior of the infernal dungeon.

Assembly is the reverse of disassembly, and we can even check to see that everything is working before setting the screen fully back in place.

And once the screen is snuggled down into its bed of adhesive, with just enough holes and tears now to ensure it is no longer even remotely waterproof, you might never suspect that anything ever happened.

However it looks like only 55% of the pixies are dancing, so a little bit of electro-shock therapy should rouse the rest of them from their slumber.

I'll be sure to post an update later if this new battery burns my house down. In the meantime, I'll call this a job well done.

Expanding Possibilities

So when I installed the conduit along the west side of my house, I just glued the whole length together with all the appropriate fittings and let it be. As it turns out, PVC conduit has quite a notoriously large coefficient of thermal expansion, and so when the sun started beating down on the wall (as it is wont to do), the conduit expanded and bent into a wiggly noodle.

This is not ideal.

So, the solution is to install some sliding expansion couplers.

These ones will expand by up to 4 inches in length, which is, honestly, quite a lot. Way more than I'll need for this length of conduit, but that's the size they come in.

As we can see below, it was slightly warmer outside when I initially installed this conduit, judging from the gap that was left after I sliced through it.

But I think we'll have enough range to accommodate it with the coupling set to about half its stroke.

And if we don't, well... I'll be concerned.

Since I have a box that somewhat anchors the middle of the conduit, I installed one expansion joint on either side.

I actually bought a third joint too, to install along the front of the house, but that run is always in the shade and close down to the soil, so I don't think it'll expand and contract as much. Also it has a bend on one end that can take up a bit of the motion.

But mostly I haven't installed it because it's much more of a pain to physically reach it.

If it proves to be an issue, I have it if I need it.

Wednesday, May 14, 2025

Summer Comes Again

With the changing of the seasons comes the changing of the sealant. The tubeless tire sealant, that is.

Hmm, I thought I had tubeless tires but these are clearly tubulars.

It's also worn out, as tends to happen with the rear tire on my gravel bike after one year.

For reference, it's supposed to look like this.

So with this tire replaced and the tubeless sealant refreshed on all my tubeless bikes, it's also time to do the summertime conversion on my gravel bike.

Since the rain is done for the year. I hope. It did actually just rain on Monday, which is highly unusual.

Speaking of things that are inflating, the battery in my Garmin 1030 is looking a little spicy.

So that's not real good. But the solution is pretty easy.

I'm actually planning on replacing the battery in the 1030, but that generation of Garmins have an absolutely sluggish, underpowered CPU in them leading to a really laggy, slow UI.

So I'm not really sad to see it go, I'll probably pass it on to a cow-orker for cheap once the new battery arrives.

In the meantime, I've got a new toy to play with. The 840 is a bit smaller than the 1030, which actually works out well for me because I have a few mounts that are really designed to fit the 840-sized devices.

And as an extra bonus, the 840 generation now has USB C charging, which is a great upgrade over the micro-B.

Lucky for me, Garmin has made the migration process a lot easier recently, so all my data screens and so on synced over automatically.

They're even generous enough to throw in an out-front mount, which is actually sized to fit the 10x0 series devices.

But I already have plenty of extra mounts, so I'll probably toss this one in with the 1030 when I get rid of it.

So stay tuned later for the battery replacement adventure.

Thursday, May 8, 2025

Super Freak, Super Freak

So we now turn our attention back to the Arturia MicroFreak that I had picked up on a whim. After a bit more investigation I was able to determine a few things.

First off, thanks to the thermal camera I picked up, I was able to narrow down the failure of the 6v +/- supply to the regulator itself, and not any of the chips it powers.

Secondly, I was able to figure out that it's actually just a 6v supply, not a 6-7v supply. I misinterpreted a page on the datasheet regarding how the positive and negative voltages are calculated across the sense resistor bridge.

Thirdly, I discovered that the supply actually only powers three chips in the VCO and VCF circuits, not the audio output. The latter is actually driven by a 1.8v linear regulator, which is apparently sufficient to drive low-impedance headphones. Go figure.

Anyway, the full repair is documented here:

And I'm glad to report that the fix worked great. The synth has actually been performing solidly for a few weeks now and shows no signs of failing again, though who knows how long that'll last. Hopefully forever.

Also the rose bush is in full bloom

Which is nice.

Saturday, May 3, 2025

I See A Red Door

This is the door to my car hole.

And let's just say it's seen some shit. Part of the problem is that it's just a basic wood door exposed to the elements, with no awning or overhang to keep the rain off of it. Part of the problem is that it was just never installed correctly from the get-go.

Part of the problem is that it's been literally chewed to pieces and (barely) cobbled back together with whatever bodge was closest at hand.

The frame is in no better shape of course, having rotted out at the top and definitely at the bottom.

On both sides, of course.

So a simple slab-swap isn't going to do here. Instead, we'll need to get much more invasive.

This is a long one, so click through to read more.