If you will remember back a few weeks, in a previous post I mentioned that my Brother CV3550 Coverstitch machine was being a pain in the ass getting itself jammed up by grabbing two loops of needle thread at the same time. What I didn't mention at the time is that all signs pointed to there being too much friction in the needle thread path, and so today we're going to have a look at it.

Yup, looks like a coverstitch machine.
First things first, Brother, for some reason I'll never understand, specifies and ships this machine with standard domestic HAx1 needles. Universal tip, even. There's two things wrong with this.
First off, I'm probably mostly going to use this machine with knits, so it makes a whole lot more sense to get ball-point needles so that the needles go between the threads rather than through them.
Secondly, the ELx705 needle is much more appropriate for chainstitch machines like a coverstitch or overlock machine.

But why is that? After all, on the front of the needle everything looks the same between them. On the left is the ELx705 needle, and on the right is the HAx1

Both of these needles have roughly the same groove up the front, basically the same eye, and almost the same tip (the needle on the left is a ball point, which is ever so slightly more blunted).
But if we flip them over, what do we see?
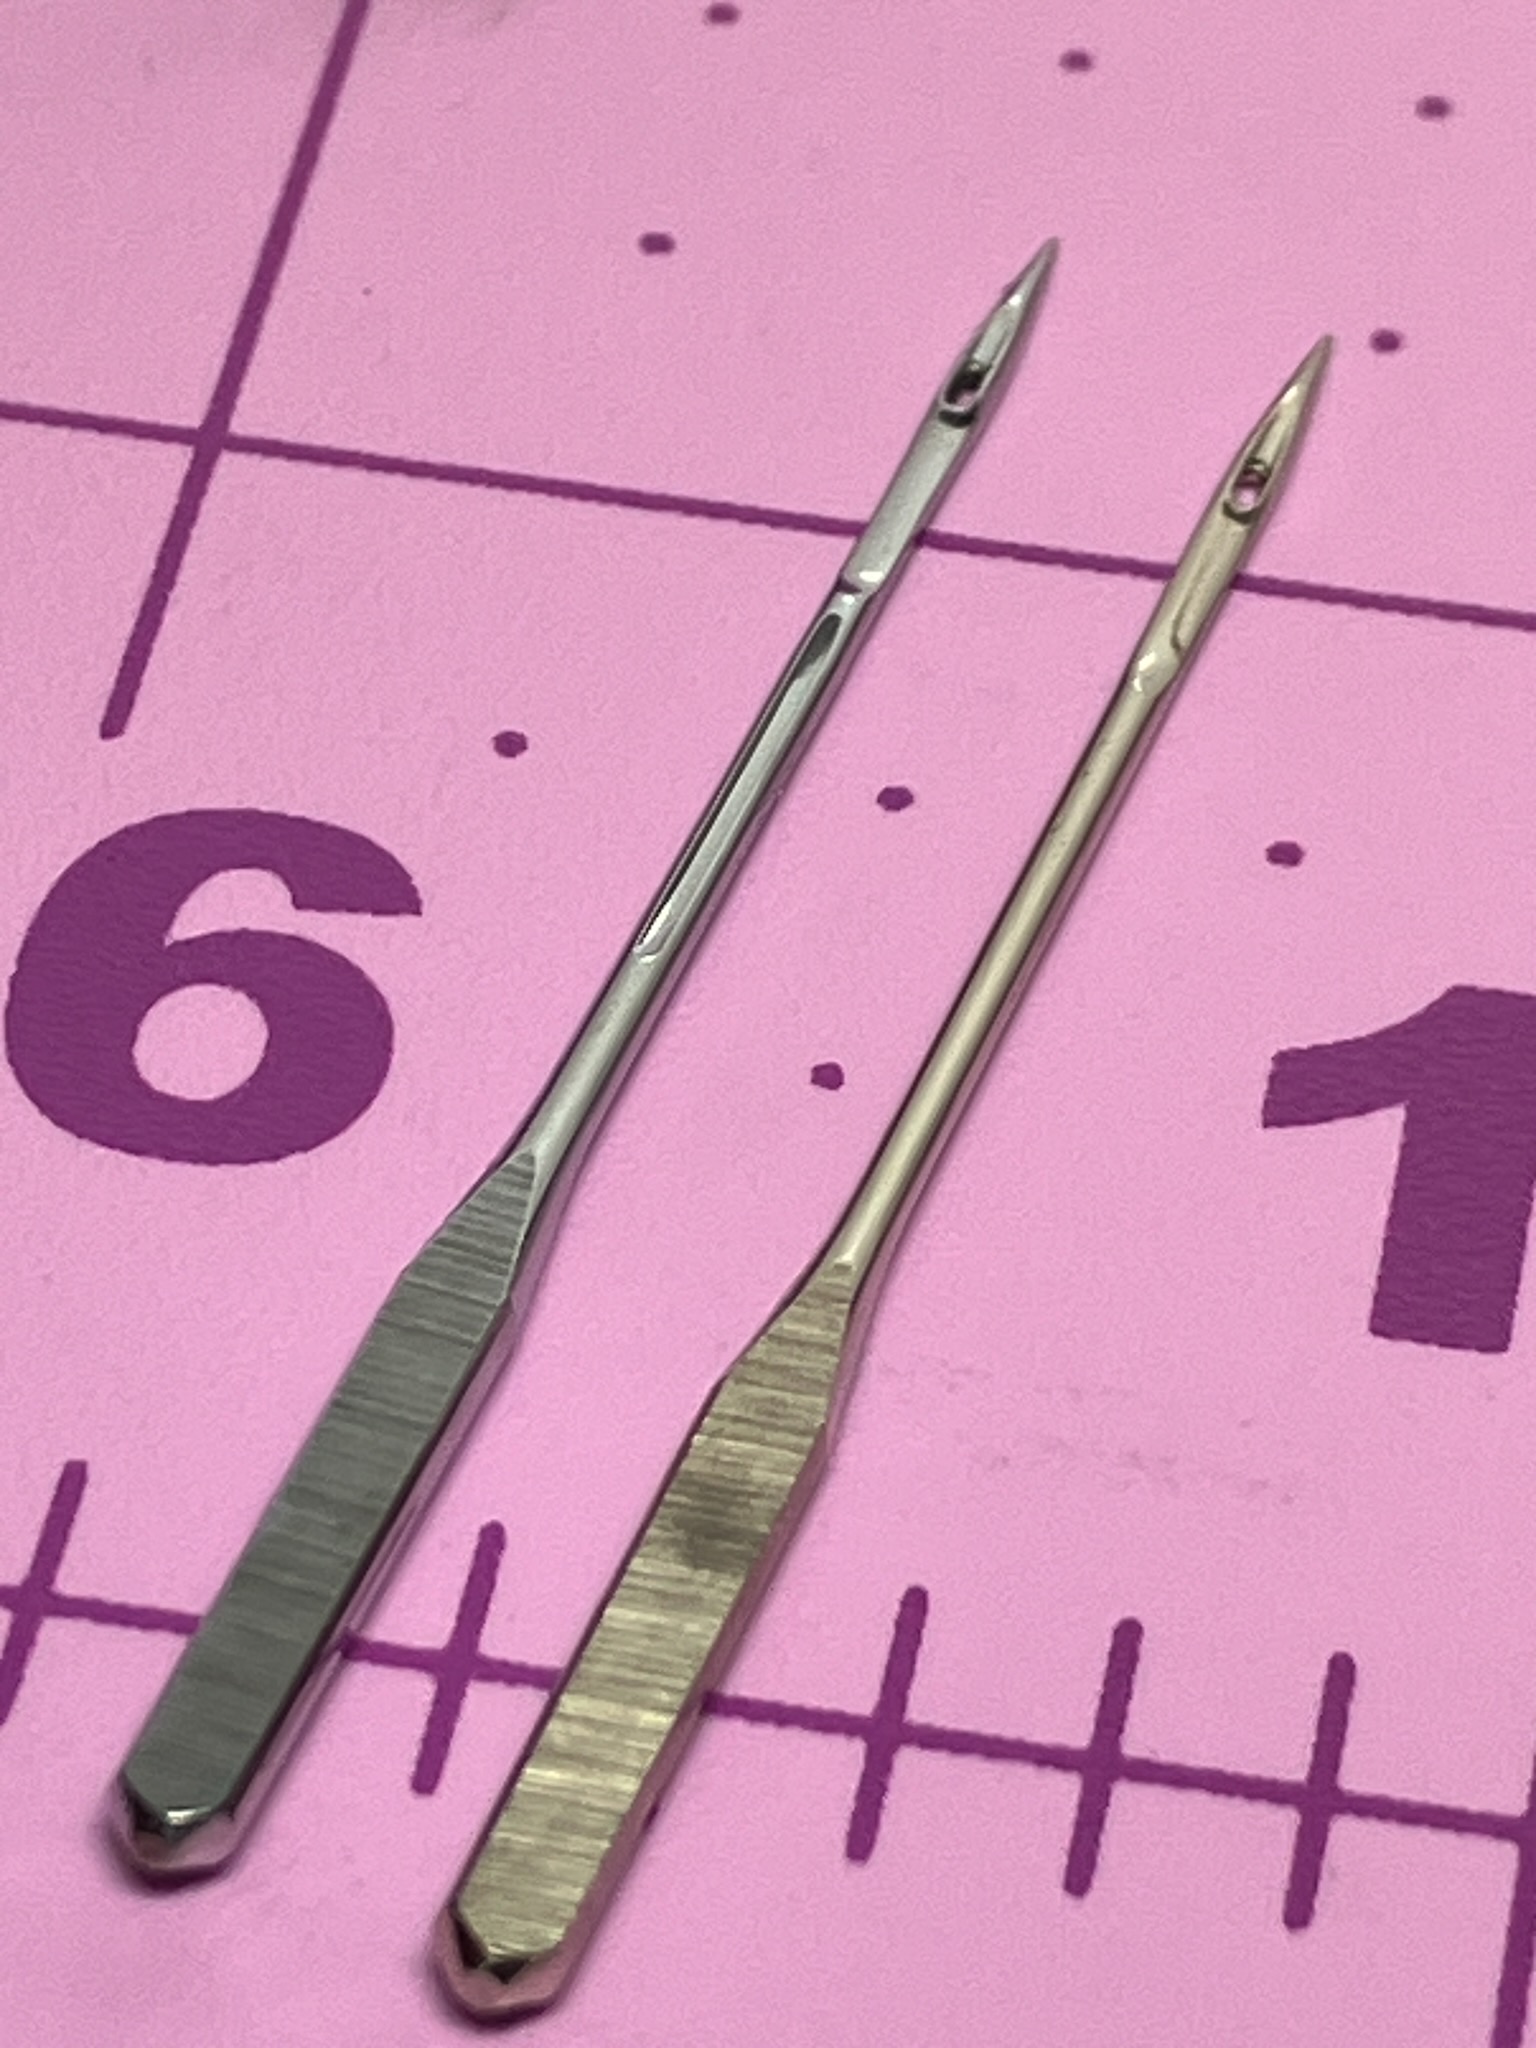
The scarf is basically the same, but what's this? On the ELx705 needle on the left, we can see an extra groove! This groove is very important.
You see, when a regular lockstitch machine forms a stitch, the needle thread from the previous stitch is already pulled taut and there's no slack to take up, thus there's no excess thread behind the needle that needs to be drawn down through the fabric of the new stitch. But not so on a chain stitch machine, there's still a significant amount of excess needle thread on the looper when the needles come down through the fabric to begin the next stitch, and that excess thread needs to be pulled down through the fabric behind the needle, which is what that extra groove on the back of the needle facilitates.
Obviously if the needle thread gets jammed up behind the needle, then the loop from the previous stitch won't be pulled out of the way of the looper, and you'll get two loops on the looper leading to a jam.
So that's one mystery solved, but we're not quite done here. Let's take a closer look at the top of the machine for a moment.

When the thread comes off the cones in the back, it goes up around the thread tree just out of view, then comes back down and goes under these silver rectangular... things. I call them "things" here because Brother explicitly and deliberately doesn't give them a name. In fact, in the manual, when describing that you should route the thread under these things, it rather obviously avoids naming them, only referring you to an illustration of where the thread should be placed. Curious. Let's remember this part and come back to it later. First, we need to disassemble.
We'll start with the upper looper assembly.

This comes away easily with two tool-free clips.

Next we'll need to get rid of the thread tree, since it's in the way of one of the screws we need to access in the back.

I promise I can aim a screwdriver when I'm not holding a camera.

Next we'll remove the free-arm insert.

And this is a good place to raise a beef about modern domestic sewing machines. They waste so much space to the left of the needle for absolutely no reason. Like that entire plastic shelf under the free arm? There's nothing inside there. And that wart behind it? The only thing in there is one counterweight which could have been made much more compact.

See that? Nothing in there.
Anyway, rant aside, we need to pop off the magical thread take-up door.

Which does literally just pop off.

Then it's just a couple screws to get the top front cover off.

And we'll also want the lower front cover off, and while we're at it we might as well get rid of the rear cover too.

Now that the machine is properly naked, we can get to "servicing" it. Brother claims that you don't need to lubricate the machine, and instead you should take it to an authorized dealer for "servicing" periodically.

That "servicing" is literally just cleaning out the lint and squirting it with sewing machine oil. In this case I'm using Juki's New Defrix #1 because I happen to have a lifetime supply that I bought after I picked up my LS-321.
The name of the game here is "if it moves, give it a drop of oil (no more, and no less)". Most of this machine is actually lubricated with grease, but the grease will thicken up over time, and mixing in fresh oil like this will loosen it back up. Ideally the entire mechanism should nearly spin freely other than the drag from the motor. You can remove the belt to test this, or just not do that and learn to recognize what the machine should feel like with the motor still hooked up.
Now remember back when I mentioned those curious silver rectangles at the start? And how I also mentioned that the needle thread in particular had a lot more friction than I would have expected? Well, it turns out that Brother was pulling a sneaky trick.

Those metal clips are hiding a set of five thread oil sponges. Instead of making sure that the thread path is properly polished for low friction, they just trick you by lubricating the thread instead so that it slides a bit better through the cheaper-to-manufacture machine. Of course, over time these sponges dry out, which is why when you take your machine to the dealer to get it "serviced": one of the lubrication points is to soak these sponges in thread oil.

A little something like this, in fact.
So let's slap the machine back together and see how we did.

And as we can see, the bottom side of this coverstitch looks perfect. No dropped stitches, no weirdness, no issues at all.

And it's the same story on the top side, the stitches and top cover turned out perfectly.
Of course, we can also make different stitch lengths, and they also look just fine on the bottom.
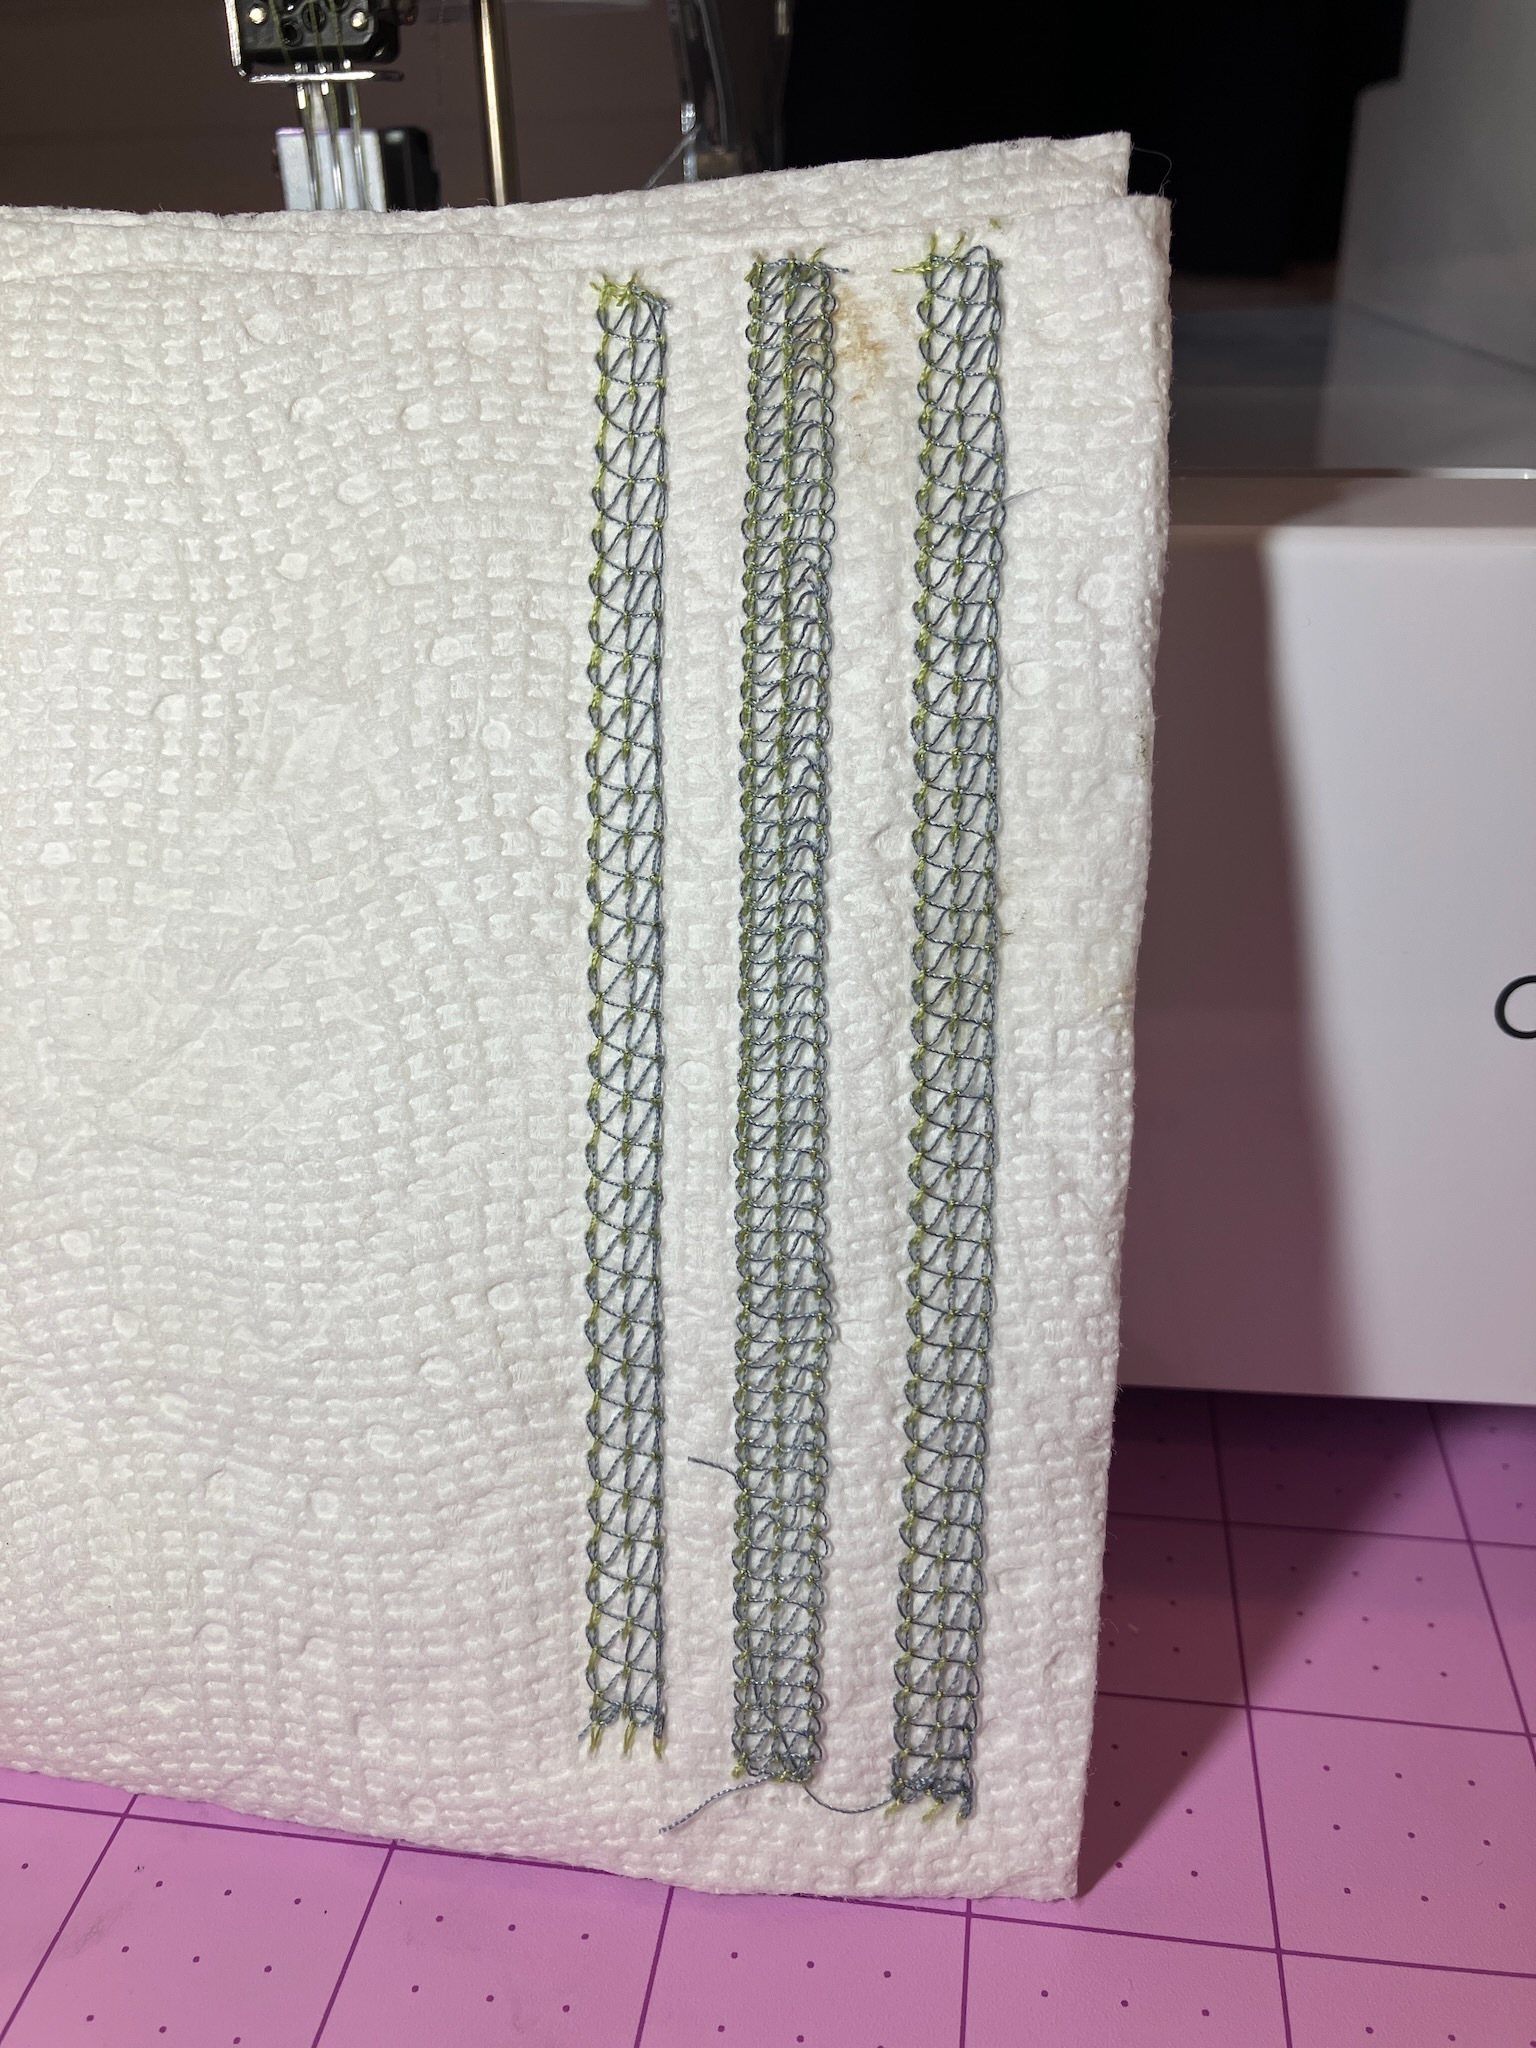
And on the top.

Of course I could probably do to tweak the tension on the various threads but that's something I can deal with when I'm sewing a real project and not just testing the stitches on a piece of paper towel.
So there you are, all the secrets of the CV3550 that Big Brother doesn't want you to know.
No comments:
Post a Comment