Friday, May 31, 2024

Keebing Up With The Joneses

Alright, last keyboard post for a while, I promise.

So, I initially got the MageGee keyboard for use with my server, but as it so happens my server is right next to the desk where I use my chromebook, and my chromebook has a pretty awful keyboard built into it. As you might imagine, this lead to me using the MageGee keyboard on my chromebook rather than on my linux box, which sort of defeated the purpose of getting the keyboard for my linux box.

Thankfully, this problem has a solution.

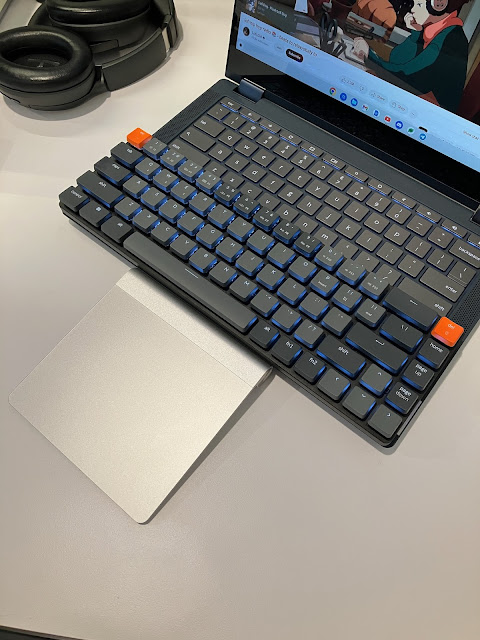
This is the Keychron K7, a 65% keyboard (which lacks the F-key row but maintains an arrow key cluster smushed in under the enter key), and it is miles better than the keyboard built into my chromebook.

And it also fits really nicely on top.

Speaking of things fitting nicely on top, it's time to return the MageGee to its forever home.

Now I am fully keebed up.

Wednesday, May 29, 2024

Hemming and Hawing

A few years ago my sister went on a trip to Barcelona. While there, she was kind enough to pick up a t-shirt for me.

It's been wearing quite well over the years, but being a tourist t-shirt it's not exactly the highest of high quality, and so the hem at the waist has been giving me a little trouble.

If you crack open your copy of the United States Government Master Specification for Stitches, Seams, and Stitching of 1926, you'll quickly recognize that this is an EFa-2 stitching using stitch type 406. This stitch type is a chain stitch, which means that if a stitch is dropped (as is clearly the case here), it will continue to unravel all the way up the seam any time that the looper thread is caught and pulled.

In fact, I previously had an issue with this hem coming unravelled, which I temporarily repaired using my standard domestic sewing machine (which was all I had at the time)

Of course a standard domestic machine produces a stitch type 301 (and can also produce a 302 when used with a twin-needle, and a 304 if you engage the zig-zag feature... or a 305 if you use a twin needle with the zig zag feature, although that's a very uncommon thing to do). The straight lockstitch, while very secure, has the downside that it does not stretch with knit fabrics, and so it is not the stitch of choice to use for hemming a t-shirt.

Thankfully I happen to now have a coverstitch machine, and a very fancy one indeed which can do a stitch type 605 if it's set up with all three needles and the upper looper. Or, for this project, the more mundane stitch type 406.

But before we get to that, we need to clean up the hem to get it ready for sewing, so it's out with the old.

And after trimming some of the excess fabric that had previously been folded up under the looper thread, it's in with the new. I decided to add some lightweight knit fusible interfacing tape here to help stabilize the hem a little bit. It'll keep it from curling up and being unruly, as well as give it a bit of body to resist the tunnelling effect you can sometimes get when applying a coverstitch hem, where the looper thread on the back pulls a bit too tight, and causes a ridge between the two lines of stitching on the front side.

And then I just run it through the machine easy-peasy to create the finished hem.

But I just performed a little magic trick here: I only actually have one spool of matching thread, so how did I thread both the looper and two needles? Well, easily enough: I wound a pair of bobbins to hold the needle thread.

Of course, the keen eyed amongst you will also notice that this isn't my Brother CV3550 coverstitch machine, but in fact my Singer Professional 5 overlocker/coverstitch machine. Why would I be using that one, you ask?

Well, if you scroll back up and click on the video showing how the type 605 stitch is formed, you'll notice that there's quite a lot going on below the fabric. The needles have to come down behind the looper to pick up the looper thread, then the looper has to retract and then slide behind the needles to pick up the needle threads, and then the needles retract, the fabric advances, and the cycle starts all over again. This is pretty much the most complicated and finicky sewing mechanism that you'll find on a domestic machine, and my Brother was not having a good day.

In particular, it was not managing the threads on the bottom side quite well enough, leading to the looper picking up the previous needle thread loop along with the two new needle threads that it was supposed to grab. This unfortunately completely jams the machine when it happens, which requires fully stopping the seam, undoing the mess that it made, and starting from the beginning all over again.

I spent a good 2 hours trying to figure out what was going wrong with the machine, and I have a bit of a hunch, but more on that in a future post. For now, the easiest path forward was to use the Singer, since it was behaving itself much better, and I was able to successfully sew the hem with it.

And it looks pretty damn good if you ask me.

Monday, May 27, 2024

Clickety Clack

 So now that I've dipped my toes in to the magical world of mechanical keyboards, it's time to get serious about it. The cheap Magegee 80% keyboard will work nicely for my server, but I have been taking the opportunity to put a few miles on it in production use to see what I liked and didn't like about it, with an eye towards perhaps replacing a few other keyboards around the house.

First off, the big thing (literally) that I wasn't fond of was the full depth key travel. It's been a dog's age (literally) since I last used a full depth keyboard, and I've been getting quite used to the short action of a low profile keyboard. It lets me keep my fingertips a little less curled without them fouling on neighbouring keys, and even though I got somewhat used to it over the course of a week or so of typing, I decided I wasn't fond of the idea of going back to full depth.

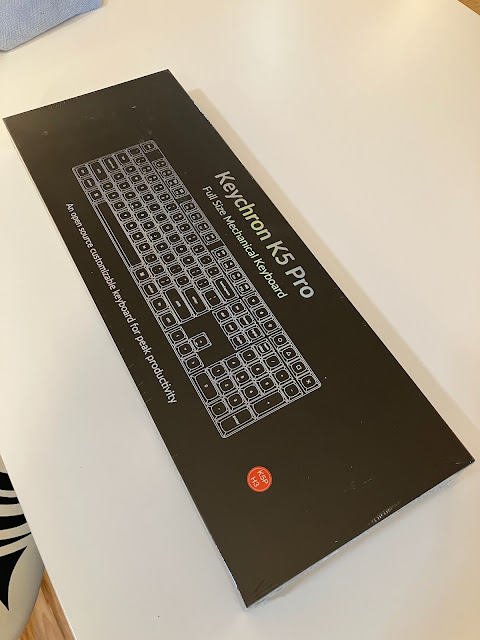
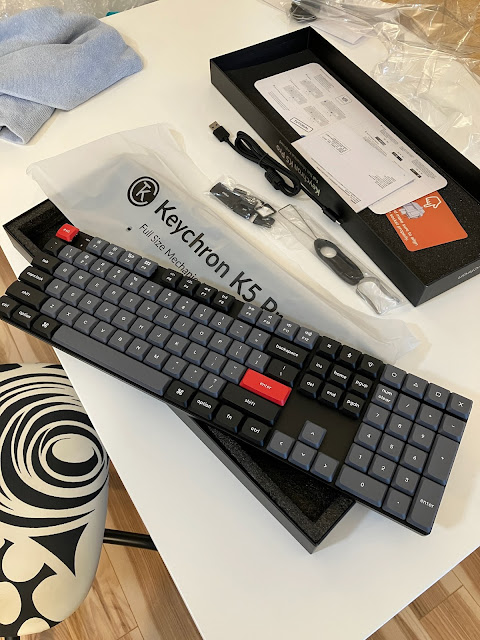
Luckily, low profile mechanical keyboards, while a bit less common than full depth ones, do exist, and so I ordered up the Keychron K5 Pro to use on my wintendo.

It's a full-size keyboard, which comes in handy when playing modded games (Minecraft, Skyrim, etc) where mod authors have a fondness for adding hotkeys as a necessary component of accessing their mod features. Once you add a few of those, you quickly start running out of keys, so having some extras really comes in handy.

I decided to go with the brown switches for this one, rather than the blue switches I got on the Magegee. The browns are a tactile rather than a clicky, which means they still have a bump in the travel to give some positive feedback of key activation without necessarily having to bottom out the key switch, but they're a bit quieter and a bit smoother than a blue clicky keyswitch.

I also tried putting this keyboard to work for a few days to get a good feel for it, and I was quite pleased with the low profile key travel. The brown tactile keyswitches were also quite nice, but I did find that for full-on typing rather than gaming, I did miss the more positive key feel of the blue clicky switches.

Luckily, since my wintendo is primarily for gaming, that actually worked out quite well.

Armed with this knowledge, I made a selection for the keyboard I'd be using as my daily driver at my work setup.

This is the NuPhy Air75 V2, which is as the name suggests, a 75% layout. It still has all 12 F-keys, the arrow keys in an inverted-T configuration (though it's tucked in under the Enter key rather than on its own island as it would be in an 80% layout), and impressively manages to not only squeeze in the page-up/down, home/end and ins/del keys, but also has space left over for a dedicated screengrab key (though every key on the keyboard is technically configurable for whatever you'd like).

The unboxing experience is curiously recursive, but does at least give a decent first impression.

But what actually matters, of course, is the keyboard itself. I opted for the lightest colour option, with the mostly-white keyset that's paired with a lovely grey for the special keys, and a nice accent with the enter, space, and escape keys.

The backside has a nice metal weight to give the keyboard some heft, as well as 2-level flip-down feet. The case is all plastic down there, but decently good quality stuff.

They also include a 2.4GHz dongle in case bluetooth isn't your cup of tea, plus a sampling of their alternate switches. I opted to get the keyboard kitted out with the blue clicky switches, but I was very close to picking the wisteria tactile switches instead. The moss tactile switches (a little bit heavier spring pressure) feel quite nice as well, and as expected I wasn't overly thrilled with the linear cowberry and moss switches. There just wasn't enough "there" there.

They also included a selection of alternate keycaps, in case you wanted to use this keyboard on a windows or linux system, or if you preferred your F6 key to have notification silencing instead of sleep mode as its alternate function, or just if you preferred a red escape key and a teal enter key, instead of a red enter key and a teal escape key.

I did, of course, opt to swap out the screen capture keycap for the screen cat-pture keycap.

Also in the box: a set of keyboard waifu stickers. I'm not sure what other people do with their keyboards, but I usually just type on mine.

They also included all the usual quick-start documentation, along with...

... a keyboard waifu poster. Sure, I guess.

Anyway, this keyboard slots in perfectly in my work setup, and I have every reason to believe that it will provide me with many years of typing joy.

And if not, I can always make sweet, clicky love to my new keyboard waifu.

Sunday, May 19, 2024

The Cult of Click

For quite a while now I've been using a pretty cheap low-profile Monoprice keyboard on my main linux box. The typing experience on it is pretty lacklustre, as you might expect for its low price point, but that hasn't been much of an issue given that I mostly access the machine over the network, and I rarely need to type on the machine directly. However, recently I've noticed that typing on that keyboard is bad enough that I'll often end up completely mistyping commands, passwords, etc due to the mushy, sticky keys, and that's just not something I want to deal with on the (thankfully rare) occasions that I need to bash on the machine directly.

Thankfully the keyboard market has come a long way since I bought that monoprice keyboard, and these days you can get a surprisingly solid mechanical keyboard for under $30. So I got a surprisingly solid mechanical keyboard for under $30.

This is the MageGee MK-Star, which is definitely a brand and product name that can only come out of the weirder corners of China. But China is who we can thank for the frankly brutal value optimization that's been going on in the keyboard space over the past few years so I'm not even slightly mad.

It's an 80% / 87 key layout, which is basically the same as a full size 104-key layout, just sliced off at the dividing line between the home/end/page-up/page-down block and the numpad. There are a number of smaller layouts than this, but I specifically wanted to keep the ins/del/printscreen/scrolllock/pause buttons as they're sometimes used in linux, despite all but the del and printscreen keys being unused on most other platforms.

Now part of the mechanical keyboard experience is customization, and this MageGee keyboard, despite its bargain price, comes with some customization options right out of the box. I mean first off it's got a lovely blue and white colour scheme, but it also comes with a selection of 16 purple keys that you can swap in to various places.

I'm definitely a fan of a purple-blue-white combo, so I did some swapping.

I initially included the wasd swap, but later switched it back out for the blue as I wasn't really feeling like the gamer cred was making a lot of sense in the context of where I was using this keyboard.

Now, this swapping process actually exposes the first bit of budget silliness that this keyboard has, in that three of the included keys are uhh...

... they do know that this keyboard doesn't have a ten key numpad, right? Well, anyways, I guess having 13 customizable keys is fine too.

The keyboard naturally has backlighting, though at this price point you only get a pale blue colour rather than a full RGB experience. You do get a bunch of different patterns that the lights can blink in, though, just in case you want to spend all your typing time being distracted by your keyboard instead of looking at your screen. I just opted for the "solid on" pattern, because I guess I'm boring that way.

Anyway, this keyboard is quite a nice replacement for the old monoprice slab, though I have to say that looking at the two side by side like this kind of shows how efficient the 96% layout of the monprice is, squeezing a 10-key pad and all of the home/end etc buttons into a footprint that's barely wider than the 80% layout that doesn't include the 10-key pad.

So, do I like this keyboard? Surprisingly, despite its bargain price, I kind of do. It definitely lacks a premium feel; the keycaps have a dry, hollow feel that seems to match the dry, hollow sound of the keyswitch clicks. It's also been quite an adjustment typing on a full travel keyboard after spending the past decade or more only typing on low-profile keyboards, but I'm slowly managing to re-learn how to press keys that actually move.

I think if I get another mechanical keyboard, which I am tempted to do, I'll go just a little bit more upscale now that I have a feel for what I'm in for, and I might experiment with getting a low-profile mechanical as those do actually exist.

In the meantime, though, I will enjoy using this keyboard.

Wednesday, May 15, 2024

This Will Be Quick

So I had a little time to spare on Sunday evening, and figured I'd set up a DMARC report parser on my home linux box. I quickly ran into some issues with dependencies though, as I hadn't updated the system in a while, so I figured I'd knock that out first.

So I updated all the packages, and for good measure rebooted the system, and... it didn't boot.

Uh oh.

I wandered over to the computer to have a peek at it, and I saw that it was stuck in the initrd phase of booting, complaining that it couldn't find the root filesystem. Trying to mount the root fs just resulted in some unhelpful "invalid argument" errors and, after bashing my head against that for a while, I decided that whatever was broken I wasn't going to fix, and that I should just finally get an SSD to put the root partition on rather than trying to deal with the md raid.

4TB should last me a while, I think. It's a good thing these are cheap, and it's a good thing that Jeff Bezos delivers these things quick.

Anyway, step one is installing this beast. This is a fairly modern case, so on the front side everything is very clean and well organized.

But that's only because the horrifying mess gets hidden on the back.

But that side of the case isn't transparent, so out of sight, out of mind.

So, with that installed we'll boot off of a live Debian image and copy everything over.

It's about 2.8TB in total, but a lot of that will get moved back to the RAID once I'm done reorganizing things.

The copy took about 6 hours to complete, which is actually a bit faster than I thought it would go.

From there it was just a simple matter of installing Grub and booting the system. Or it would have been a simple matter if I'd remembered to make an EFI partition, or if I'd remembered to actually configure Grub, or if I had had the sense to boot back into the live Debian image to configure Grub instead of stubbornly trying to get it to boot manually for an hour or so.

Anyway, I did eventually get things back up and running, and I must say it'd much more spritely now that it's not waiting on the latency of the spinny drives.

I still need to move some stuff back to the RAID though; for now that'll mostly be my security cam recording directories, but I'd also like to put some Time Machine shares there... once I figure out how to fix the Time Machine shares to actually work. Always something...

Saturday, May 11, 2024

Roses Are Red

And they're in bloom.

Now that spring has finally sprung, it's time for a plant update. Here's some geraniums that haven't died yet.

And yet Yarrow is continuing to do well.

The boxwood and gay goblin seem to be taking rather well.

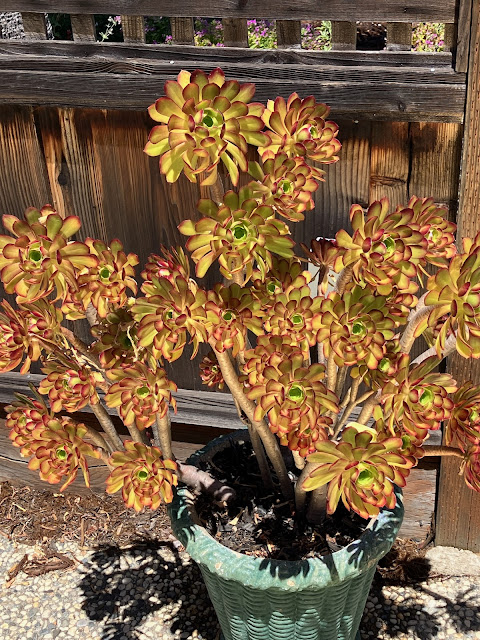
Then there's this which Google is telling me is an Aeonium Voodoo, though I feel like I've been calling it something else.

Well, whatever it is it seems happy.

These, on the other hand, are definitely irises.

And this is definitely ice plant.

And once again the baby sage is enjoying itself after getting a hair cut.

It really, really likes getting cut back in the fall.

And we'll round things out with the pink lemonade blueberries.

And the rosemary, which I recently pruned an entire garbage can of growth from.

Featuring a photo bombing calla lily (unkillable).

Thursday, May 9, 2024

Call Me Mr Christie

I decided, on a lark, to make some chocolate chip cookies. I already had most of the ingredients, so I really just needed to pick up a few odds and ends like chocolate chips. The recipe calls for 12oz with an option to go all the way to 16. I figured 16 sounded like a nice round number, and made a note to pick up a 16oz pack of chocolate chips. Or two 8oz packs, either would do just fine.

That plan lasted right up until I got to the chocolate chip aisle and discovered that the packs came in such round numbers as 9oz, 10.3oz, 11.5oz, 13oz... seriously?

I picked up 2 packs of 11.5oz so that I could maybe use a pack and a half or so, but I actually ended up only using a single pack. More on that in a bit.

First, let's have a look at how they turned out.

They look pretty damn tasty, and taste pretty damn tasty too.

And here's the "before" picture of the second batch before thy go in the oven to bake.

I went a little more liberal on the salt for this batch.

But salt you say? Since when are chocolate chip cookies topped with salt?

Since I make them, that's when. I took my usual liberties with this fairly standard recipe, mixing things up and modernizing it to my palate. The notable changes being...

First off, I swapped out the mixture of brown and white sugar for all white sugar plus an equivalent amount of molasses. I keep white sugar around, and I keep molasses around, and I just don't care to dedicate cabinet space to other types of sugars. So that was less of a culinary change and more of a convenience change that doesn't actually affect the end result.

Second, I went for an all-butter cookie instead of a butter-shortening mix. Part of this is convenience again, as I don't keep shortening around the house, and part of it is so that I can brown the butter first, which adds a delightful nutty flavour and also skips the step where you spend ages trying to cream the butter and sugar together.

And third, speaking of that nutty flavour, I substituted 25% of the all purpose flour for buckwheat flour, which adds a fantastic earthy, savoury complexity on top of everything else.

Of course, for the finishing touch, we have the salt. The maldon salt comes in fairly huge flakes, and this is important: regular table salt would just dissolve away into the cookie during cooking and wouldn't give you that hit of salinity right when you bite into the cookie. It would just, instead, taste like an oversalted cookie, which wouldn't be great. The flakes of salt take much longer to dissolve though, so they make it through the baking process basically intact, and you get little firecrackers of salinity as you munch on the cookie. It's well worth the extra trouble.

Anyway, cooking these for 11 minutes at 375°f(reedom) yields a cookie that's just soft and toothy in the center with a crispy, lacy caramelized underside. Absolutely perfect.

But looking at these perfectly formed cookies, you might wonder how I got them so uniform? Well, that's simple.

I just eyeballed it with a tablespoon, because this cookie scoop I ordered was dropped off by the Amazon guy right as the last batch was going into the oven. Oh well, next time.