Thursday, April 28, 2022

More Bees

So earlier this week I woke up to the thermostat complaining about a low battery. I pulled the cover off to discover a trio of AA batteries, one of which had sneezed some electrolyte snot onto one of the terminals. I was able to clean it off and replace the batteries, but I had never been particularly enamored with this basic 5/2 programmable thermostat.

So, it was time for a change.

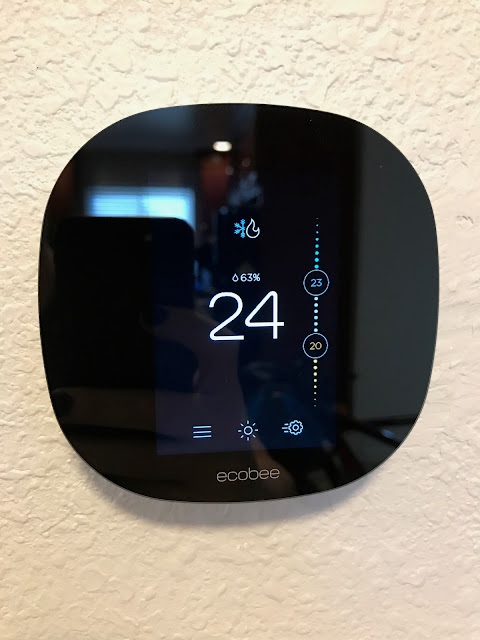
The EcoBee 3 Lite was recommended as a replacement that was just smart enough to have a bit more brains than a calculator watch from 1987, but not so many brains that it would be forever beholden to some server in the cloud. I like that middle ground.

But I can't very well install it on top of the old thermostat, so we need to get rid of that first.

You'll notice that, conveniently, there are 5 wires in this furnace cable. There are also a bunch of extra holes in the wall, including the main hole which is much larger than it ever really should have been, but we'll come back to that later. Anyway, the 5 wires are power, heat, cool, fan, and pointlessly-not-connected-at-either-end. I can't really blame them for that last one, though, as usually this fifth wire would be hooked up to a common so that the thermostat could be powered from the 24vac between the common and power wires, but in this case the old thermostat didn't bother including circuitry to actually use that power connection. It only ran on the batteries, and nothing else. Splendid design.

Anyway, those holes need dealing with.

Bless this hot mud, the impatient handyman's best friend.

Ok, while that sets up it's time to go out into the car hole and grab my paint.

So, little side note here. I'd been told, for reasons I will perhaps never understand, that it was a good idea to store paint cans upside-down after opening them. Apparently this isn't actually very good advice at all, as over the past few months the paint had been slowly leaking out of this particular can and spilling all over the concrete floor of my car hole.

That's the bad news.

The good news is that I actually really didn't like this paint in the first place. I bought it as trim paint, but it wasn't, honestly, all that good at being trim paint, and had over time got rust in it from the paint can itself corroding, got little flakes of crap from paint drying around the edges, and over all it was just kind of a pain in the ass that I could never quite justify just throwing out.

But now I don't have to justify it. Sweet.

Anyway, getting back on track, my walls are not white but instead a cool grey color, so I grabbed the can of cool grey paint I got color matched at a store that was since burned to the ground (in an unrelated incident, I assure you) and slapped a coat over the now set hot mud.

And I also installed the base plate for the new thermostat. Obviously.

The little push-in connectors are really quite convenient, as is the tiny built-in level (since there's no straight edges on the whole thing).

You'll also notice here that I have all 5 wires hooked up, as I went into the furnace and connected the blue wire to the common terminal on the controller board, which then allows the thermostat to draw power from the 24vac supply. As it should.

Then the thermostat just snaps into place.

The future looks like featureless black slabs of plastic. Who could have predicted that?

Flipping the furnace back on we can see...

It lives! Hurrah.

Now I just have to wait for some state sponsored hackers from Russia and China to hack into my thermostat and try to assassinate me via fan death or something. I dunno.

Friday, April 22, 2022

Elasticity

A while back I discovered that the elastic in the waistband of my swim trunks had gone all crunchy.

This does not bode well for staying decent after diving into the water. Thankfully, I can fix it.

After ripping one of the seams, we can see there's not much stretch left in that "elastic".

Yeah that elastic ain't gonna do much.

Removing the second seam, we come across an interesting discovery: when this garment was sewn, a line of overlocking was used to stitch together the liner with the outer fabric along the hem, but then almost all of this stitching was trimmed away when the overlocking for the elastic was done.

This is a little bit troublesome as I need these layers to lay flat against each other when I sew them to the elastic, and I don't really want to either add another seam (as this could end up getting somewhat bulky), or trim more fabric off the waistband.

It's a good thing I have science on my side.

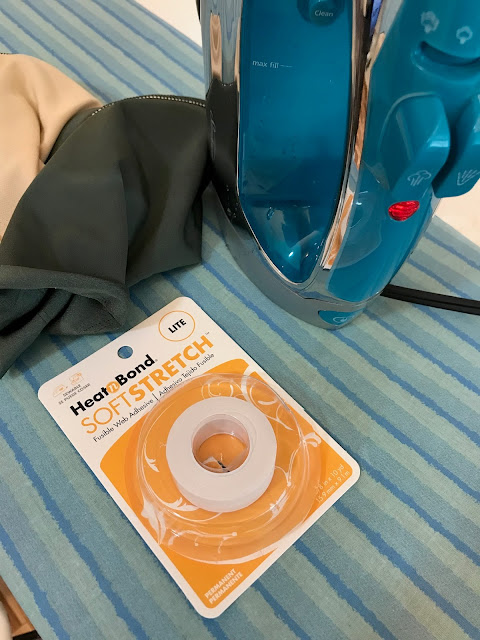
A little bit of ironing later...

And the two layers are secured together, plenty well enough to survive the sewing process (and, honestly, probably well enough to survive a lot more than that).

With that out of the way it's time to measure, cut, and stitch the elastic into a loop.

Which I accidentally sewed with a twist on the first attempt. Oops. Thankfully it was an easy thing to fix.

Next I dialed in the overlocker stitch.

I used a narrower stitch than last time, with only a single needle rather than two, to match the original stitching.

So we're off to the races, time to stitch the elastic to the waistband!

On the wrong side... Whoops.

Ok, rip that stitching out and take two.

Yes, that's more like it.

Then it's just a simple matter of reconfiguring my overlocker for a narrow 2-needle coverstitch.

And I'd say that looks pretty good.

The thread ended up being a somewhat contrasting color since I ordered it online and didn't bother checking what shade of green my swim trunks actually were. Thankfully the colors still work well with each other, and the stitches on the outside don't even show up much through the spandex.

Another minor goof is that while I thought I had some 3/4" elastic kicking around, it turned out that I actually only had 1/2" and 1" (and some unrelated 3" stuff, but never mind that). I opted for the 1/2" which meant that the waistband turned out a bit narrower, and the new stitching didn't line up anywhere near the old stitching. Thankfully, it's not something that's really visible or noticeably wrong, so the end result looks just fine regardless.

So when am I going to go swimming? Fuck if I know, probably not any time soon. But at least now I have one less excuse to not do it.

Wednesday, April 20, 2022

Adventures in Pastry

I've been experimenting with various methods of making puff pastry for my pot pies. I've generally been enjoying the taste of it, but I've been finding that while it puffs nicely when baked on its own, it isn't really puffing in pot pie form, which leaves me with a crust that doesn't have a really great texture.

So, setting aside my previous poor experience with frozen pie pastry, I decided to make some from scratch.

The result was very tender, which is a nice improvement over the puff pastry, and it tasted great too. Plus it's a lot less work to prepare, so I think I'm quite happy with it.

Life Begins Anew

Or just resumes being green, perhaps.

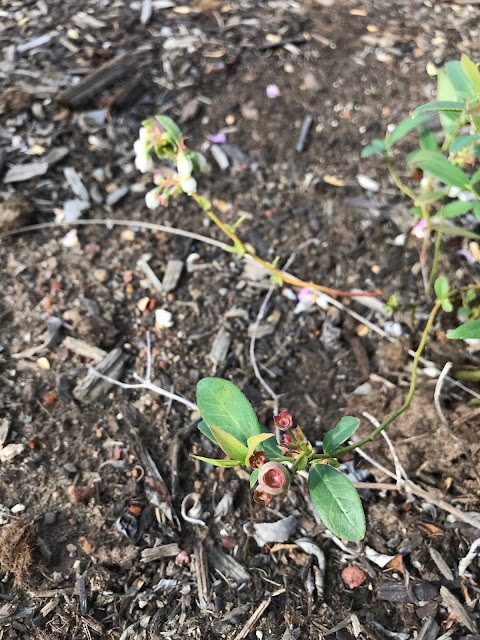
First up, the pink lemonade blueberry, which bloomed this spring and started growing a few berries.

It looks a bit spindly in this shot but I mostly just wanted to show off the berries in front and the blossoms behind. There's plenty of leaves on the rest of the plant.

Next up is the Mexican Heather, which I assumed had just up and died, since it's commonly sold as an annual and had died back in the frost.

Well, that saves me buying a replacement plant.

Speaking of replacement plants, it seems that two of the four Lantana survived the frostpocalypse.

It remains to see how vigorously they'll grow, but I'll just go ahead and assume that life finds a way. The other two do appear to be properly dead, though, so I still need to replace a few.

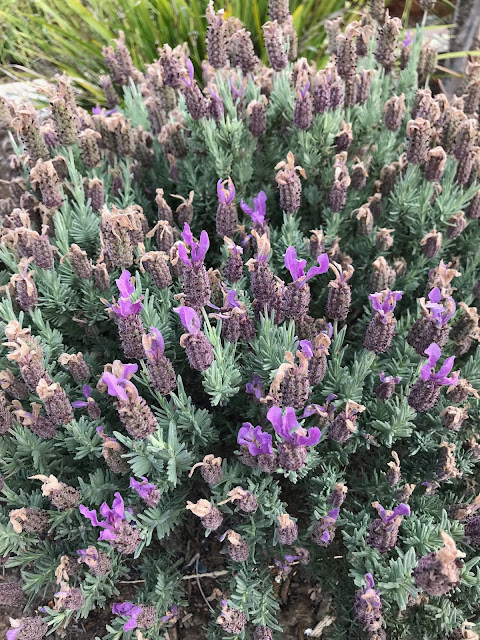
Meanwhile the Spanish Lavender I planted last year seems quite happy.

Didn't quite catch it at its peak bloom so a lot of the flower clusters have browned up, but whatever. You get the idea. It's happy.

Speaking of blooms, the Rose seems to have forgotten how to rose.

Why have one rose at a time when you can have two?

The Irises are doing their irising.

And the daisies and daisy-like things are doing their usual thing.

All in all, things are looking good.

Saturday, April 16, 2022

Food Influencers

Looks good, doesn't it?

Well, it tastes like crap, and was a nightmare to prepare.

The problem all comes down to "food influencers". When you search for a recipe online these days, literally any recipe at all, all you get are hits from fancily designed cookie-cutter food blogs, where they bloviate for 5000 words about how the recipe they're shilling you reminds them of their childhood when their grammy used to make it for them, giving you no useful advice whatsoever on preparation tips or anything remotely practical like that, then once you scroll all the way down to the bottom of the article you get the recipe itself, which is often of highly questionable quality.

The disaster you see above is supposed to be a soda bread made with a mix of white and buckwheat flours. What it actually is, is pasty, dense and sickeningly flavorless. It doesn't have enough salt, the leavening didn't work well (despite rising quite a bit in the oven), the cooking time was absurdly underestimated, and the dough was so sticky that I had to add nearly an entire cup of flour on the bench to keep it from permanently entombing both my hands when I tried to knead it.

So I try to find out what went wrong. Normal bread dough hydration is supposed to be around 62%. This recipe works out to 88%. That seems wrong, and matches my experience with the dough being unworkably sticky, but I look around at other recipes for soda bread and they're all suspiciously wet, even recipes from sites that should be reputable. What gives? I have literally no idea, because every food influencer out there is spending all their time barfing out family stories of holiday get togethers rather than researching what can (and will) go wrong with their recipes.

This is the first time in probably 10 years or more that I've had to throw out food, and it pisses me off that it's because of our collective dumbing down of society in pursuit of bullshit social media points.

Thursday, April 14, 2022

Plumber's Crack

Recently I've been noticing that my shorts have been, shall we say, not gripping my hips as tenaciously as they should, particularly if I put anything weighty in my pockets. I figured this was due to me losing weight over the past two years, but then I noticed that it was really only one pair of shorts that was giving me trouble, and two other identical pair were still holding on reasonably well.

I mean I still lost weight, there's multiple factors at work here.

Anyway, the waistband is made of 1-1/2 inch elastic, and it had lost a lot of its stretch. It was secured in place by hemming it to the edge of the shorts with an overlock stitch, before being folded over and secured with four rows of chain stitching.

Both of these stitches can be approximated with a standard sewing machine, but to really do the job right you kind of need an overlock/coverstitch machine.

Well gosh, would you look at that. Better make sure it works.

Hmm, so far so good.

Yes, that will do nicely.

Now it's time to disassemble the waistband of the shorts.

I guess there's a reason they sell this stuff in 3000 yard spools.

Goodbye, flimsy, stretched-out waistband.

Hello partially disassembled shorts.

So with that done, it's a simple matter of cutting out a fresh piece of elastic.

Oddly the new elastic is a bit longer than the old, but grips my waist quite a bit better. It's amazing what miracles actual elasticity will enable.

Of course, I'm not a big fan of having pins in my shorts, so let's try tacking that together with thread instead.

A regular sewing machine will do this just fine, then it's off to the overlocker to hem the elastic in place.

That's about as hemmed in place as things get.

A quick reconfiguration later and the chain stitching is done.

You'll notice that the backside of these stitches looks different from the original. The reason for that is fairly simple: my overlocker only has a single chainstitch looper, so if I want to do two rows of chain stitches at once, the looper thread has to go through both lines. And I do want to do two rows at once, because to hell with going around this waistband 4 times trying to keep things exactly lined up; it was hard enough just getting these two lines in the right spot to begin with.

Anyway, the looper threads are on the inside and give the waistband a little extra grip against my hips, and even if they were showing, who the fuck cares? It looks just fine.

So with that out of the way, the drawstring goes back in. Not that I ever use it, but it makes more sense than throwing it in the trash.

Pro tip: even out the ends of the drawstring then sew a line of stitches through it at the back of the waistband to keep it from pulling out.

Looks like a pair of shorts to me. I'll call this project a success.