Friday, February 28, 2025

Make Some Noise

So it's all well and good to have a synthesizer keyboard. The one I have is, in particular, a very tactile and immediate model, with all the controls directly at my fingertips to both shape the sound and play it melodically.

However, it is but one instrument, particularly since it's monotimbral (which is to say, it can only play (multiple) notes of one particular sound at any one time; you can't pick out two different sounds and play them both together). Most pieces of music these days are arranged for more than one instrument, so that leaves us in a bit of a quandary.

Thankfully, technology has an answer: sequencer synthesizers. In this case, in the form of a compact "groovebox".

This is the Roland Aira S-1, which is a monotimbral synthesizer with 4 note polyphony and a 64-step single-track sequencer. It has a relatively basic analog-modelled subtractive synth engine that has a square, sawtooth, sub-octave and noise oscillator which can be mixed together and filtered in various ways, plus a number of other features that I won't bother listing here.

What's important is that it's a melodic synthesizer, and it has a built-in sequencer so that I can program in a tune with a melody and/or chords, and it'll play it back in a loop hands-free so that I can play my keyboard while it does its thing.

So now I have two synthesizers, one of which plays itself, that I can set up to make two different melodic sounds. But melody is nothing without rhythm so let's go ahead and fix that.

This is the Roland Aira T-8, which is a drum and bass synthesizer. It can separately sequence 6 different drum sounds with some limited sound design options, along with a monophonic synthesized bass in either sawtooth or square wave form.

There's another part to this that I will discuss in a later post, but for now I've got a pretty decent setup going between these two grooveboxes.

And as a bonus, they're designed to daisy chain together quite nicely with 3.5mm TRS jacks, so they'll sync up the sequences between themselves via MIDI and also mix together the audio when you plug one into the other. Very convenient.

Saturday, February 15, 2025

Noisy Fidget Toys

A little while ago, as you might remember, I picked up a MIDI keyboard so that I could goof around with making music. At least, music in key-form. This worked out pretty well, but I found that there was some friction with plugging the keyboard into my computer, booting up some synth software, setting up the instruments, etc...

So the other day while I was drifting through eBay, I happened upon a listing for a Yamaha Reface CS for a suspiciously low price. Of course the unit was marked as "Parts or Repair Only" which is music to my ears, and scanning the description showed that the speakers were apparently blown but the rest of the keyboard worked as expected.

Well, not having working speakers wouldn't really do well for me, as having to hook up the keyboard to an external amp wouldn't be much different than having to hook up my MIDI keyboard to my computer. But then, just as I was closing the tab, my finger slipped and...

Oh fiddlesticks, I guess I'll just have to fix it.

Now on the bright side, a new set of speakers for one of these Reface models is only about $35 and still in production, but before I fired up an order I figured I should at least do some due diligence to see if I could reproduce the problem.

Now you might have noticed something in the photo: there's a little 1/4 to 3.5 adapter plugged into the keyboard. I'll admit I thought the same thing you probably did: they probably forgot that this adapter was in the headphone jack, and having the adapter there would mute the speakers.

But alas no, it was in the line out port.

And removing it had no effect. Oh well, free 1/4" adapter I guess.

Well, let's put that adapter to use at least and see if the keyboard is functioning with it.

And indeed it is, so that's good.

So a new set of speakers it is... except there's something not quite right, still. This keyboard has stereo speakers, and neither of them is making any sound at all. Not a very quiet whimper; not some scratchy, distorted noise; not a single peep. That's peculiar. Very peculiar indeed.

 Hmm, I wonder...

You know, just to be on the safe side, since who knows what configuration parameters the previous owner might have changed (inadvertently or otherwise), let's do a quick factory reset.

And wouldn't you know it, the speakers work just fine once you actually turn them on. There's nothing wrong with this keyboard at all.

Well, nothing critically wrong, that is.

As is the case with anything that has a battery compartment, at some point someone will inevitably leave some batteries in it. This keyboard is no exception, and the previous owner had somehow even left 5 (not 6???) alkalines in the unit. There were also signs of leakage, though curiously not from this set of batteries.

In particular, this pair of terminals was a little crunchy, though luckily they weren't too damaged.

And the foam on the lid had soaked up quite a bit of electrolyte.

So it's plain white vinegar to the rescue to neutralize the caustic goo.

And while there's still a bit of rust staining left on the foam pads, things are basically clean again.

So, let's pop some batteries in there. Some nice NiMH cells that won't leak and destroy everything.

But that's peculiar, when I switch the unit on it acts like the batteries are almost completely dead, even though I just charged these.

Though, this one cell does look a bit lower than the others.

Ignore the negative voltage, the leads are reversed.

And with the unit powered on...

Ah,  yes, it definitely shouldn't be reading -1 volts across this cell. For comparison, we'll pop one of the alkalines in its place.

And with the power on, and the leads the right way around this time...

Ok, that's much better, and the keyboard is functioning perfectly on battery power now too. I guess I'll order up some new NiMH cells, these ones are probably 15 years old at this point.

Well, just one final step left to go: update the firmware. That means plugging it in via USB.

Damn, it's a good thing I don't throw out old cables.

And install the update.

Then with just a little bit of cleaning to wipe off the leftover finger-schmoo from the previous owner...

It's looking as good as new.

And the only thing left to do is to make some noise with my extra-loud fidget toy.

Wednesday, February 12, 2025

A Long Way From Home

Today I learned that earthworms can fly, I guess.

See him there? No? Have a closer look.

Wiggling around all smug and proud of himself.

Saturday, February 1, 2025

Darn it again

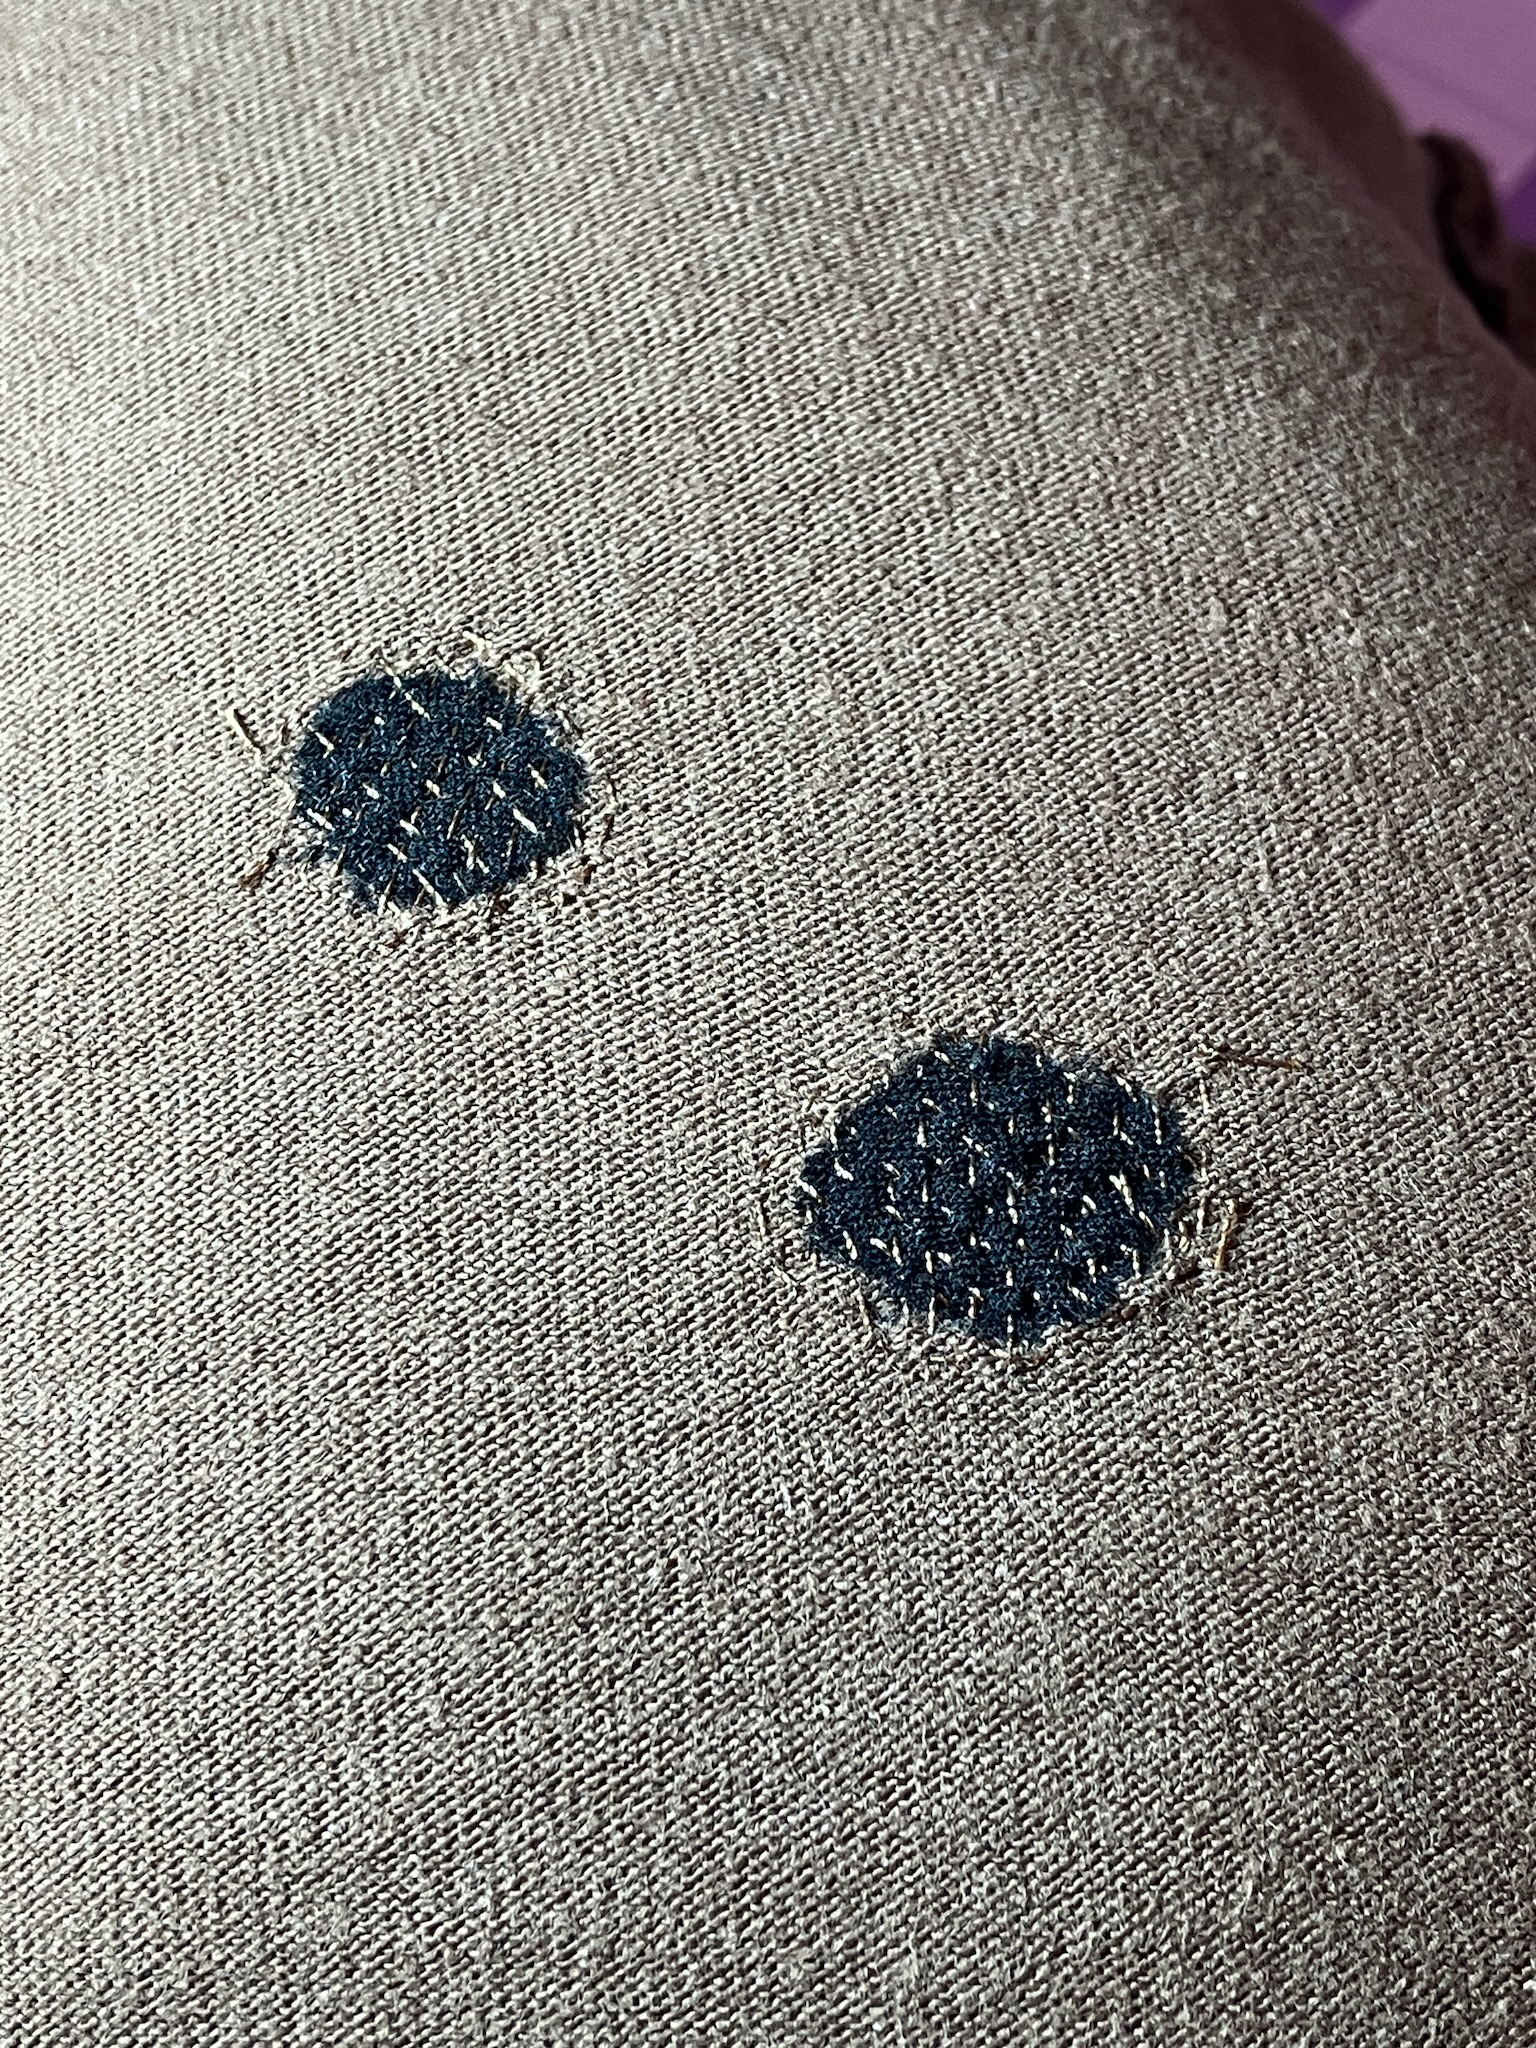
On the gurney today rolling in for treatment is one of my t-shirts, which happened to grow a few unfortunate holes on the back of one of the shoulders.

Since t-shirts are a knit fabric, you really don't want to leave holes like this alone, as they'll have a tendency to grow over time. So let's dive in.

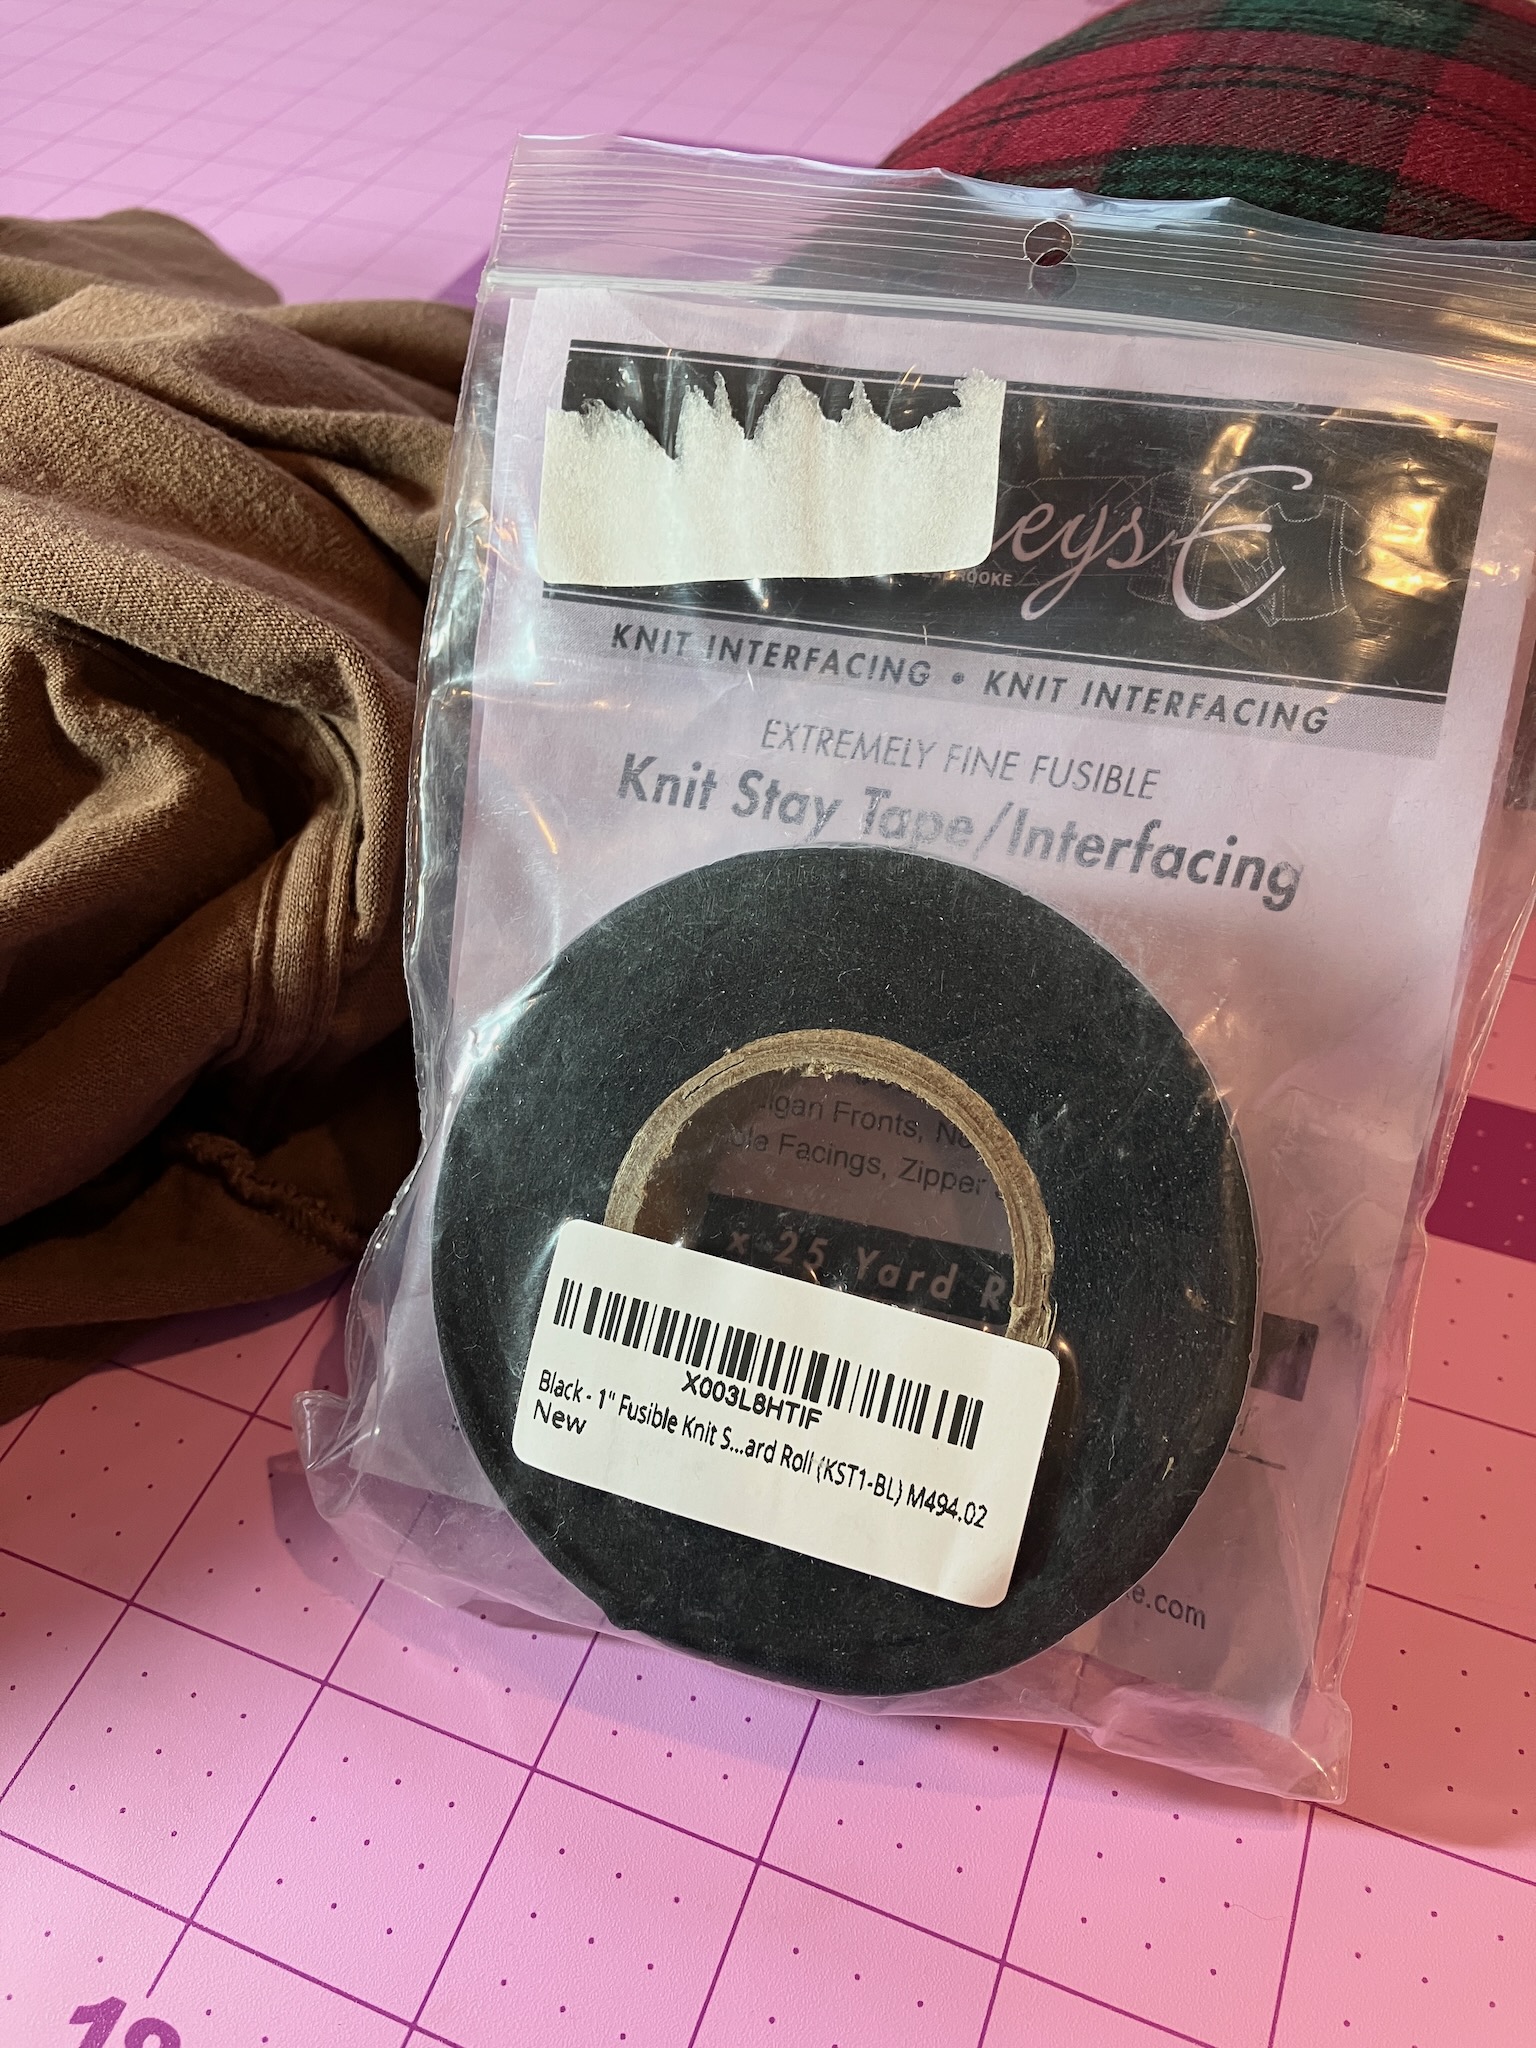
The first step is to apply a bit of ultra-light knit interfacing to the back. This mostly comes in either black or white, and since we're dealing with a dark colour the black will blend in a bit better if it happens to show through somewhere.

The good news is that I have a roll in my stash. The bad news is that it's definitely not knit.

Yeah, that's definitely woven. Sigh. Well, whatever. T-shirts don't need to stretch all that much, and I can just apply it on the bias and it'll be fine.

So, on it goes.

And even without doing anything else, we're already looking quite a bit better. The glue on the interfacing is holding down the loose threads nicely, though the fact that we also just pressed it with a hot iron is certainly contributing to the improvement too.

And on the backside, things look well adhered.

But a little light heat-set glue and some pressing isn't going to last more than a few trips through the wash, so we need to get things secured a bit more permanently. Last time I used machine darning to close up the holes, but that leaves quite a bit of thread showing on both the front and back, and I want something a bit more hidden this time. So, we're going old-school.

We need a very fine needle for this work to prevent punching huge holes through the fabric, and a #12 is about as fine as you can readily get these days.

I'm not sure the black oxide coating is really all that much more special than a chrome or titanium nitride coating, but whatever, they'll do the job.

So in we go with a basic running stitch. Since t-shirt fabric is knit stockinette, it tends to stretch from side to side, but not up and down. So we'll do the stitching on the bias (much like how we applied the interfacing) and even go a little further by angling both directions of stitching more vertically than a plain 45 degrees.

The goal here is to keep most of the thread on the back side here, catching only enough of the front of the fabric to keep the stitches secure. This will minimize the visibility of the stitches on the right side.

Once we've stitched back and forth in one direction, we come back across at the opposite angle.

We also want to make sure that we're not pulling the thread tight. It should be just pulled through so that there's no loose loops, but not making any pulls or puckers in the fabric. Also, since I'm using a somewhat slippery polyester machine embroidery thread here, tying off both ends is vital for keeping everything in place.

We don't need to completely bury the patch in stitches, just get it sewn down enough so that it fully reinforces the hole and can't come up around the edges.

From the top side, we can see that we were largely successful with keeping the stitches from showing through.

However, with a raking light it's still obvious that there's some unevenness here.

This is unavoidable, but we'll be rectifying it shortly. But first, we need to sew down the second patch.

Speaking of sewing, and especially since we're using a very fine needle, now is a good time to cover the proper use of a thimble. The uninitiated might assume that the thimble is intended for the off-hand, to armour one's fingertips and protect them from the jabs of the pointy end of the needle. However, this is not the case.

Rather, it is for wearing on the sewing hand, and is used to push against the butt of the needle when you're forcing it through the fabric.

A needle that's fully woven through the fabric like this can take a fair bit of force to push through, and the thimble prevents the butt of the needle from pushing back through your finger while you're applying that force.

Anyway, second verse was the same as the first, and both patches are now secured.

And on the front side we're once again greeted by stitches we can't see, but puckers we can.

At least in this harsh, raking light.

But the solution is as obvious as it is straightforward: pressing.

The heat of the iron on the "cotton" setting actually softens the polyester thread, causing it to conform to the shape of the stitches. This both allows the fabric to flatten back out, as well as kinks the thread so that it's much less likely to shift or pull out as the fabric moves around during wear and washing.

And now, particularly in much less harsh light, you'd be hard pressed to see where the darning was even done, unless someone pointed it out to you.

Ok here, I'll point it out to you.

The slight light spot you can see is only really visible in the photos, and is just due to the pressing having flattened some of the natural fuzziness of the t-shirt fabric. It's not apparent in person, and will vanish completely after the next washing.

So, chalk up yet another successful repair.

C is for Cookie

 These are good enough for me.

I think I've got the recipe and technique basically dialed at this point. It's taken a while, but that's mostly because each batch lasts me 6 weeks, so I only get to experiment with it every month-and-a-half or so.