Sunday, March 26, 2023

Generating Interest

I've had a few power outages since I moved into this house. Quite a few. In fact, I've racked up almost 70 hours of runtime on my generator, and that's not counting the time I borrowed Tyler's generator before I got this one, nor the time I spent sitting in the dark hoping that the outage wouldn't be long enough to justify hauling out the generator. Needless to say, PG&E is not doing an impressive job of keeping the lights on.

Now, running on generator power is somewhat inconvenient for a number of obvious reasons, but one of the less obvious reasons is that getting the power from the generator, which is outside, to the appliances, which are inside, usually means having a window or door propped open a bit. This tends to let in a little bit of exhaust fumes (not ideal), cold/hot air (also not ideal), noise (ideal, it is not), and various bugs and woodland creatures (definitely not ideal).

So given that the power grid is unlikely to get any more reliable in the foreseeable future, I decided it was time for an upgrade. Specifically, it was time to install a generator inlet.

Now I could have installed a transfer switch instead, so that I could feed the actual house wiring, but I decided to hold off on that. Those transfer switches are usually designed for 240v generators and mine is a 120v, plus my main panel is kind of a little bit over-stuffed and I didn't fancy the idea of adding a whole bunch more wires to it. Also they generally cost over $300.

So, downside is that I'll still be dragging extension cords through the house to keep things powered up, but upside is that I won't have to deal with running a cord through an open door or window.

Anyway, to get started, I needed to pick a spot for the inlet. I decided that right beside the back door would be an ideal location, since it was under an awning (to keep the generator dry), near where I store the generator, away from my bedroom (so I don't have to deal with as much noise when I'm sleeping), and conveniently located for running the extension cords through the house.

Yes, this spot will do just nicely. As a bonus, the hose bib piping here makes for a convenient ground bounding point.

Inside, things look just as convenient; nothing in the way I need to deal with.

So let's get this party started. A little poke with the jab saw, and some quality time with a cheap diamond drill makes room for the box and conduit stub to poke through.

I initially tried to drill the holes in the stucco for the wall anchors using my milwaukee drill's "hammer drill" mode and the masonry bit included with the anchors. That lasted about 30 seconds and an 1/8th of an inch into the stucco before I said "fuck it" and got out my rotary hammer. The next 30 seconds was all the time it took to drill the three mounting holes.

Of course that's gonna need a bit of caulking to keep the water out, so let's take care of that before I forget.

Beauty.

Next comes the inlet box. From the factory it doesn't come with the ground/neutral bonding bar; I added that myself. It's important that a power system has a ground-neutral bond in exactly one place, and my generator does not have one, so I figured it made the most sense to install one in this box.

I'm reusing some 10ga stranded wire here that I recycled out of my drawer full of assorted lengths of wire, which you might remember me mentioning in a previous blog entry. I only had some black lengths, though, so I used a roll of white electrical tape to properly mark my neutral.

Speaking of proper markings, any time you're installing a bit of unconventional wiring like this, it's a good idea to label it.

And on the subject of good ideas, let's get that ground wire hooked up.

The rotary hammer (the Boschhammer barely visible in the bottom right, not the orange Black & Decker screwdriver-pretending-to-be-a-drill) is one of the best tool investments I've ever made. It just melts through stucco, masonry and concrete.

Also a good investment: the angle grinder with the wire wheel attachment I used to scuff off the paint from this copper pipe. I had actually thought "oh, I'll just use this regular, hand-held wire brush to clean off some of this paint and expose the bare copper underneath" but apparently paint is much, much more durable than I give it credit for.

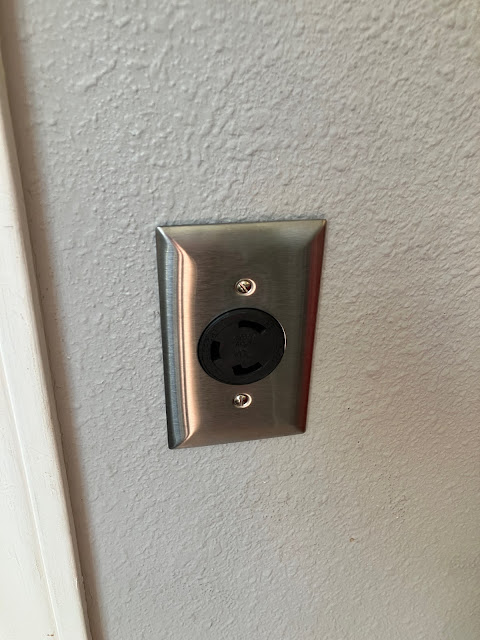
Anyway, with the outlet installed on the inside, things are really starting to take shape.

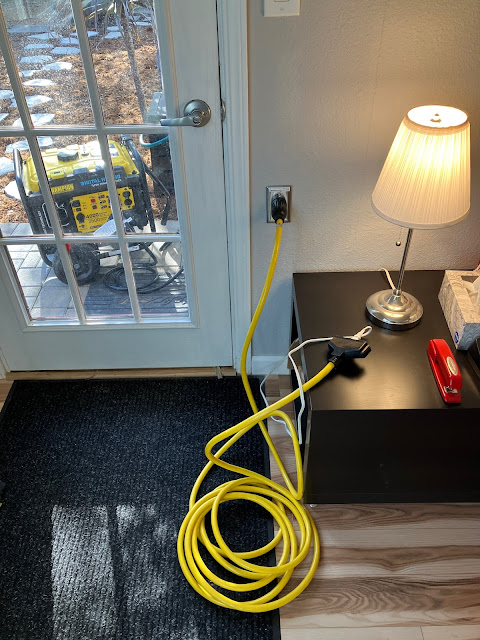
And as a little unexpected bonus, the inlet includes a little indicator LED to tell you that the power is on. In case you somehow couldn't hear the generator rumbling away right beside you.

But in all honesty it is actually nice to be able to see that power is making it to the box, and that nothing weird is happening along the way.

This is admittedly a silly way to light one (1) lamp, but when the next power outage rolls along I'll be happy to have it.

I'm In Hot Water

For a while now, one of my major peeves with this house has been the hot water. The tank itself works fine; it heats up quickly and has plenty of capacity for my hot, steamy showers. The problem is the pipes. It just takes centuries for the hot water to make its way from the tank over to any of the faucets.

For example, I can turn on the tap, wet my hands, soap up, take my time and scrub a while, and then when I go to rinse off the water coming out of the tap will still be ice cold. Not ideal.

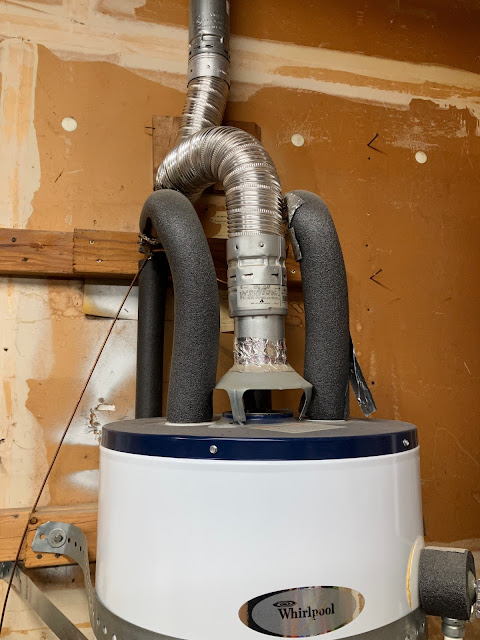
Thankfully, there's a solution to that problem, and it comes in the form of a circulation pump. All I need to do is install the pump on the hot water outlet of my tank.

And install a thermostatic bypass valve on the most distant sink, to allow a trickle of cold hot water to leak back into the cold water pipes, in order to make way for the hot water being pushed by the pump.

Installing the pump was a breeze. Really the only difficult part was carefully bending the corrugated copper line up to make room for the added height of the pump, without kinking and breaking it.

Then you just plug the cord into a nearby outlet, set up the timer for when you want it to not bother running (like late at night, or during the middle of the day if you're usually away from home), and let it do its thing.

Installing the bypass valve under the sink was similarly easy.

You're technically supposed to fasten it to the wall with the included screw anchors, but I couldn't find a good position where the lines wouldn't end up kinked and where the fittings would still all be accessible, so I just left it like this.

And the result? Perfectly warm water at every faucet, within seconds of turning on the tap. The shower temperature is a little bit unstable when you first turn it on though, as the hot hot water pushes out the warm hot water, and then the cold cold water pushes the warm cold water out of the pipes, but it's nothing I can't deal with.

I just love that I can actually use warm water to wash my hands now.

Whip It Good

The air conditioner for this house isn't the newest unit on the block, not by a long shot, but it does its job well enough. I upgraded it with a hard start kit a while back to handle an occasional stalling issue it would have when powering up, and it has been running well ever since.

However, it still has its minor issues here and there. For example, the wiring is a bit dumb.

A 3/4 flexible whip connects to the AC unit, which goes into a cut-off switch box, and then that switch box is connected to the main panel by some 3/4 EMT conduit which, for reasons I perhaps will never understand, uses an LR conduit body to turn the corner rather than just using a 90 degree bend.

None of this really makes much sense. 3/4 is way too big for a 10/2 circuit, not to mention that the plastic is sun baked and falling apart. The shut-off switch is less than a foot from the panel, which could easily, itself, serve that purpose. And the conduit is just... why.

Oh, but it gets better. Upon disassembling this mess, I discovered that the wiring between the cutoff switch was two 10ga stranded conductors, both with black insulation; not ideal but perfectly serviceable. But the ground was, for some reason, a stranded, green insulated, 6ga wire??? And then after the cutoff switch things completely reversed: the ground was now a solid 12ga bare conductor, and the two hots were an 8ga black and an 8ga white with black tape.

Clearly someone was using up some of their assorted lengths of wire.

Anyway, I pulled the flexible conduit and started hooking up the new whip, but I noticed part way through that I had neglected to account for the knockout sizes. They had been punched out for 3/4 inch conduit, but I had purchased a 1/2 inch whip. It came with one set of reducing washers, but I'd need another set to finish the job.

Not the greatest place to stop for the day but at least it's not AC weather yet outside.

The old flexible conduit was definitely in need of replacement though, as you can clearly see.

It had seen better days.

Anyway, the next morning after a quick trip back to the Home Despot I was able to finish up the job.

Much more sensible. It still needs a bit of touch-up paint but I can take care of that at my leisure. The good news is that the AC still works, though I did notice that the contactor was looking a bit crispy on its terminals. I might think about replacing it one of these days, since it's an easily obtained $15 part, but as of right now it's not a very pressing issue.

The important thing, however, is that I was able to add a few more lengths of wire to my drawer.

Sunday, March 19, 2023

The important thing is that it's free

So it seems my neighbours have bestowed upon me a gift.

Before this day, I had never asked myself whether I wanted to receive a storm damaged, mostly dead tree as a gift. Now I know that the answer is no, no I do not.

For those not keeping track, this is what the damaged shrub looked like before the neighbours sawed it off at the base and let it tumble freely into my yard.

I think they could have done a less lazy job of removing it.

Saturday, March 18, 2023

Capturing the World

A while back I bought myself a Ricoh Theta V 360 camera with the intent of using it to capture 360 panoramas to add to Street View. I kind of regret it. I tried a few times to capture 360 image sequences but the quality was terrible and the workflow experience was basically unusable on a number of fronts.

However, as the days and years have gone by, the world has changed. The old Street View app has been replaced by the new Street View Studio, which promises to give a much smoother experience. So, I figured I'd give things another shot (pun intended).

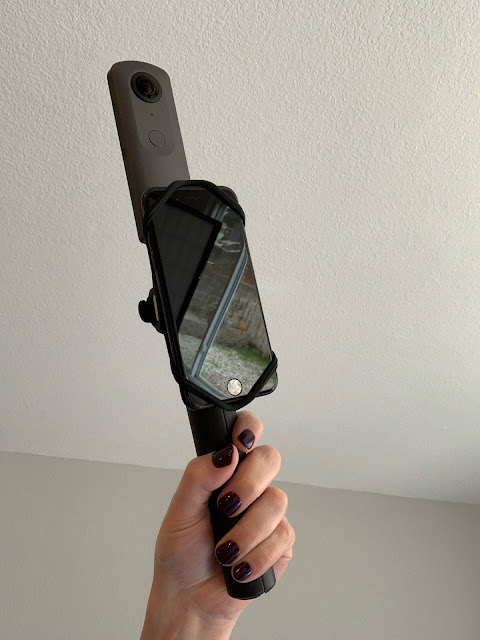
To make the physical part of the experience more pleasant, I bought myself two items: an extendable monopod selfie stick thing, and a phone holder which, while intended for bicycles, would work perfectly to strap my phone to the handle of the monopod.

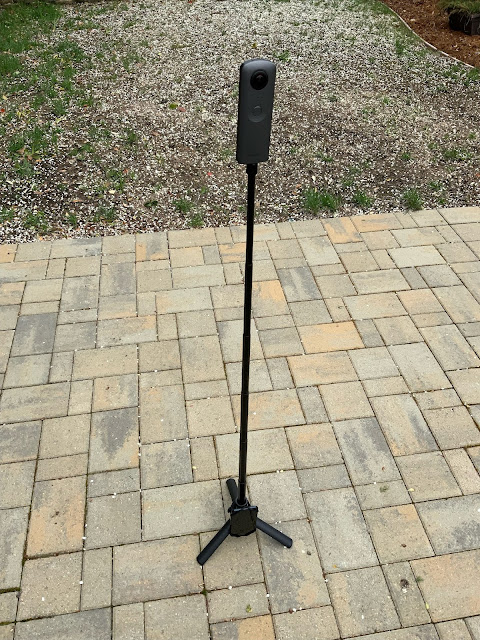
So far, so good. Though, I will say that taking this picture was a bit of a challenge.

The bottom of the monopod folds out into a wee little tripod, which has a small footprint so that it doesn't show up (or is at least easy to crop out) in 360 shots.

Of course it doesn't make much sense to use it like this, it's really intended to be extended when using it with the tripod legs.

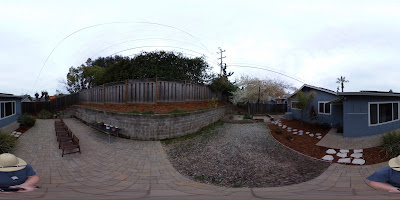
But I didn't buy it to use it like this. What I bought it for was to use it with the legs folded and the telescoping rod extended, so I could walk around outside taking 360 photos like this.

And yes, I know this isn't showing up as a scrollable/spinnable 360 photo. Just pretend it's working.

However, there's just one itty bitty little problem left: Ricoh never updated the Theta V to work with the new Street View Studio. They updated the newer (and more expensive) 360 cameras, but never bothered to restore the functionality to the V.

Now I've never been fully satisfied with the V in other ways, notably its relatively poor dynamic range and lousy overall image quality (chromatic aberration, shitty focus on one side, probably some other issues I'm forgetting) so I'm not going to be sad to replace it, but at the same time I'd rather it just work (in every aspect) than have to buy a new camera.

At least this time I'll learn my lesson and NOT buy a Ricoh.

Friday, March 17, 2023

We will rebuild

The wind storm that blew through this week didn't leave my property totally unscathed. For example, one of the neighbour's bottle brush shrubs snapped off and started leaning over the fence.

And the plum tree snowed petals all over the yard.

It may take time to heal, but we will recover from this disaster.

In all seriousness though, I did lose power for a little more than a day which was annoying. There's quite a few trees and fences around the neighbourhood that blew down, but nothing major happened other than that.

Saturday, March 11, 2023

Open Heat Surgery

The furnace has been acting up again a little bit, hitting the high limit cutoff error. I ran into something similar before a while back and ended up replacing the main control board (which is surprisingly affordable). This time, however, it seemed to be cutting out in less peculiar ways (like, not immediately after starting) and so I decided to take a different path with troubleshooting.

I decided to clean the main blower fan.

I kind of knew it was going to be dirty. When I got this house the furnace filter was one of those bargain basement $2 fiberglass filters that are guaranteed to catch 99.5% of gravel and coarse sand. The previous owners also had both dogs and cats, so it wasn't hard to imagine the worst. I have since switched to using some MERV-13 filters that turn jet black every time there's a "spare the air" alert, but of course the damage had already been done.

So there's only one thing to do: get in there and clean it.

The good news is that this isn't one of those "the blower is the first thing that goes on the assembly line, and the rest of the furnace is built around it" things. That would be the heat exchanger. The blower is the second piece.

So that means I only have to remove the main board mounting bracket, the flue, and the access panel to get to the blower. Not too bad, really.

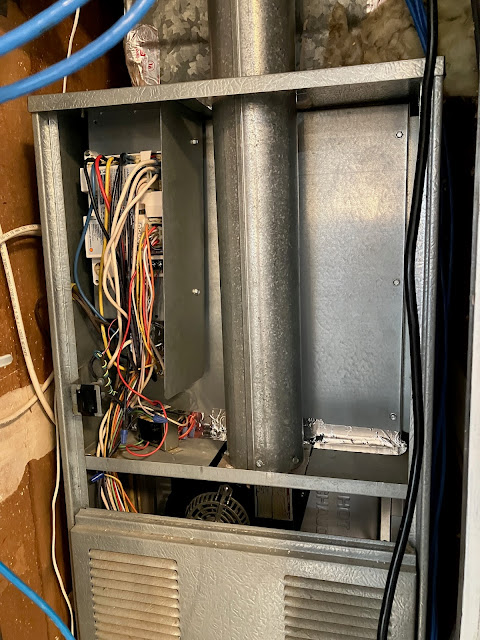
But first, we take a photo or two of how the blower is wired.

This is very important because this isn't something you can look up in a manual or online. There's no correct way to wire this, you have to reconfigure the wires between the terminals to get the fan blowing at the right speeds for different modes while measuring static pressure, CFMs, etc, and that's not something I'm at all interested in doing.

Anyway, with that done we can unscrew the main board mounting bracket and swing it out of the way.

Or "out of the way" as the case may be.

Then, a bit of wrestling with the flue and plenum access panel and we're in like sin.

These blowers are generally stuck in place with two bolts and some bent sheet metal tabs that a flange slides into, so removing it is just a matter of popping those bolts out and sliding the fan free. After unplugging the wires from the high temp limit switch and the power lines from the control board, of course.

I should probably mention here that the furnace should be switched off, both the electricity and the gas, by this point. There's full line voltage exposed in here, and it'll give you a tickle if you forget. I did not get tickled this day.

Anyway, the dusty 'ol beast is out.

If I were replacing the blower, this is when I'd be swapping the new unit in. However, this blower is still working fine, it just needs cleaning.

Speaking of "needs cleaning," now is also a good time to get the vacuum out and clean out the plenum.

It's not critical, but you might as well.

Anyway, outside we go with the fan so we can have a look at the dust buildup.

Yup, it's dusty. It's a caked on type of dust, too, so it needs some physical agitation to work it loose.

I used a bamboo skewer and a tooth brush, along with plenty of air from my compressor.

Anyway, with that all taken care of, it's time to get things put back together again. The plenum is nice and clean after a vacuuming.

And the fan slides back into its tabs and gets bolted down again.

Some aluminum tape seals the gaps around the wires, and along the bottom of the access panel where the soft gasket material has hardened into something resembling the texture and consistency of lucky charms marshmallows.

And with everything wired back up and bolted back into place, we're back in business.

Was the cleaning a success? Well, I certainly got gobs of dust out of the fan, and the furnace still works now that it's back together, so that's a positive sign. No hint of an overtemp yet, but it's an intermittent issue anyway so the jury is out on that. I did notice that the furnace sounded a little quieter when it was running, but it's one of those things where it could just be confirmation bias, so who knows.

In all, it took about 90 minutes from start to finish, not counting a nice hot shower afterwards to wash the dust off myself. Well worth the effort, I think, and it's probably not something I'll have to do again given that I'm using good filters now.

Thursday, March 9, 2023

Looks Pretty While It Lasts

Another atmospheric river is bearing down on me as I type, which is really unfortunate timing for my plum tree which is just at its peak of blooming right now.

So I took the opportunity to snap a few photos of the plum blossoms before they get completely destroyed by the wall of rain lurking just off the coast.

It was pretty while it lasted I guess, though I have to say this isn't exactly my favourite tree.

In other news the periwinkle is blooming again.

This thing is incredibly hardy.

The daisy is also blooming, despite being much more finicky.

Rather curiously pink this time, I think it usually blooms a bit more white.

Tuesday, March 7, 2023

Between a Rock and a Hard Place

I was up cycling in the hills and came upon a curious sight.

This fancy car carrier managed to get themselves stuck at the end of this cul-de-sac. Ahead of them was a security gate intercom (because this neighbourhood is far too fancy for its own good) inches from their front bumper. But what was stopping them from backing out?

Well, they managed to get a tree stuck behind the cab, and were half way through chopping out the offending branch when I passed by.