Thursday, June 30, 2022

Flower Power

Time for another garden update.

First off, the elderberry has made another appearance, after dying back from some powdery mildew for the billionth time.

I've been taking extra care not to get any water on the leaves when I water it and the yarrow in this pot. We'll see if that helps.

The new lantana is looking good.

Although I think one of them might be the wrong color.

It still looks lovely, but I wanted the purple, not the red. Oh well.

The third one I planted had a bit of a setback due to some water stress, but is still alive.

It should hopefully look less ugly as it recovers and establishes itself.

Speaking of establishing, the two that survived the frostpocalypse are a bit small but doing quite well.

They look about the same as each other, so just look at this picture twice and pretend I showed you both of them.

The spanish lavender is very well established now.

The french lavender is looking nice too, but it wasn't in the mood to be photogenic today, so I'll try to grab a snap of it another time.

The mexican heather continues to exist, somehow, though it has yet to surpass its original size when I planted it.

Alive is better than dead, at least.

The beardtongue is blooming right now for some reason.

Go figure.

Speaking of blooms, the rose is looking mighty rosy lately.

I have a new set of stakes to prop up this bush since it has well outgrown the original set, but I've been lazy about putting them in.

The gerbera daisy is blooming too.

I probably should have snipped off the seed heads before taking this photo. Oh well.

Saturday, June 25, 2022

I Have the Power

In the immortal words of He-Man.

More bits for the new bike have arrived, this time the power meter spider. This fits in place of the direct mount chainring on SRAM Force or Red cranksets, and then you mount a chainring to it. As the name implies, it reports a live reading of how much power I'm putting through the pedals as I ride.

I didn't order the chainring just yet, though. The crankset I ordered came with a chainring (technically you're supposed to be able to get it without, but supply chains), in a rather large 46t size, and I want to get a few rides in to see how the gearing feels before I settle on what size to order to mount up here. There's a 99% chance I'll go with 42t, but there's no sense in being hasty.

The Shrinks

On longer rides on BlackBirb, my XC bike, I've been having issues with lower back fatigue and a peculiar amount of chafing on my upper buttocks. I'm no bike fitting wizard, but my instincts tell me that my cranks are too long (170mm feels nice to me, but this one came with 175mm) and the reach is too long (I could plausibly fit either a small or a medium frame from this brand, and I ended up getting the medium).

At some point I'm planning to get a shorter set of cranks, but I'm also planning to do a number of other upgrades at the same time (switching to a 12-speed 10-50 cassette instead of the 11-speed 11-42, getting new wheels, adding a power meter, getting a new derailleur and shifter...) so that's a project for future-me. But shortening up the reach is pretty easy to do on its own.

For reference, this is the current set-up, which is stock from the factory. A 90mm +6° stem, which is quite long by MTB standards though not uncommon for XC bikes at the time.

Having a longer stem is kind of nice when climbing because it puts your weight more over the front wheel, which helps keep it from lifting or washing out on really steep stuff. But if the total reach is too long, you just end up stretched out in an awkward position, which is no bueno.

So, I replaced it with a stem with more modern proportions: 40mm and 0°.

I took it for a quick spin around the block and honestly... it kinda feels the same? I'm not sure if I was expecting a really dramatic difference in handling or in how stretched out or compressed I felt in terms of reach, but people tend to make a big deal out of how much stem length affects these sorts of things. Apparently those people are all crazy.

This lack of difference is generally a good thing, though. I did like the way the bike handled before, so having that change dramatically would have been a disappointment. I'll need to go on a longer ride to see how the reduced reach impacts the lower back fatigue, but I'm hopeful for good things there.

Also, you might notice that I used a different top cap. The reason for this is that the steerer on this fork is cut to a really peculiarly awkward length, where it extends almost exactly 60mm above the top of the headset cap. The stem is 40mm, the garmin mount is 5mm, and all of my spacers are either 5 or 10mm. This means that either A: the top of the garmin mount lines up exactly with the top of the steerer, and I can't apply any preload to the headset, or B: the bottom of the garmin mount lines up exactly with the top of the steerer, and it therefore can't locate on the end of the steerer. The top cap I swapped in here (temporarily) has a little ridge on the underside to help locate against the topmost spacer, the stem itself, or in my case the garmin mount, whereas the original top cap does not. I've got a set of spacers ordered up that has some not-divisible-by-5mm heights, so I'll be able to get things a bit better sorted when that shows up.

But that's a project for another day.

Update: I decided that instead of waiting for more spacers, I'd just file down the top of the steerer a few mm. Now I can just run a 5mm spacer above the stem, with the garmin mount on top of that.

I also switched to the hinged garmin mount, as I needed just a tiny extra millimeter for it to not interfere with the front half of the stem.

Thankfully I happened to have on in my drawer of spare parts, so everything worked out nicely in the end.

Wednesday, June 22, 2022

Bi-, Meaning "Two"

After some consideration, I decided that having a front wheel on the bike as well will probably help make the rides a bit less fatiguing.

I'm still waiting on more, fairly vital parts, so we're not quite in the home stretch, but things are looking good.

Yes, things are looking very good indeed.

Tuesday, June 21, 2022

Uni-, Meaning "One"

Well, I guess I've got almost enough bits to make a unicycle.

Who needs a front wheel anyway, you only use that when you're not doing dank whoolies.

I have to say I'm really impressed with the finish on these Nobl wheels. So far I'd say they were well worth the money, especially given that the price was right in line with any other high end carbon wheels.

I just have to hope they hold up to the abuse I'll be giving them.

(And for those wondering: fear not, the front wheel should be arriving tomorrow)

Sunday, June 12, 2022

Despite All My Rage

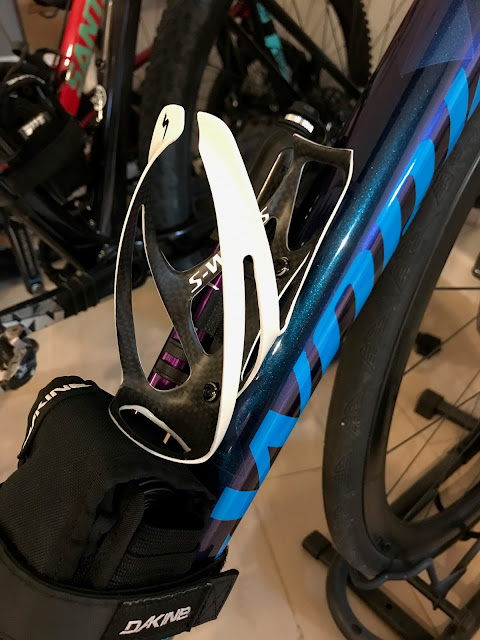
Apparently I got a little carried away putting my bottle back in the bottle cage on a ride last week.

This is a Specialized Rib Cage II, which has in most regards treated me very well over the years. It holds the bottle securely, it's easy to get the bottle in and out, and of particular importance for this bike: it's white.

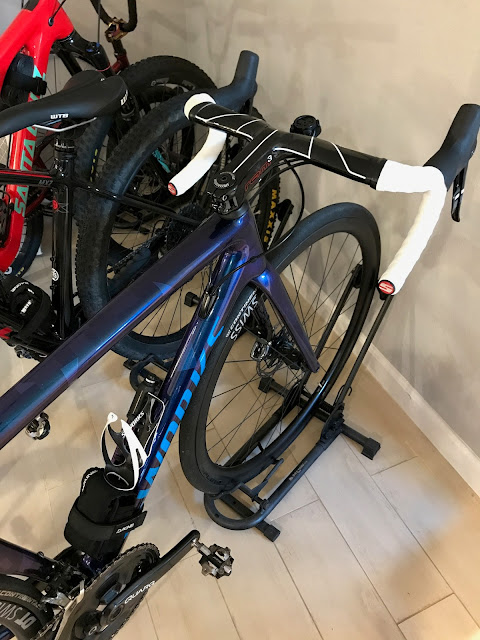
The white part is important, as this bike also has white bar tape. When putting together a colour combination for something like a bicycle, it's important that each colour is used in more than one place, so as to provide a sense of cohesiveness across the whole design. Without the white on the bottle cage, the bike just didn't look right.

The simple solution to this broken bottle conundrum would be, then, to simply purchase a new Specialized Rib Cage II in white.

But they don't sell it in white anymore. They only sell it in black with white (and other) accents, and that's not really good enough for my situation.

So, I decided to go in a different direction.

This is the Specialized Rib Cage III Carbon. Yes, a bottle cage made of carbon fiber. It's not quite all white, but it's got more white than the current lineup of Rib Cage II, so it'll have to do.

So far I've found it quite easy to use, though it feels like it might not grip the bottle quite as tightly as the Rib Cage II. That said, I haven't seen any signs of the bottle wanting to bounce out of it, so I'll come back to this point at some future date if that trend shows any signs of changing.

It does, thankfully, have enough white on it to pull the colour scheme together again, so that's nice at least.

And yes, it does cost a silly amount of money. Silly in bottle cage terms, at least.

Thursday, June 9, 2022

It's Parked Forever

I can never drive my van another mile from where it sits right now, for it has achieved perfection.

Truly a milestone worth celebration.

Saturday, June 4, 2022

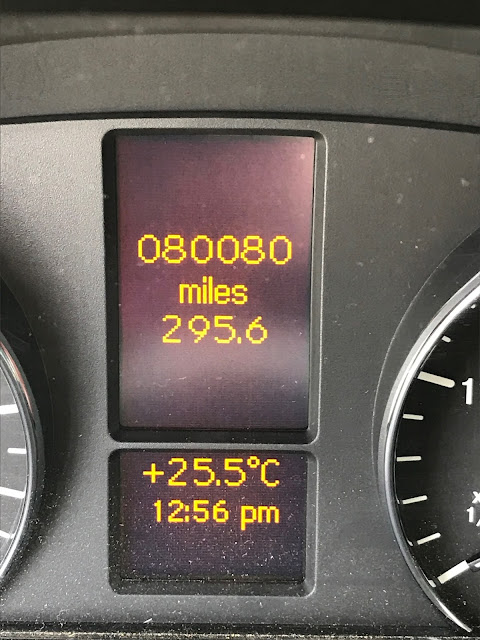
It's Just a Number

In exactly 5 miles I'm going to be a mature and responsible adult.

I should maybe clean off the dust too.

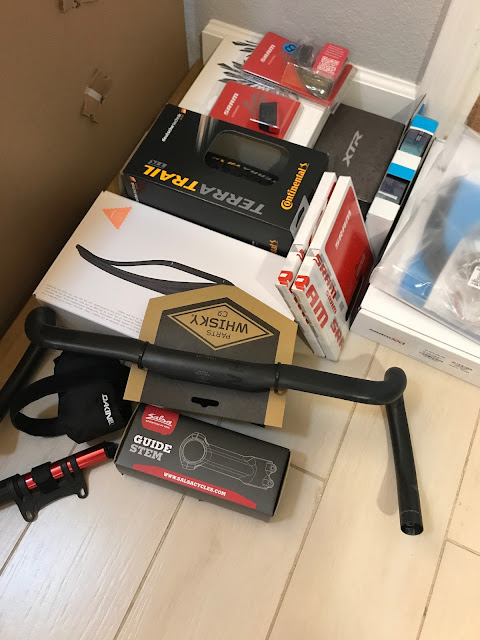
Further Accretions

Little by little, a pile of bike forms.

Still more to go.

Thursday, June 2, 2022

Let the Sparks Fly

Since the weather this morning was quite pleasant, I decided to take some time after my morning grocery shopping to finish up a few odds and ends under the hood on the PedoVan. Mostly I wanted to replace the heat shrink on that one wire I had noticed last time, where its original heat shrink had split and fallen off.

A quick 5 minute job: slide under the van, pull the cable, heat shrink it, bolt it back in place.

But then I decided that since I was out there, I'd clean up some of the wiring up top.

First off, I added some heat shrink over the ring terminal on the charging cable for the auxiliary battery.

Remember this photo, we're gonna come back to it later.

Then I replaced the positive and negative terminal clamps on the aux battery cables.

This was partly to get a 2-connector clamp on the positive for a later project, and partly because the old ones looked like this.

I will never understand why they make these out of lead.

Anyway, I buttoned it all up and went back in the cab to set the time on the diesel heater controller, only to find that it wasn't powered on.

Well that's peculiar.

Doing a little investigation, it turned out that the huge, thick ground cable for the aux battery had no electrical connection between one end and the other. Somehow. I puzzled over this for a bit, poking and prodding at it, before realizing that the ring terminal had been installed incorrectly way back when it was originally put in.

For those of you following along at home, here's how to make three mistakes in a row:

  1. Strip back the insulation on some fine braided welding cable and tin the end with solder.
  2. Use a vise to crimp the ring terminal to the tinned end of the cable.
  3. Install the cable and assume that everything's going to be just fine for years down the road.
Some people reading this list will be sighing and shaking their heads. For everyone else, here's the answer sheet:

  1. NEVER tin a stranded or braided cable when installing it in a high vibration environment, such as in a vehicle. The solder wicking up the cable will create a rigid section in the wire, and you'll end up concentrating the bending stresses at the end of that section, well away from any strain relief.
  2. NEVER use a vise as a press, and especially don't use it as a substitute for a proper crimping die. A vise is for holding, a press is for squeezing.
  3. NEVER use a solder-tinned wire in a crimped or screw-terminal connection. Solder has a very low yield strength and will creep over time, causing the connection to come loose no matter how tight it is when you install it.
Now I didn't really have the option to start over from scratch on these cables, so I did the next best thing and got out my hydraulic cable hex crimper to at least put a proper crimp on the ring terminal. After applying some heat shrink over it, it came out looking pretty darn good.

Nice solid connection, no half-loose wire jiggling around inside, and a perfect zero ohms resistance on the multimeter.

But the diesel heater controller still wasn't powered on.

Remember that photo up near the top, the one I said to put a little mental bookmark on? The photo of the welding cable crimped into a ring connector in a method eerily similar to the one that had just failed?

Yeah, guess which connection just failed.

Here's a little rule of thumb: if you're putting on a ring terminal like that, and the tool you're using doesn't look like this, then you're probably doing it wrong.

See, this is what a crimped connection is supposed to look like.

Anyway, I put a fresh layer of heat shrink on it, bolted everything back in place, and finally it was all working properly.

Another job done.