Sunday, July 20, 2025

Rabbit Goo

So it's high time I spread some rabbit goo on my windows.

At least it is according to this randomly-named Chinese purveyor of decorative window films over at the House of Bezos.

I wonder where I'll find the instructions on how to install this?

Anyway, the north-facing windows on my house tend to spend most of their time either partially or fully closed. This is because they face right out onto the street, and that leads to them being slightly less private than I'd like when the blinds are open. This hasn't been a huge burden, all told, but it has meant that I rarely get the opportunity to look out of the north side of my house, which I find myself wanting to do from time to time.

So the solution I came up with is to install some window film over the lower half of the north-facing windows, just high enough so that it blocks the line of sight between me and the neighbours, but not so high that it completely obscures my view of the sky and trees and so on.

I opted to go for this frosted film with a pattern of googie-style sparkle/star/whatever thingies for two reasons. First, my house was built in the 60s so something like this would have been broadly period for it. Second, the small clear bits still let me peep outside through the film if I find myself wanting to do so, while not compromising the privacy in any major way.

This stuff is pretty easy to install, you just cut it a little oversize, spray down the window (after cleaning it mind you, so you don't permanently entomb a layer of dirt under the film) and slap it up there, squeegeeing out the bubbles from the middle to the edges.

Once it's solidly in place, a little trim around the edges neatens things up.

The kitchen was the main goal for this, since the other north-facing room on my house is my bedroom and I tend to spend most of my time in that room completely unconscious and not peering out of the window.

But the window film is pretty cheap, so I did the bedroom too.

There's usually some sheer drapes that go over this window too, so it gets two layers of privacy when the blinds are open.

I apparently did my measurements well, as this was all that remained of the two rolls when I was done.

But not everything went perfectly, there was one casualty of this project.

My poor spray bottle. You left us too soon.

Stirred, Not Shaken

As I alluded to in my last blog post, an immersion blender is in my future. Well, the future is now.

This is a Kitchen-Aid something something variable speed immersion blender. It seems to be quite nice and solidly built. I guess we'll see how ti stands up to the test of time.

But the real question is: will it blend?

The answer is yes, yes it will. It even comes with a little blending cup, seen here (just in case you lacked any vessels in which to blend things), and a plastic bumper for the bottom of the blender thing in case you don't want to scratch your pots (I don't imagine I'll get a lot of use out of that, but it's a nice touch).

Saturday, July 19, 2025

In A Jam

It's that time of the year again.

The plum tree in the back yard produced a crop of fruit again, although not nearly as much this year as last. As such, to make this year's batch of jam I decided to risk a heretical move and buy some store-bought fruit to make up the difference.

Do what you must to make me pay for these crimes, but know that I have already won.

And speaking of crime scenes, getting the pits and stems out of these cherries is sure a task.

Since the cherries weren't all ripening at once, I filled up a gallon bag with the softest ones and kept the stragglers to snack on.

So into the freezer they go, both to store them for a few weeks while the last of the plums come off the tree (also going into the freezer) and for the ice to help break up the flesh of the fruit.

And on the other end of those few weeks, the freezer did its job nicely.

In the end I only got about 3/4 of a gallon of plums, so it was a good thing I picked up the cherries.

Now while the ice did a decent job of starting to break up the fruit, it didn't exactly reduce them to a smooth pulp, so that task comes next.

I'm definitely buying an immersion blender for next year's batch.

Anyway once the cherries were minced I ended up with 3qt of purée.

And I learned my lesson from making a no-sugar jam last year, and decided to add sugar this year. Not quite as much as you'd use for a full-sweetness jam, but enough to take the tart edge off.

4 cups was enough to get things to a nice sweetness with just the cherries, though I ended up adding a 5th later once the plums were mixed in.

Speaking of mixing things in, the one major downside of buying fruit at the store is that they don't include the flavour; you have to buy that separately.

2tsp of this stuff was enough to get the purée tasting like cherries instead of unidentified vegetal matter, which was a welcome improvement. Honestly I could probably add this stuff to iceberg lettuce and get the same effect.

Now while I had pitted the cherries before freezing, I left the plums intact, so they needed to part with their pits.

And after a trip through the food processor, I ended up with another 2qt of purée.

And with a bit more sugar (the extra cup I mentioned previously) and running a bit of water through the foot processor to clear out the remaining fruit shrapnel brought us up to about 5.5qt total.

So onward with the next artificial augmentation: pectin. I'm honestly not sure if I really need to add any since I am including the skin, but it's cheap and doesn't do any harm.

It just gets whisked in and then it's into the pot to boil up, in two batches since it can tend to foam up if you heat it a little too quickly.

It sure is starting to look like jam.

I decided to go for 215f, since getting to 220f was taking absolutely forever and I like my jam to be a bit on the soft side.

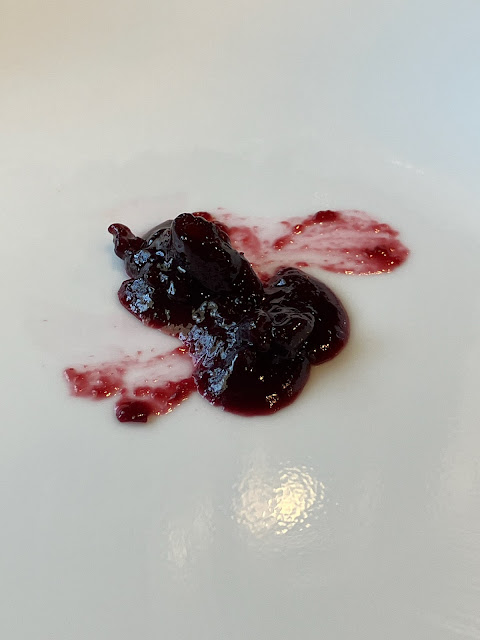
I did the plate test and it was looking plenty jammy, so I rolled with it.

So it's into the jars with it.

And then the water bath canning.

In two batches, again.

And after cooling off a bit, yeah, I'd say that set just fine.

10 jars is a little short of what I was hoping for, and quite a bit less than last year, but I'll take it.

I think I might add some cherries to next year's batch too, even if I do end up with more plums from my tree, as the extra colour it adds really gives the jam a great appearance compared with the somewhat pale pink that just the plums alone delivered last year. Thankfully I have plenty of cherry extract left, so I'll be well prepared for the flavour-not-included commercial fruit.

Wednesday, July 16, 2025

Tape on Tape

After my morning ride today, I noticed that the bar tape on Purple Haze had come loose.

This tends to happen after a few years when the electrical tape that wraps the end goes a bit gummy and starts sliding around. Luckily the fix is easy, and starts with removing the old electrical tape.

And cleaning up some of the gunk underneath, of course.

Then I can rewrap it in its usual orderly manner and finish the end with some fresh electrical tape.

In this case I switched things up and went for some white electrical tape to match the bar tape a bit better. Of course that meant I had to replace the tape on the other side too.

And of course now that this fresh white electrical tape is sitting next to my not-so-fresh white bar tape, this would be a good time to give it a little cleaning.

Well, it's better but it's not perfect, and this is life with white bar tape: it's only ever white once.

Saturday, July 12, 2025

You Can't Tuna Fish

When we last left off with the Rat Shack Synth, it was making noise but not very well. The tone was drifting upwards on the main oscillators and oscillator 1 wasn't tracking the keyboard properly.

But thankfully every problem has a solution, and after a bit of head scratching I managed to get everything working perfectly.

Frequency Modulation

This right here is a Yamaha Reface DX. It's modelled after their classic line of Digital FM synths from the 80s and 90s, with the DX7 being perhaps the most famous and widely used synth.

This one has a problem, though. Some of the front panel switches don't work, and some of the LEDs don't light up.

For example, here's the LED behind the FREQ button lighting up as it should:

And here's the LED behind the LEVEL button doing a whole lot of nothing:

Oh and also it doesn't make any sound. I guess that's important too.

Now one of the problems with these compact synths is that because of their small size, people often tend to treat them like those old toy synths, even though, well...

But thankfully I didn't have to pay $500 for this one. Anyway, let's crack it open and see what's inside.

And interestingly there's more in here than I thought there might be. These days you can run a synth like this on a board the size of your thumbnail (not the chip, but the whole board) but I guess the Yamaha engineers decided to fill the space available to them. No harm done I suppose.

So over here on the left side is the chip that drives the switch and LED matrix.

If we probe one of the matrix lines with the scope, we can see it scanning.

But if we probe another line next to it, we see something that looks almost like a flat line...

However, if we bring up the vertical scale a bit.

We can see that it's still trying to strobe the lines, but it's lost its pull-down resistor.

Now I could dig into this board and try to figure out which resistor is faulty, or trace down a broken via, but I really don't feel like it when replacement mainboards are still readily available.

Though at $150 they're not especially cheap, but given the bargain I got on the synth I'm still coming in under budget.

Now to get to the mainboard we have to remove the keys.

And the keybed PCB.

And then to get the mainboard out we of course need a different size screwdriver.

But once we've got those screws removed, the mainboard just lifts right out.

And then the new mainboard goes in, after we've removed the curious bits of kapton tape that were stuck to each connector.

And we can verify that the switches are working and the previously "dead" LEDs have come back to life.

But the synth still isn't making noise, curiously, so let's check the volume slider.

If we measure the resistance on the wiper for the octave slider next to it, we get a reasonable reading:

But unfortunately the volume slider is being rather unreasonable.

And after spraying it with a little contact cleaner...

It's somehow still not working. Lovely.

Just to test things out, let's try jumpering the volume slider with a fixed resistance.

And if we test the resistance now, we see a much different result.

But unfortunately the synth still doesn't make noise. Because I put the resistor on the wrong pin, it should have been like this.

And now the synth makes sound. Good. So we can order up a volume pot, and let's just go ahead and replace the octave pot too since it was reading a bit funny on one end.

We just have to pull out this front panel sub-board.

And do a bit of desoldering. Using a hot air gun can really help with larger mechanical solder joints like these two tabs in the middle.

And with a little magical slurp from my solder sucker, both pots come out easily.

Goodbye old slider pots, you left us too soon.

Then the new pots get soldered in.

And all that's left to do is reassemble.

But there's still some finishing touches left.

Like replacing the missing rubber foot.

And getting rid of the Alkaline batteries before they leak and destroy everything.

And with all that done, we're back in business.

And ready to make some sweet 80s synth-pop!