In a previous blog post, I covered last week's adventures in installing an irrigation system in my front yard. Well, those irrigation valves aren't going to open and close themselves (at least I hope they aren't). They'll need some external assistance.
Like the last entry, this one is a long one so click through to read more.
This timer will be more than sufficient for my needs. However, for whatever reason, nobody seems to sell a solar/battery powered 24VAC irrigation controller; they all want to use latching DC valves, which tend to be prone to failure. As such, I'll need to run power out to this spot here on the fence where I plan to mount the box.
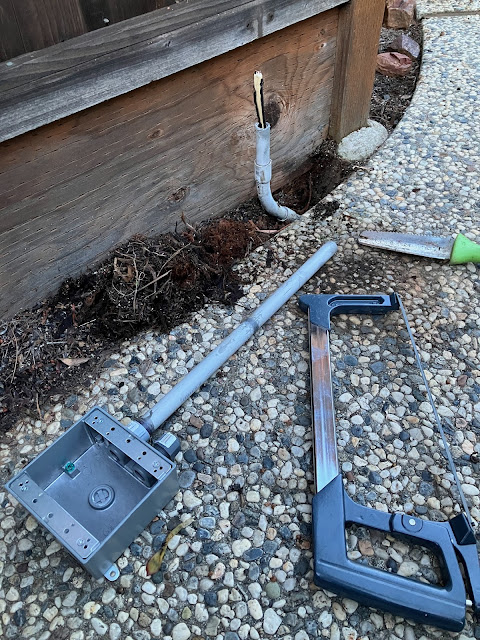
I'll also need a way to get a wire back over to the one valve at the front of the house, so I'll be running both a power line as well as a control line through the existing conduit. They'll be terminating in this 2-gang box, which has a conduit connection on one side and a cable gland on the other to allow the control line to exit the box.
The gland is pretty neat, it's got a squishy gasket inside that compresses around the jacket of the cable as you screw down the nut.
On the other side, we'll need one port to connect to the conduit going under the driveway, another to connect to the power coming in, and another gland to allow the control cable to exit. I had to special order this box online because for whatever reason Home Despot doesn't stock a 5-hole 2-gang box like this.
And we'll round things out with another box for some outlets next to the front door. Curiously my house had exactly zero external outlets when I moved in. I installed one already near the panel in the back when I dug the sump pit many, many moons ago, and I'll be tapping into that circuit to power these outlets too.
I could have used a 3-hole box for this one, but I was already grabbing 5-hole boxes so I just went for it.
Moving right along, I don't really want to just mount the outlet and irrigation controller directly to the fence boards. For one thing, it would probably be a little janky, but also the existing conduit is set forwards from the fence boards by almost exactly the thickness of another fence board, so it just makes sense to put up another board to space things out and give me some flexibility for where to mount the conroller.
And for those who claim that it's too hard to make a clean, smooth, accurate perpendicular cut on a board like this using only a circular saw, I have just one thing to say: skill issue.
I'm not sure how much it comes across in the photo, but the surface of that cut is smooooooth.
And luckily, it fits the spot just right.
So we'll glue the conduit in place and mount the box. For whatever reason, the conduit wasn't glued here, nor at the noodle on the far end. I'm not really sure why, but it ended up making my job a little simpler so I'll take it.
I'll also take this opportunity to once again say that buying a rotary hammer was one of the best tool investments I've made. It makes it so easy to sink holes into stucco and concrete for mounting wall anchors and the like.
And now that box is secured in place, and there's just enough room behind the noodle for the lateral run of conduit to sneak through.
But there's a problem here, and that problem is that 1/2 inch conduit really sucks, particularly when there's opposing curves at each end. I could have probably used a conduit body at this end to eliminate one corner I'd have to pull through, but I didn't expect to be completely unable to even get the fish tape through the conduit: no matter how much I struggled with it, I could get the tape 90% of the way through from either end, but when it ran into the opposing noodles it would just jam up, and no amount of wiggling and jiggling would get it through that last stretch.
So I did what any reasonable person would do.
I lopped one of the ends off, and the fish tape pushed through just fine.
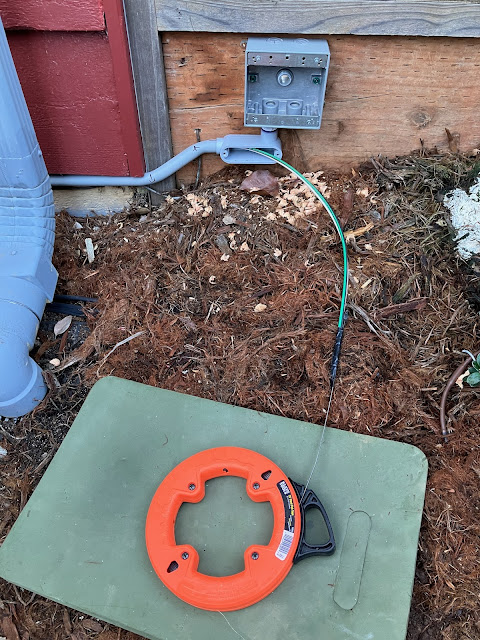
Of course, getting the fish tape through is only half the battle, the real struggle comes next: getting the wires through. I made the perhaps questionable choice to reuse the not-quite-so-jacked-up section of solid-core UF cable that I had rescued from this location previously. According to code when you're running a line underground, even in a conduit, you're supposed to use waterproof cable. For whatever reason the local home stores don't stock THWN stranded conductors, so I was left with the choice of reusing the UF cable, ordering THWN online, or skirting the regulations with THHN.
Well, wish me luck, because I'm gonna need it.
The pull actually went somewhat ok, though I think the sprinkler wire would occasionally twist around the UF and end up slightly pinched, causing a fair bit of drag on the pull.I probably should have taped the two together at regular intervals, but it wasn't too much of an issue until right up at the end when...
Son of a bitch.
Yeah, less than a foot from the end, past the last curves, the fish tape ripped right through the tape and left me stuck.
On the bright side, though, I was less than a foot form the end, so...
For every problem there's a solution. And before you ask: for whatever reason that connection just below the mulch level, which I hadn't touched, was in fact originally glued, so I wasn't able to just slip the conduit apart there to gain access to the end of the wires.
Anyway, it was a bit of an inelegant detour, but the important thing is I've got enough wire to work with now.
And I only needed to buy one extra coupling.
Moving right along, the controller screws to the plank quite easily.
And then I just need to install some outlets in the box to...
Hmm, ok, maybe not this outlet. I had salvaged a number of outlets from around the house when I moved in, since for whatever reason there was a mix of white and ivory. I've really never liked ivory outlets and switches, so I had swapped them all to white, but kept the old ones for situations just like this. Apparently, though, I kept one too many, as this one was in no shape to be reused.
I'm pretty sure this one broke when someone tried a bit too hard to jam a plug in through the tamper-resistant shutters, one of those "some kid was playing with paperclips and ruined things for everyone" misfeatures we have to live with in the modern world. Oh well.
So that does mean I'm one outlet short, but I've got enough to wire up this box for now.
And the nice thing about this being in an exterior box is that it's almost impossible to tell that the outlets are ivory instead of white.
And even if you can tell, it's not really somewhere that outlet colour is all that important, or I would have gone to the trouble and expense to get all new outlets in ANSI 61 Grey.
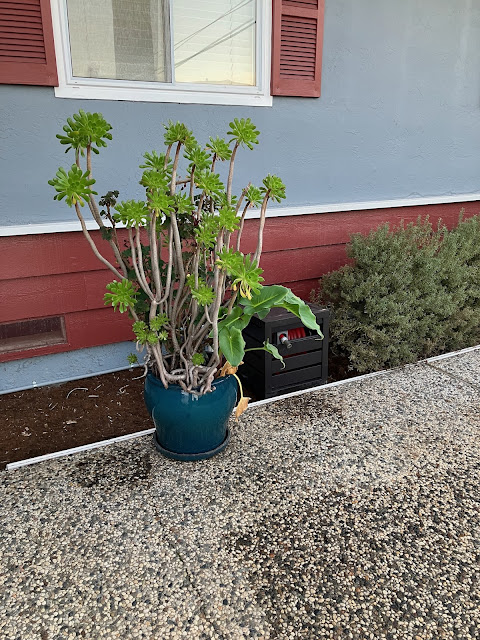
Anyway, with the plant moved back into place, the install is perfectly camouflaged and you'd never eve know that something is here.
It's like it's invisible!
So, coming back around to the other side, the conduit gets glued back in place after the wires have been pulled through the final section and into the box.
And that thankfully marks the end of the most annoying part of this install. Since I'm using stranded THHN for the rest of these runs, the pulls will be incredibly easy in comparison.
The first of these pulls will be to the box next to the front door.
And this is probably a good time to mention that prewiring the outlets together for a 2-gang box can save a lot of struggle when you're bent down and crawling around on your knees.
And I'm happy to say that pulling the conductors was an absolute breeze.
As was packing everything into the box once things were wired up.
I went for a white outlet here so that it would match the 4-pack of white GFCI outlets I got, since I had to purchase one new one anyway and this one will be fairly visible when you're walking up to the house. I also opted to get the "heavy duty" version and I think I'll probably buy those from now on as the wire clamps are much nicer to use than the plain terminal screws that you usually deal with on outlets and switches.
So that makes box number 2 all buttoned up.
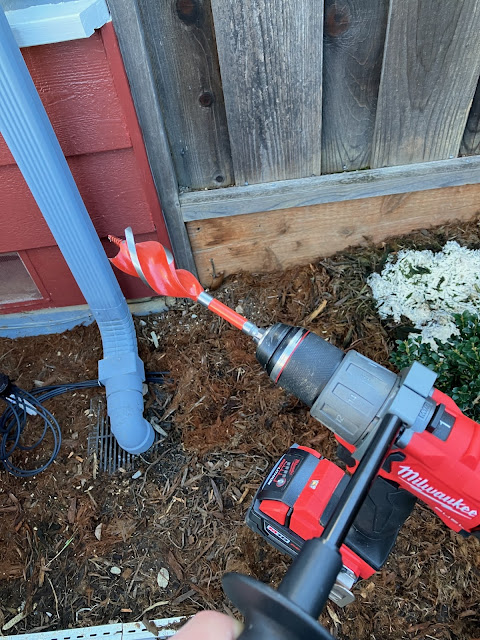
Before I install the outlets in the third box, though, I need to run the wires to the fourth down at the far end of the driveway, so that I can join them all together at the same time. That means drilling a hole through the bottom kick board of my fence so that I can continue this run along the side of my house and back to my panel.
That, in turn, means I get to try out my new 1-1/4 inch auger bit. Pray for my wrists.
Also the slime mold is having the time of its life munching on my damp mulch here. Shout out to Sir Slimy.
And actually drilling that hole went really smoothly. The screw cone on the bit fed the cutters into the wood at just the right rate, and as a bonus it stopped self-feeding just a fraction of an inch from breaking through on the other side, which meant I could walk around to that side and line up to finish the hole without blowing out any big splinters (or I suppose I could also have just pushed through and let that happen, if I couldn't, or didn't want to be bothered, accessing the hole from the other side).
Finishing up the hole from this side left things nice and clean.
Now I need a little bit of an offset for the conduit to reach the box when it's mounted to the kick board here, and the nice thing about PVC conduit is that it's rigid up to 90°c. Above 90°c, it is not.
I don't know if there's some code that says you shouldn't do this, but for conduit, where it doesn't need to hold any pressure, it tends to work just fine.
Waiting for the glue to dry on that length of conduit gives me some time to put my rotary hammer to work sinking a few more anchors to mount the conduit straps.
It was at this point when I started to consider whether the length of conduit I had just glued in place was more than the full length of my 25 foot fish tape (because when would I ever need one longer than that). Luckily, that turned out to not be the case.
And unsurprisingly the pull went just as smoothly this time. Using stranded conductors is really the way to go with conduit.
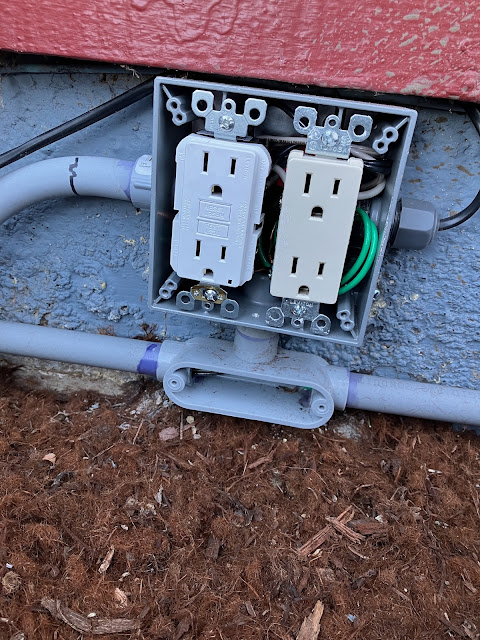
So with those wires run, I could finally button up the middle box, and we get the first glimpse of what the mismatched outlets look like together.
It's a national tragedy, but somehow I'll find the strength to carry on.
It won't be too hard though, as it's already less noticeable with the cover on.
And you'd really be hard pressed to spot it with the hose reel and potted plant of miscellany moved back into place.
Though it does make the outlet itself a bit less convenient to access.
Which I suppose I should explain. The outlet next to the door has some pretty obvious utility. It's electricity, right there, where you need it. The outlet at the far end of the driveway has some utility to it too, in case I want to plug in a battery tender, or charge up an electric motorcycle, or something like that.
This one here in the middle, though? It exists for one purpose only: to not not exist. Because I know if I just put a blanking plate here on this box, and skipped wiring in the outlets, that I'd find myself some years down the road cursing myself for not having installed one when I had the chance.
Of course, it also serves to provide GFCI protection to the underground conduit run, and the outlets on the fence. I could have installed a GFCI directly at those outlets to protect the outlets themselves, but you're supposed to have one protecting underground electrical runs too, so it made sense to centralize it here.
Anyway, there's a bit more work left to finish things up: I need to put the outlets in the box at the end of the driveway, and then run the conduit, including one more outlet box, along the side of my house. But I got rained out today and I'm on vacation, so I'll just tackle those tasks when I get to them.
For now, I'm calling this project "done enough".








No comments:
Post a Comment