Sunday, December 25, 2022

A Little Off The Top

It's time to deal with the leafbare pile of twigs in my front yard that pretends to be a baby sage plant. I don't know why, but it always gets all spindly and ugly like this after growing really well for a while.

Luckily the solution is a simple one: just hack it back to the ground and let it grow again. I also took the opportunity to prune up the beardtongue a little.

Looks a bit ugly right now, but in a month or two it'll look great.

Hemming and Hawing

Back in 2008 when I first worked at Palm, they gave me a bunch of palm-branded merch as a welcoming gift. And also to clean out their palm-branded merch closet, probably. One of those items was a t-shirt celebrating the launch of the Treo 750.

It's a nice enough t-shirt. It's the usual tv-static-grey t-shirt colour, with black rib-knit cuffs around the sleeves and neck, and it's printed with a wireframe model of the Treo 750.

It does have a few shortcomings, though. The first and probably least solvable one is that the way the design is printed, whimsically positioned around the torso of the shirt, makes it incredibly confusing figuring out the front from the back, and because of this it's the only t-shirt in my collection that I still frequently, to this day, accidentally put on backwards.

The other problem is those black rib-knit cuffs.

They are simply overlocked in place, and this results in a somewhat bulky seam on the inside that tends to fold back on itself in awkward ways, and also tends to pucker the edge of the t-shirt fabric a little. Luckily I do have the means to fix this issue.

So, I loaded up my coverstitch machine with a medium grey thread in the needles and a reasonably well matched grey wooly nylon in the looper and stitched the seam down into place.

My coverstitch machine doesn't have a free arm, so I had to make do with sewing the sleeve inverted, but since it was right up near the hem it wasn't a big deal.

The result is a seam that is now completely under control and, as a bonus, a sleeve with much less puckering in the fabric.

I also gave the same treatment to the front of the rib knit trim around the neck hole (the rear already had some bias lining sewn over it to avoid the seam there sawing the back of your neck open) since I had the machine out and set up.

I'm quite pleased with how this turned out.

Saturday, December 24, 2022

The Weather Outside is Frightful

But weather inside is even worse. Thankfully, this weather intrusion was only sort of partly inside, so it wasn't too much of a bother, but it was still something that needed to be attended to.

The roof leak causing this peeling paint has actually been an issue for as long as I've lived in this house, but given how little it rains here in California (especially in the middle of our wonderful megadrought) I hadn't really given it much thought. Just a bit of peeling paint from the few times it gets soaked each winter wasn't going to ruin everything.

However, since I had the time and half a tube of cold patch, I decided to climb up there and make another attempt at sealing things up.

It was obvious that the issue was in some way related to this roof jack, given its proximity, but with the way roof leaks go it's never all that obvious what the exact cause of the leak is. So, I buttered up the cracked sealant where the roof jack met up with the plumbing vent, slathered on some goop around the base, schmeared some on some shingle seams, and frosted over some popped nails.

I actually think the popped nail just above the roof jack might have actually been the issue. When the roof was redone last, they didn't actually remove the old, curled shingles and instead just laid down a new layer over top. This isn't the best way to lay down shingles, but usually it doesn't cause many issues. That is, of course, if you use long enough roofing nails. Which they did not. As a result, the nails have been working their way out of the sheathing, and the heads have been erupting through the shingles, leading to a number of leaks that I've had to patch over the years.

And now that I've patched a few more, I hope that it'll keep even more of the weather on the outside where it belongs.

The Ups and Downs

I decided to do a few big rides this week. First up on Tuesday, I did the Dirt Bohlman. I'd been meaning to try this one on my gravel bike basically ever since I built it up, since it's pretty much the ideal case for it: a relatively smooth fire road at the far end of maybe 6 or 7 miles of pavement. I'd done this a few times before on my XC bike, and found it to be maybe a bit overkill for the fire road and less than ideal for the pavement leading up to it.

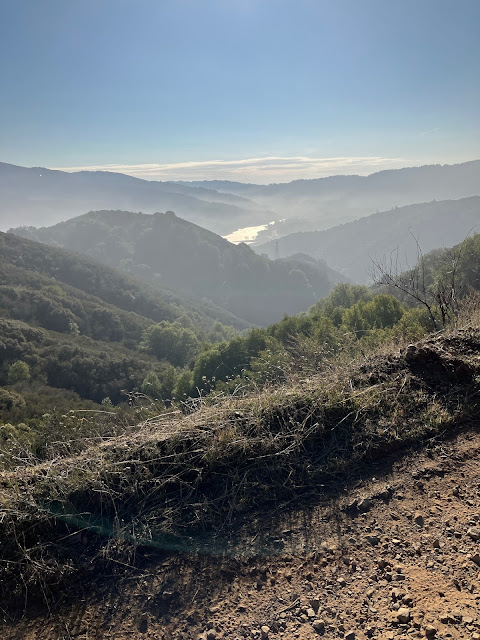
The only major downside to this ride was the weather this week. The temperature was good, but an inversion layer was trapping wood smoke from fireplaces, back yard fires, and wood stoves in the bay, so it was a good idea to chew the air thoroughly before inhaling it.

On the bright side, it did make for a pretty picture of Lexington Reservoir.

Anyway, on Friday I decided to cross another route off my gravel bike to-do list: Kennedy. Much like Dirt Bohlman, I'd done this one a few times before on my XC bike, which was a bit overkill for the fire road. Unlike the aforementioned route, though, there was only a few short miles of pavement before the dirt started, so it really suited either bike just fine.

The air was still plenty smoky though, but luckily, like the previous ride, I spent most of my time above the inversion layer.

You can just barely see the Mt Um cube in the distance from the upper helipad here. The trail network actually continues over the ridge, then drops down and back up again to reach the peak of Mt Um. I did that Dirt Cubed ride a while back, but didn't feel like repeating it this time; just getting to the top of Kennedy without keeling over dead is enough of an accomplishment.

Wednesday, December 21, 2022

Let There Be Different Light

When I moved in, the hall leading to the bedrooms was lit by a pair of LED pot lights. The only upgrade I made to them was to install a motion-triggered light switch so that I would actually use the lights rather than just ignoring them and stumbling through the darkness.

There was nothing particularly wrong with these lights, at least from this side of the ceiling. But, since they were retrofit LED modules inside regular can-style pot lights, they stuck up above the tops of the ceiling joists in the attic.

This meant that they were in the way of placing down a piece of plywood to walk on, directly in the middle of what was essentially the main thoroughfare of the attic. Not really the end of the world, but not an ideal situation.

Thankfully, it's a situation with a solution: we just need to remove the cans and replace the lights with canless LED modules.

Step one: remove the cans.

This was a little bit tricky because the cans are basically made of tinfoil and not even slightly designed to be removed. Thankfully they're cheap and I didn't intend to reuse them, so there wasn't anything stopping me from applying a bit of violence. Being careful not to mangle the drywall, of course.

Step two: install the canless LEDs.

These are way, way lower profile than the cans, as you can see, and they're now much lower than the joists. As a bonus, the insulation can be scooped back in to cover them completely, giving me an absolutely unmeasurably small increase in insulation here.

As another bonus these modules are a full 6 inches wide, rather than being a 4-inch module with a 6-inch flange (designed to fit into either a 4 or 6 inch can), so they look slightly less dorky.

I mean, I guess. I don't spend a lot of time staring at my lights.

Anyway, the important part is that I was able to move the plywood walkway over top of these, so it's now much easier to get around up in the attic.

Wednesday, December 14, 2022

Wooly Bully

A while back now I got myself a combination overlock/coverstitch machine. This type of sewing machine can create a number of different stitches that are impossible to do on a regular lockstitch style sewing machine, stitches that are commonly seen on commercially produced garments.

However, making these stitches with regular thread is really only half of the puzzle. The machine runs with multiple threads, and while the needle threads are usually ordinary, multi-ply spun threads; the threads used in the loopers are often what's known as "wooly nylon", even though most of the time it's actually just polyester.

This special type of thread is differentiated by the fact that it is not spun at all. It's essentially just a bundle of wrinkled fibers (and as such, it's only generally available in synthetics, since shorter natural fibers would just fall apart without being spun into a normal thread). When used in the loopers of an overlock or coverstitch machine, these fibers fluff out and provide a much different finish.

Of course, being fluffy means that it drags against the tension discs more, and so one needs to account for that so as not to unbalance the stitching.

Luckily my machine is very easy to adjust, and with just a little tweak the seam was correctly balanced again.

The difference on this test piece isn't terribly dramatic, but on a real garment the fluffiness stands out quite a lot more.

On this seam I only used the wooly nylon in the upper looper, since the lower looper threads won't be visible once the waistband is closed.

In the finished waistband, the wooly nylon provides a very soft, full finish to the back of the seams.

Definitely well worth the small amount of extra fuss to source a matching thread and deal with feeding the fluffy and somewhat cantankerous bundle of fibers through the machine.

A Burning Ring of Fire

I'm not really in any particular hurry to go down, down, down in a burning ring of fire. If I go down, down, down, I expect the flames will go higher.

It would burn, burn, burn; that ring of fire.

That ring of fire.

The Accretion Continues

I'm still pretty sure that ignoring the problem will be a successful strategy.

Despite the parts pile continuing to grow.

I suppose I could probably find some use for these carbon cranks.

Sunday, December 11, 2022

Mysterious Sky Water

It's strange enough for water to fall from the sky, but this morning I discovered a strange new form of solidified water pouring out of the heavens.

Perhaps some day science will learn more about this strange, undiscovered phenomenon.

Anyway, this came on top of the 2.5 inches of rain that already fell at my house over the past 24 or so hours. Needless to say it's soggy out there.

Also, I am sad to report that this little furry friend seems to have died from hail.

And no other contributing causes.

Friday, December 2, 2022

Sub Zero

It got a little frosty overnight.

This is a totally unacceptable state of affairs.

Luckily I had the foresight to protect the lantana.

Which is a nice way to use the moving boxes I still have piled up from moving in here. I must say, they do work quite well.

Luckily the sun came out and burned off the frost pretty quickly.

But not before my cold-numbed hands fumbled my iPhone.

Which marks the first time I've ever managed to break a phone screen. Disappointing, but not the end of the world.

A quick trip to the Apple store and $129 later, all is right with the world again.

Saturday, November 26, 2022

Mulch Ado About Nothing

When the previous owners ripped out most of the lawn in the yard, they laid down a layer of shredded redwood fiber mulch. This is a rather nice mulch material, as it tends to felt together and form a mat, rather than other styles of bark mulch that just remain loose and chunky forever.

However, over time it does compact and break down, and it was starting to look a bit shabby due to this.

It's rather obvious to see how much the mulch has shrunk and sunk down from the edges.

So naturally there's only one thing to do.

I ordered 7 yards of fresh new mulch to be delivered, which ended up being about $300 for the material and $200 for delivery.

Hmm, this kind of looks like more than 7 yards to me. Oh well, I'm sure the career professionals at the landscaping supply depot are trustworthy and reliable about core functions of their job like this.

Anyway, time to get things spread.

I started with the front yard, since it was literally right there.

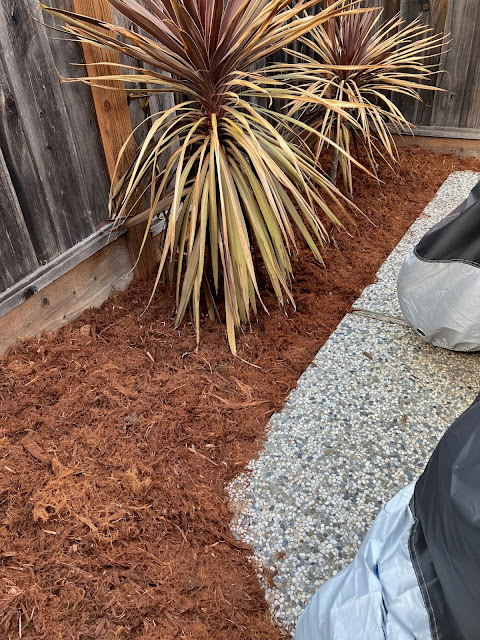
This is definitely a huge improvement, and we made a decent dent in the mulch pile. About 3.5 yards worth, I'd say.

Funny though, it looks like there's more than 3.5 yards left.

Oh well, moving on to the back yard and the story is much the same, a huge improvement again.

Yes, this is looking so much better.

Anyway, I'd say I spread about 3 yards in the back, so that should leave us with around about half a yard of mulch still in the pile.

Hmm. Hmmmmmm. You know, it's been a while since I did my math degree, but this feels like more than half a yard to me.

Well, no bother, I'll just spread some out on this patch in the back that I had left bare.

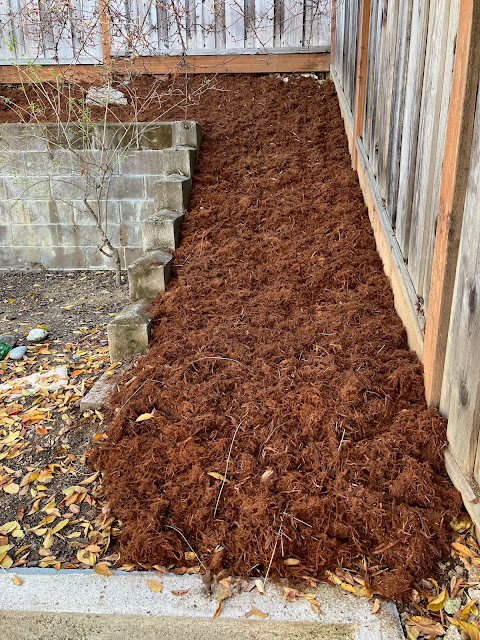
Surprisingly, this didn't seem to make much of a dent on the remaining half yard of mulch. Luckily I had a few more spots I could fill in, like in front of the motorcycles.

And on the east side of the driveway.

And along the huge area behind the retaining wall in the back yard.

Even though I hadn't planned on filling this area in, it was nice to get a layer of mulch down on it. The slope here is pretty steep and the soil doesn't have much structure at all, so the mulch here should help keep the erosion down. Plus it looks nicer than the bare clay soil.

I'm pretty sure that the landscape company actually dropped off more like 10 yards of mulch given how much area it covered and based on my eyeballing the size of the pile. Luckily I had some extra yard I could spread it out over so it worked out pretty much perfectly in the end (though it was a lot more work than I had initially planned on).